
Throughout the world of Horizon Zero Dawn, you will encounter machines that are infected with Corruption. The Corruption from an unknown source drives machines mad and can make them a serious threat to Aloy. When machines are corrupted, they are twice as dangerous as their original counterparts, even the docile machines can become a threat because of it.
RELATED: Horizon Zero Dawn: Complete Guide To All Machines
You can encounter hostile and corrupt machines at various points throughout the map but there are a few specific areas that are highly infected with it. These are called Corrupted Zones and it's your job to clear them out to remove the infection. There are different machines in each of these areas and they get progressively harder.
Each Zone has a recommended level attached to it. This is just showing you what level you should be at to take on the machines in this zone but often if you're equipped with the right weapons and you're quite confident, you can ignore this.
This guide is going in order of the locations of the Corrupted Zones across the map.
What Equipment Do I Need?
To make taking down the machines found in the corrupted zones easier, you should have the following equipment:
- Fire-arrows in any bow – Corrupt Machines are extremely weak to fire.
- Hard Point arrows –These are one of the best arrow types in Horizon and they do a lot of damage to machines when they are on fire.
- Shadow Tripcaster – Fire and Blast traps found in this version of the Tripcaster do a lot of damage.
- Shadow Blast Sling – All three bomb types found in this weapon are useful against corrupted machines as you don't want to get too close to them.
- Banuk Sickness Eater Outfit – It may not be one of the best outfits in Horizon Zero Dawn but it will give you some protection against corruption.
- Antidote – This is a potion that you can craft out of Corruption Glaze Root. It will defend you against corruption poisoning for a short period of time.
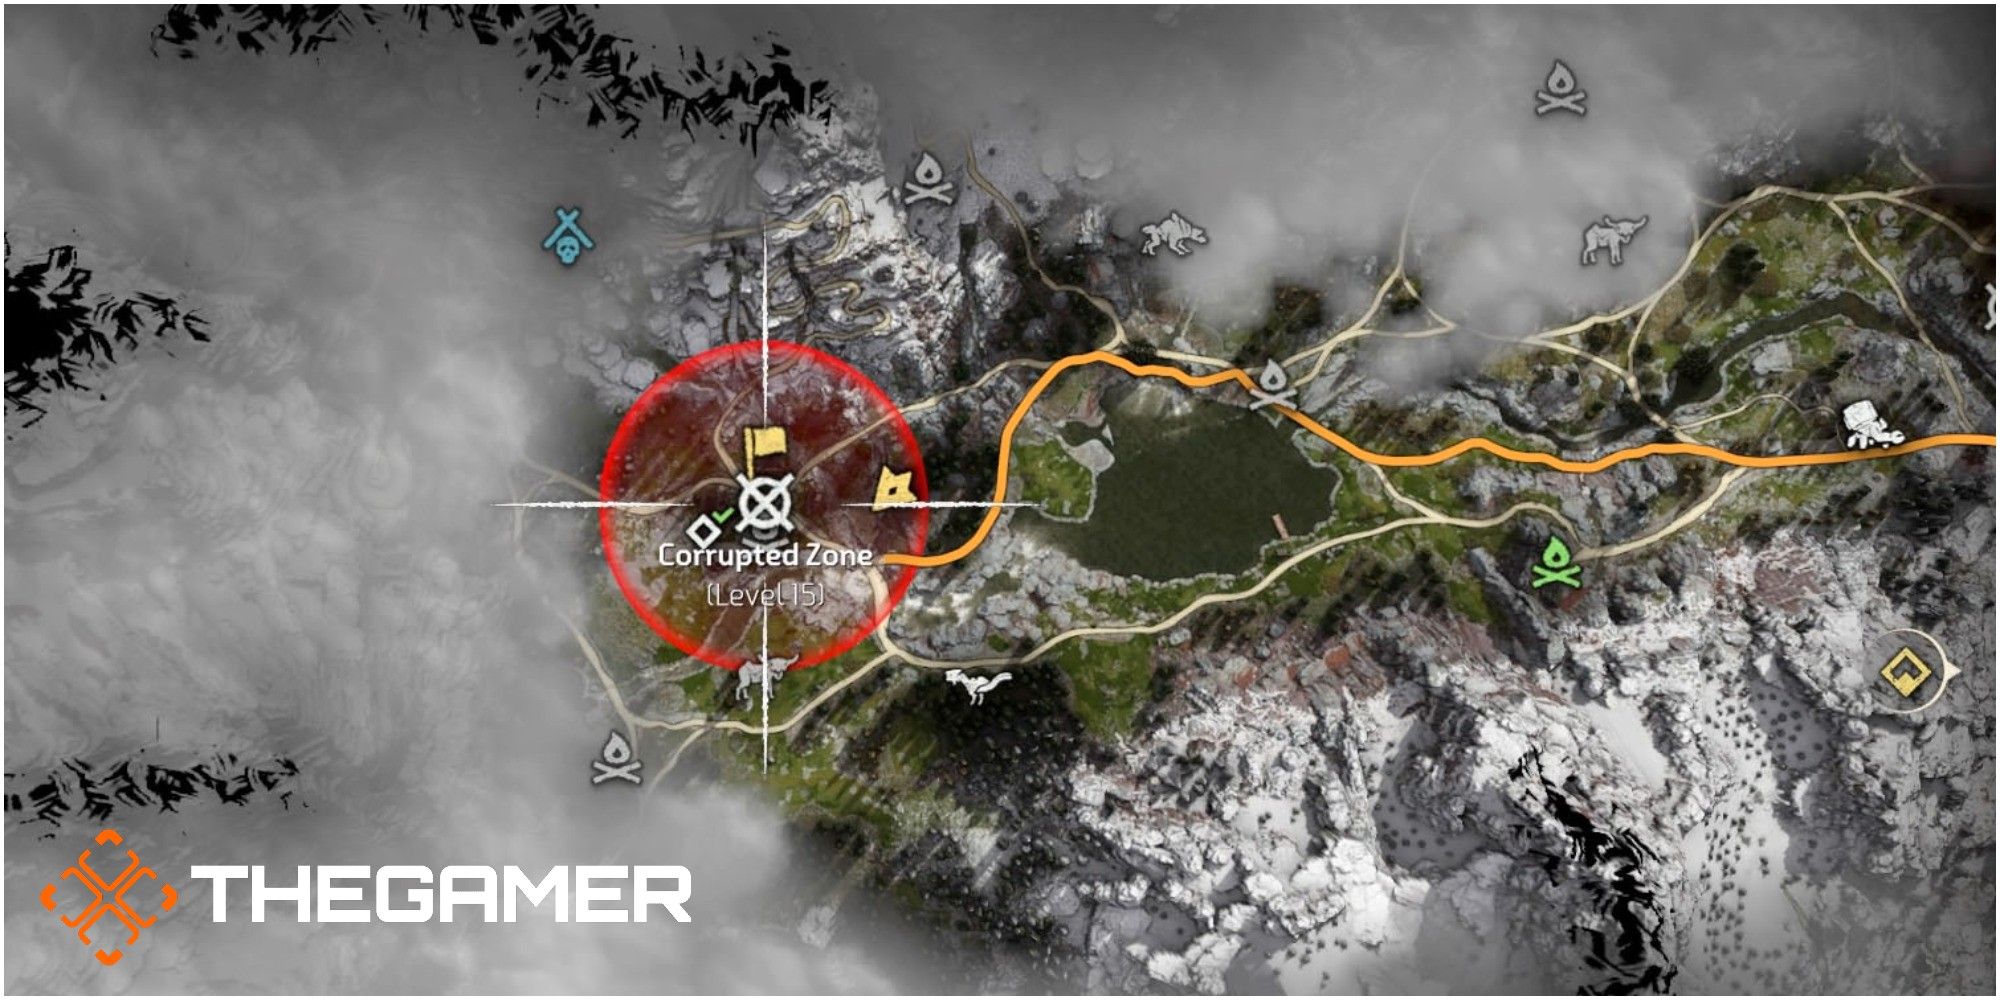
Corrupted Zone One

Location: Northeast of the Southern Embrace Gate
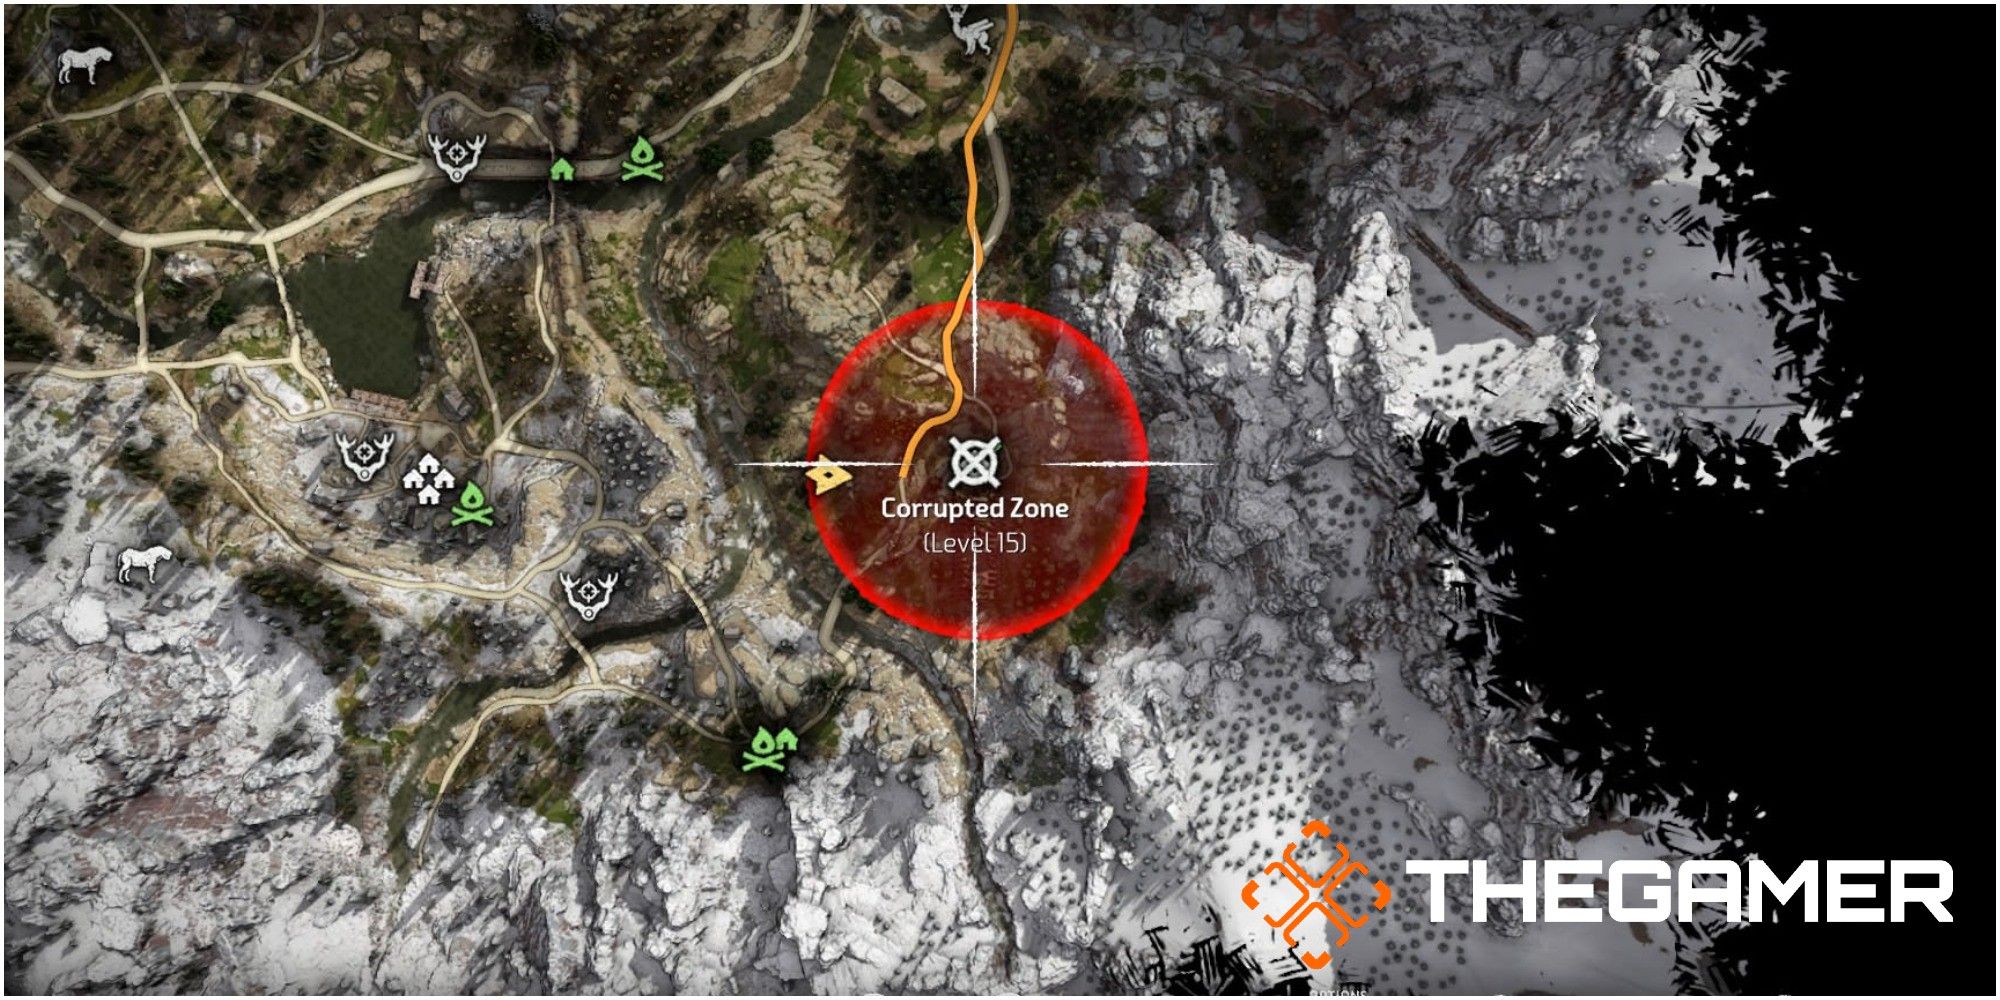
Recommended Level: 15
Machines: Four Scrappers
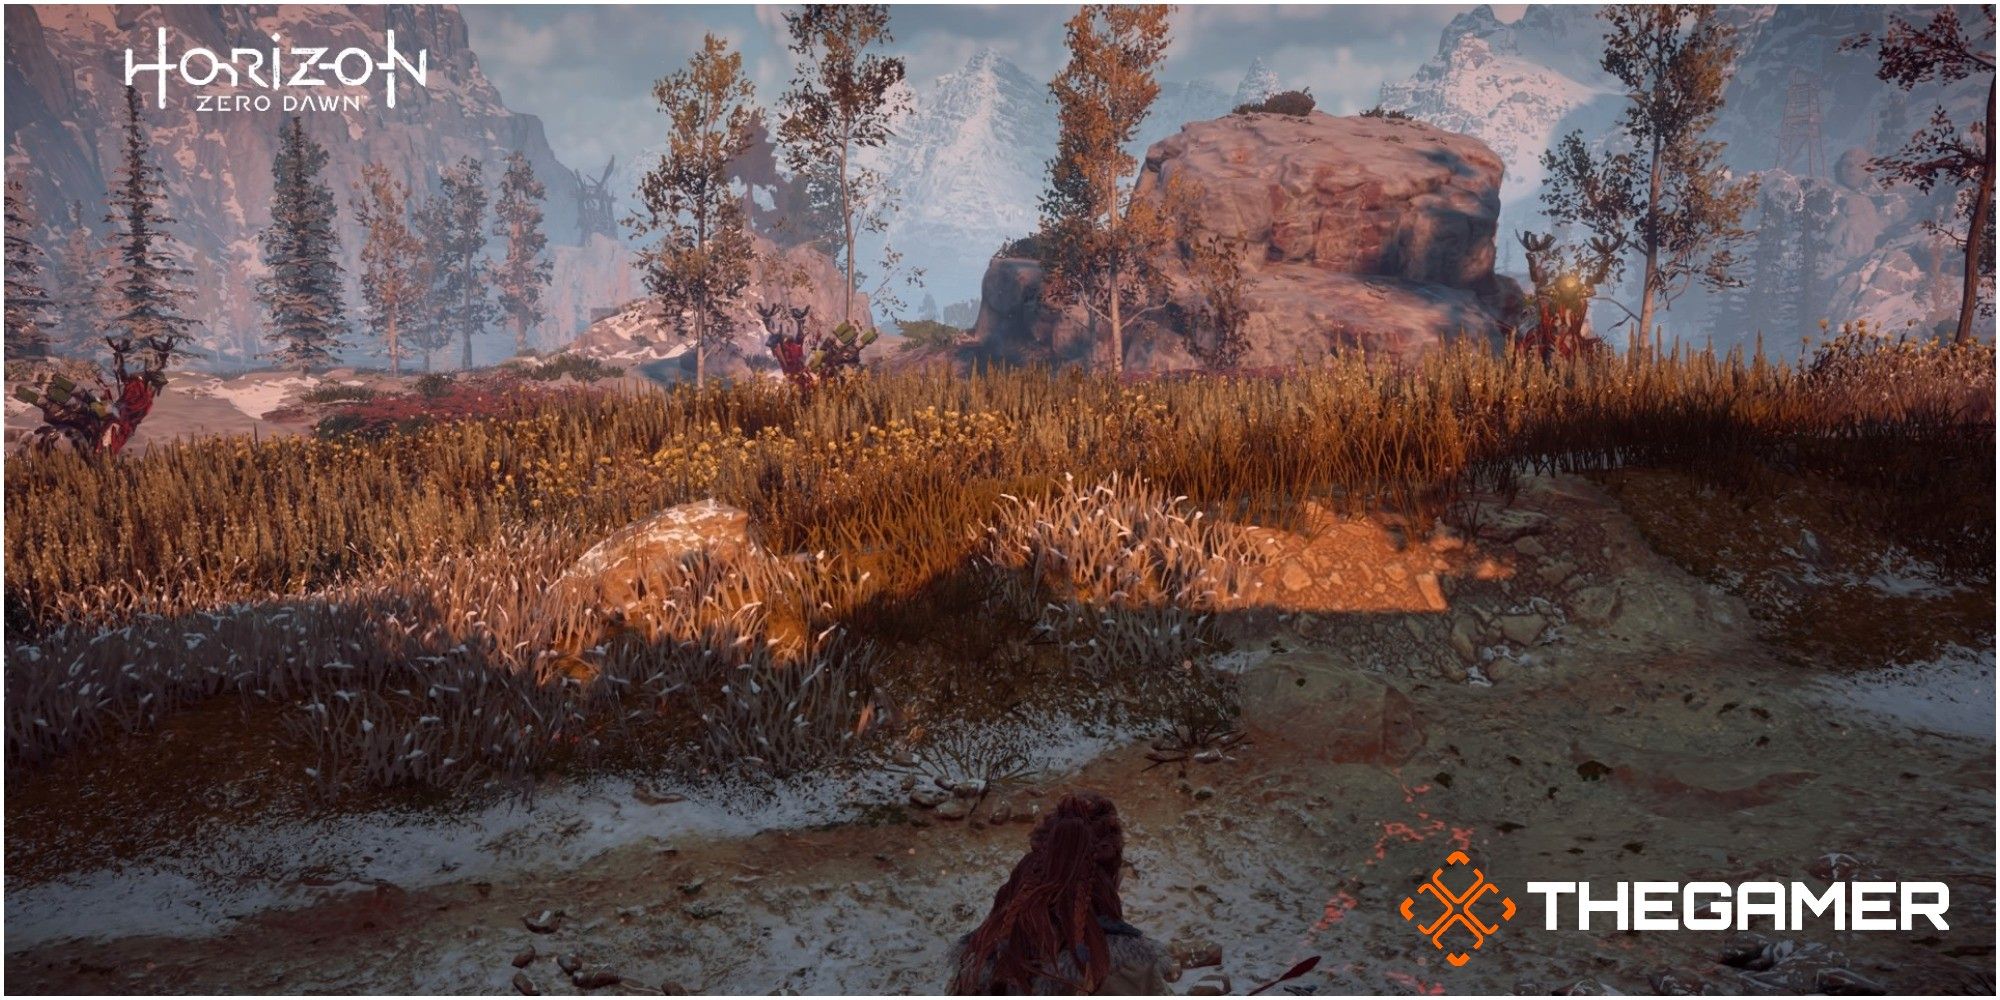
When you get to the corrupted area you will see that the environment is covered in glowing red stripes similar to that of the corrupted machines. This is your indicator that you are in the zone.
When you reach this zone, you will see that there are four corrupted Scrappers for you to fight. Load up your bow with fire-type arrows but try to keep a good distance between you and the machines. If you get too close, they can attack you and the corruption that courses through them can poison you.
There are plenty of places to get a good shot from, so load up and fire away. Try to avoid going into the hut as they can pin you in there.
Corrupted Scrappers burn quite quickly, all you need to do is keep them alight and stay out of their way.
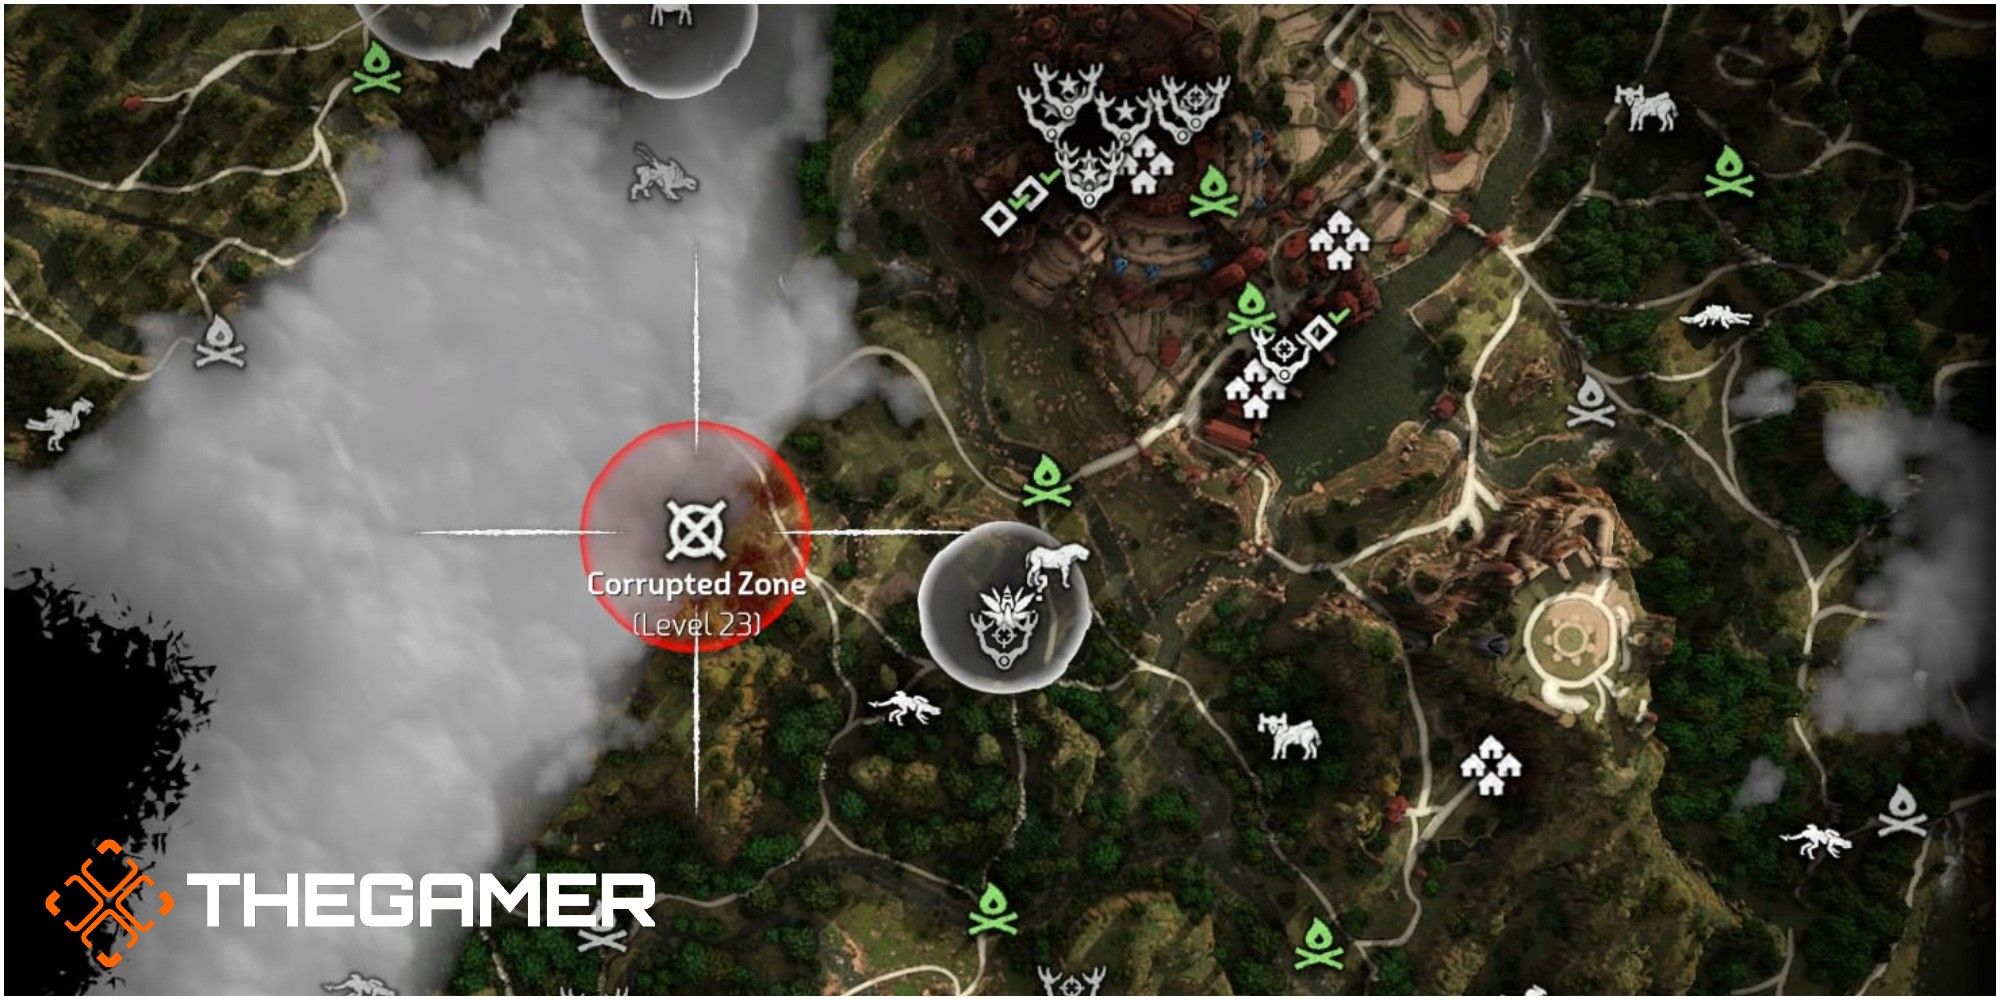
Corrupted Zone Two

Location: Northeast of Cauldron SIGMA
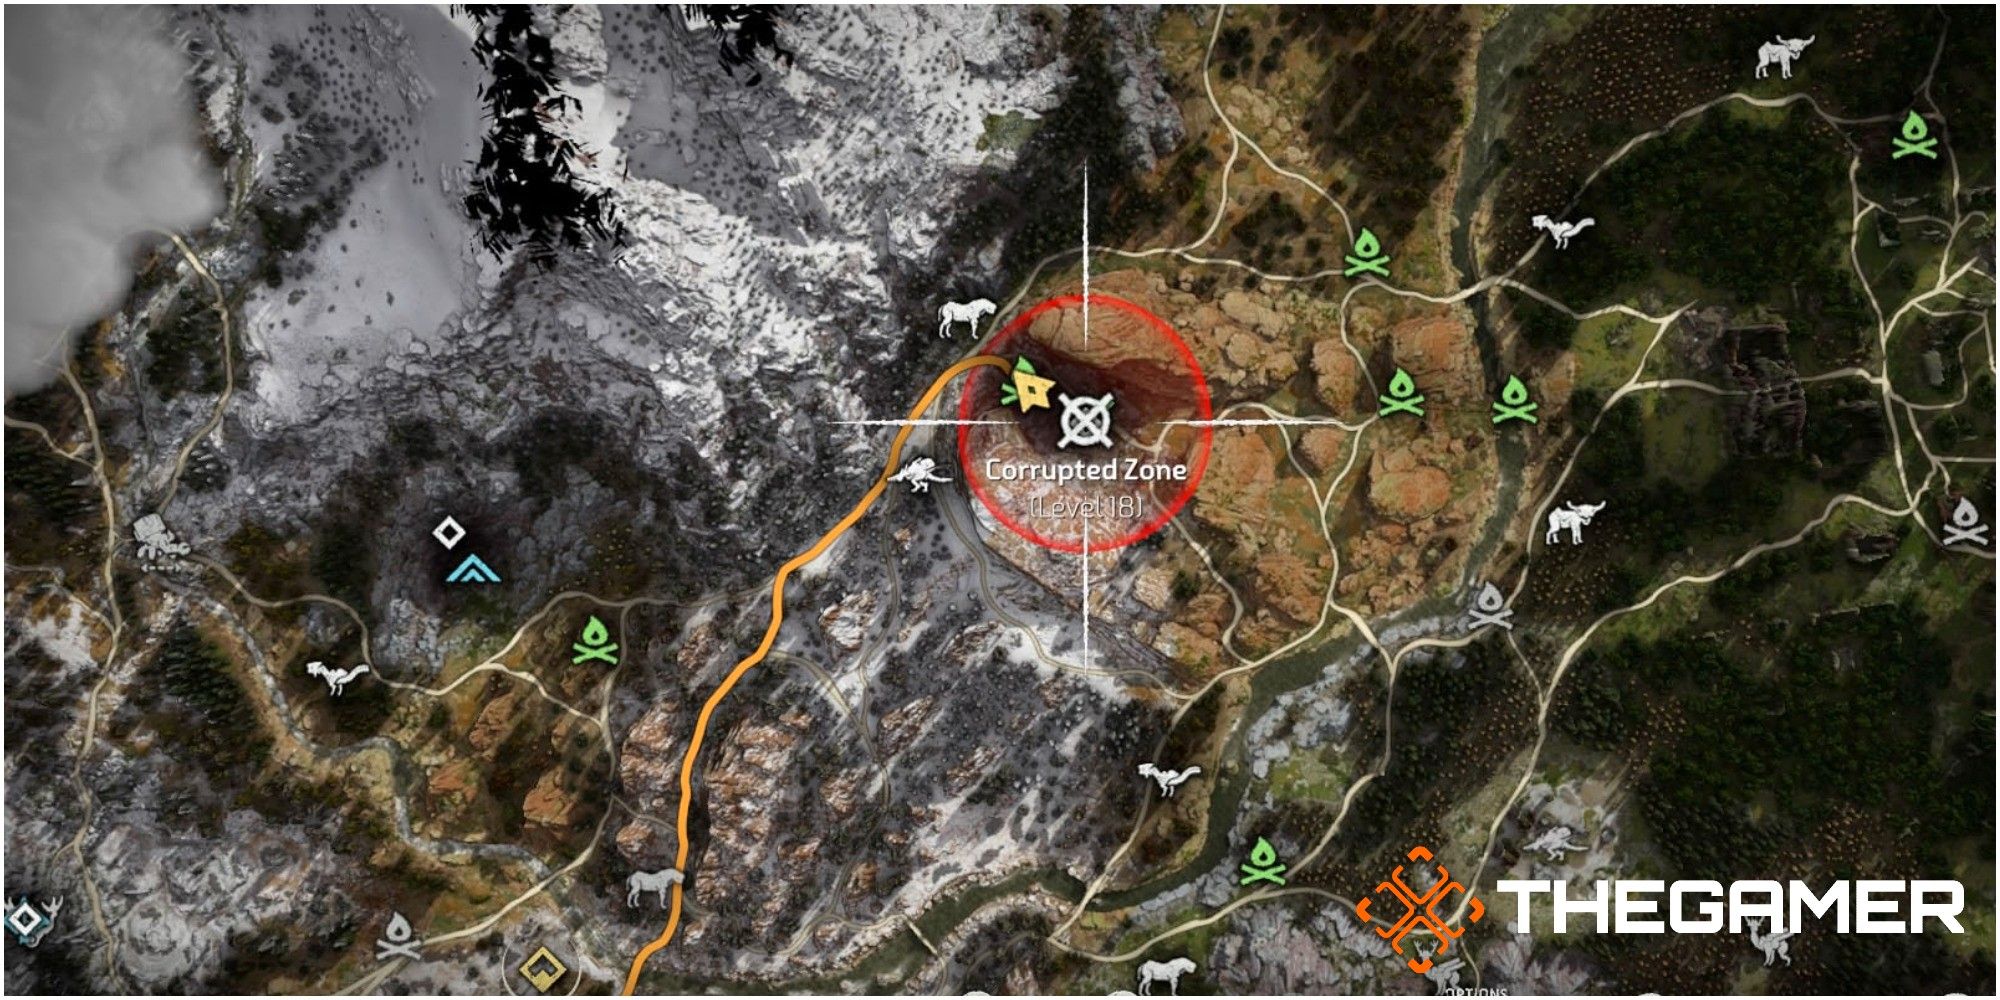
Recommended Level: 18
Machines: One Fire Bellowback and four Chargers
The easiest way to approach this zone is to climb up the rocks on either side of the area. This will give you a good vantage point of the area and you will have a great position to attack from.
When you have settled on a spot, use your focus to scan the area and tag the corrupted Fire Bellowback.
This needs to be your first target as it's your biggest threat. Stay in your spot on the rocks and continuously fire fire-type arrows at it until it's set alight.
Tip: If you have unlocked the Double Shot and Triple Shot skills, it will make these battles much easier.
Once the Bellowback is on fire, equip your Hard Point arrows and aim at the large cargo sac on its back. This is the Bellowback's biggest weak spot and it will do the most damage to it. If you destroy this part then, combined with the flames, it should destroy the machine.
You can now turn your attention to the Chargers who have probably gone to the far side of the area. If you cannot hit these with your fire-type arrows from your spot on the rocks then they are safe enough for you to head down to get them.
You still mustn't get too close to them or they will poison and trample you. They die quite fast once you've set them alight, just hit them with a few more arrows and they should go down.
Corrupted Zone Three
Location: Northwest of Mother's Crown
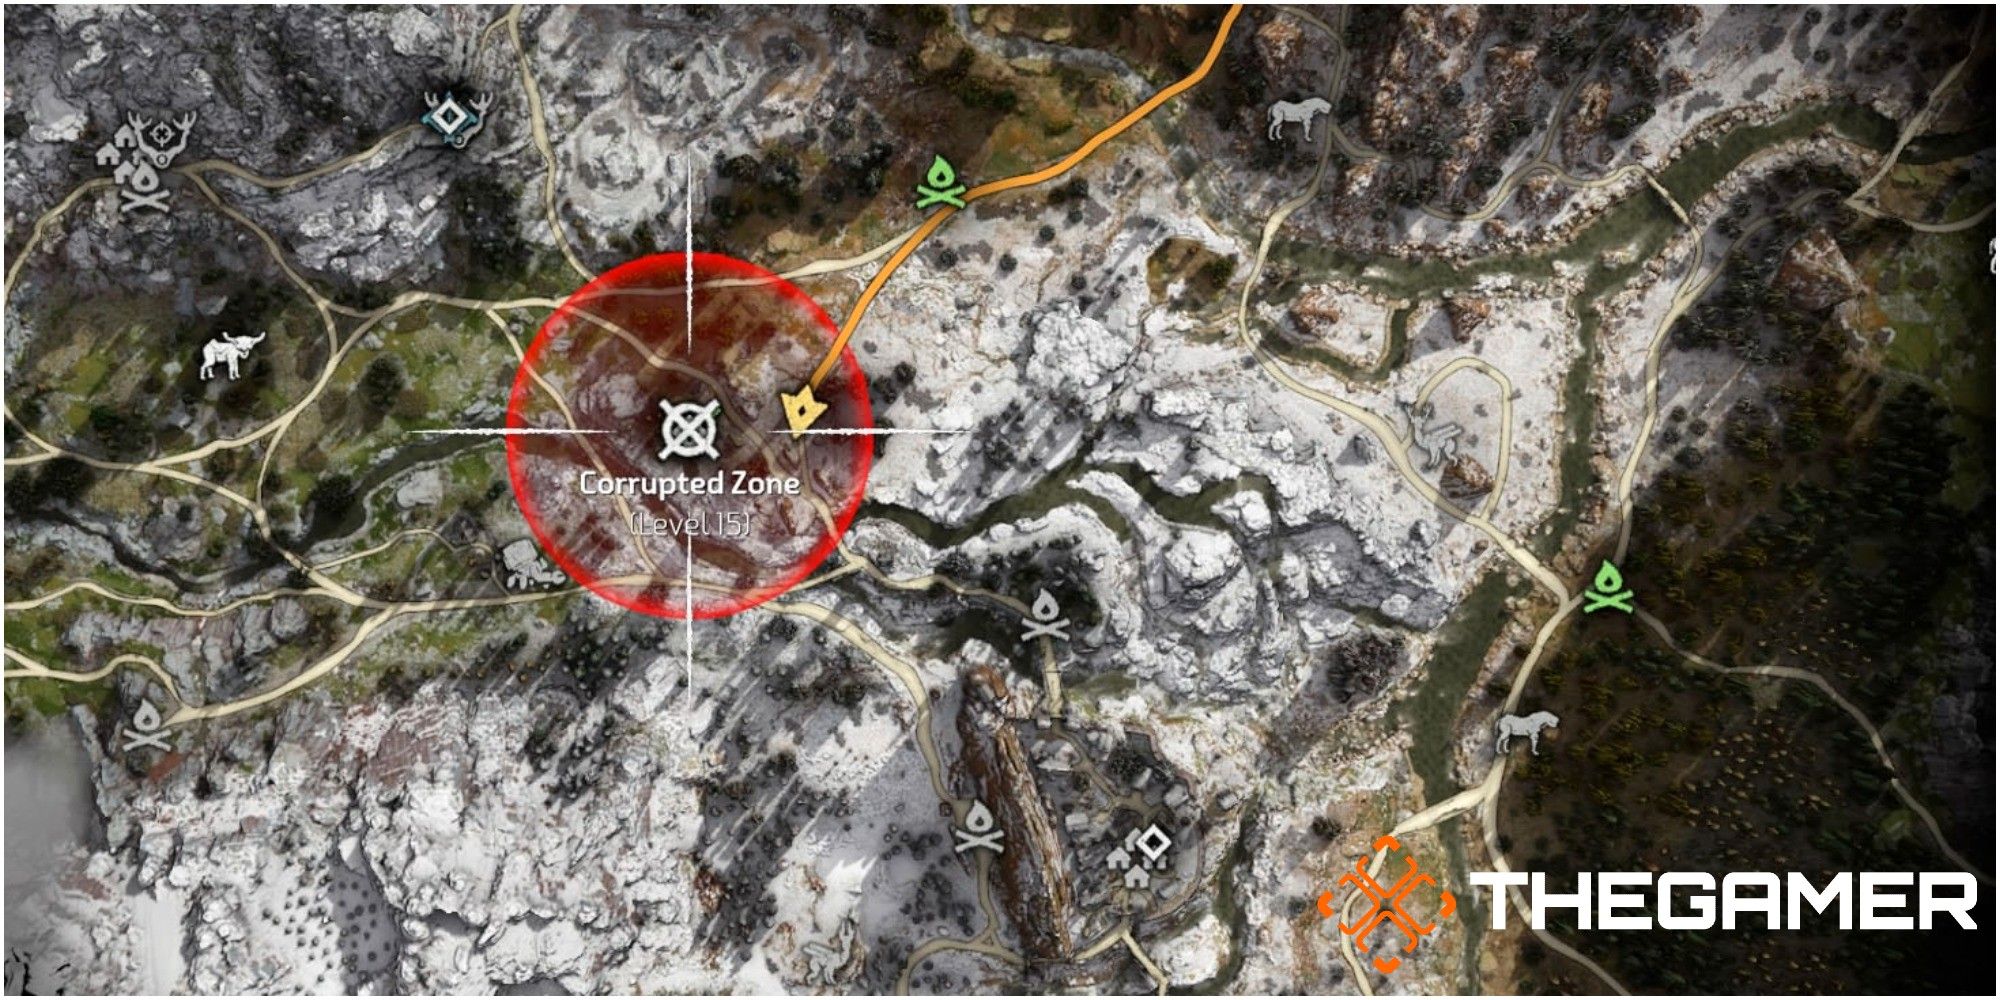
Recommended Level: 15
Machines: Three Grazers
This one is pretty easy for a Corrupted Zone. All three Grazers have a weak spot — their Blazer Canisters located on their rear. All you need to do is equip your fire arrows and repeatedly fire them at this spot on the machine.
The corruption makes them more vulnerable to fire, if you shoot the Canisters with fire-type arrows it will cause an elemental explosion that will engulf the machine and its surroundings in flames. This will make very short work of this zone.
Corrupted Zone Four

Location: Southeast of Two Teeth Bandit Camp/Settlement
Recommended Level: 15
Machines: Three Watchers and two Scrappers
There are a few places you can hide in this zone, which means you can get in a few silent strikes to thin the numbers out.
Your first target should be the trio of Watchers that are pacing around. If you highlight them with your Focus, you will be able to tag their path with R1, so it will be clear even after you come out of your Focus.
You can either go in headfirst and start fighting them with fire-type arrows or you can use their path to figure out good ambush spots. If you successfully pull off a silent strike, you are unlikely to alert the other machines to your presence.
When you have taken the Watchers down, you can focus on taking out the remaining Scrappers. Again, mainly use fire-type arrows to set them alight then bombard them with Hard Point arrows.
Corrupted Zone Five

Location: South of Two Teeth Bandit Camp/Settlement

Recommended Level: 20
Machines: Two Longlegs and one Scrapper
When you get near this zone, you will notice that it has quite a few high rocks around it and is close to the base of a Mountain. You should choose one of these to climb up to get higher ground because the fight will be much easier from a distance.
Use your Focus to scan the area and tag the Longlegs.
You should take these two out first because they are your biggest threat in this area. You can do this from your spot on the higher ground, equip your fire-type arrows and bombard the machines with them. Once they are on fire, you can use your Hard Point arrows to aim at the weak spots.
The easiest one to hit from a distance is the weak spot on their chest. If you destroy this, it will really hurt the machine.
Once the Longlegs are down you can either stay in your spot to attack the Scrapper or you can head down and take it on head-on.
Corrupted Zone Six

Location: Southwest of Gatelands Bandit Camp

Recommended Level: 20
Machines: Three Longlegs and two Tramplers
Unfortunately in this Corrupted Zone, there aren't many options for fighting the machines from a higher point. Before getting near this zone, it's strongly recommended that you equip your Shadow Tripcaster and Shadow Blast Sling.
Once you are near the zone, you will see that the machines are semi-confined to a small cove area. Keep low and try to stay hidden.
Whilst you're unseen spread as many fire and blast tripwires as you can across the entrance of the area. If the machines spot you and come after you, which they will, the tripwires will slow them down and damage them.
Once you have been spotted or you're satisfied with how many tripwires you have placed down, target the Tramplers first. These are your biggest threat but the Longlegs are still just as dangerous so watch your back.
Tramplers are ferocious in their normal state, which makes them much worse when they're corrupted. Equip your fire-type arrows and bombard them until they are set alight.
Once they are alight, use any of the ammunition types found in your Blast Sling to cause damage.
The key to beating a Trampler is to keep your distance from it.
When both of the Tramplers are down, you can turn your attention to the Longlegs.
Again, try to keep your distance from them and bombard them with fire-type arrows. Longlegs can dodge quite quickly, so your best bet is to use Hardpoint arrows to attack them once they're alight.
Corrupted Zone Seven

Location: Southwest of Spurflints Hunting Ground

Recommended Level: 23
Machines: Three Stalkers
Stalkers are machines that have components built into them that can make them invisible. The best way to approach this one is to run straight into the Zone area and deliberately set off one of the Stalker traps on the ground. The traps are glowing red areas on the floor, if you run over one or near one, it should set it off.
This will tell the Stalkers that you are there and it will lure them to you. This is what you want because as soon as they start attacking you, you will be able to see where they are.
Tip: When a Stalker is invisible, you can still see them thanks to a little trick. Wherever the invisible Stalker is, the environment warps around it in the shape of the machine's body. If you spot this, you've found them.
RELATED: Horizon Zero Dawn: Mistakes Everyone Makes When Playing For The First Time
After successfully getting the attention of the Stalkers, you should head across to the other side of the River that runs through the Corrupted Zone. Stay there and attack the Stalkers with fire-type arrows to set them alight.
As with the other machines, once they are alight, you can attack them repeatedly with Hardpoint arrows to take them down.
The Stalkers shouldn't follow you across the river unless they are really desperate. If they do follow you, their health is typically low and it's their last attempt to attack you.
Corrupted Zone Eight

Location: Southwest of Meridian
Recommended Level: 23
Machines: Three Glinthawks and three Scrappers
When you are in this Corrupted Zone, things are going to move really fast so make sure you're ready with the equipment you need. Glinthawks are the ultimate alarm call for machines alongside Watchers. There are three for you to deal with and they should be your priority.
Fire-type arrows are the best things to use against Glinthawks as this ammunition type re-loads quickly, and whilst infected, Glinthawks are extremely vulnerable to this element.
These machines will dive bomb you and attack you from the sky, so it's easy to get distracted whilst battling them. However, you must watch your back because the Scrappers can use your distraction to sneak up on you and inflict serious damage.
The trick to this Zone is to keep moving. Do not stand still otherwise you become an easy target.
Once you have dealt with the Glinthawks, you can focus on destroying the remaining Scrappers.
Corrupted Zone Nine

Location: South of Sunfall
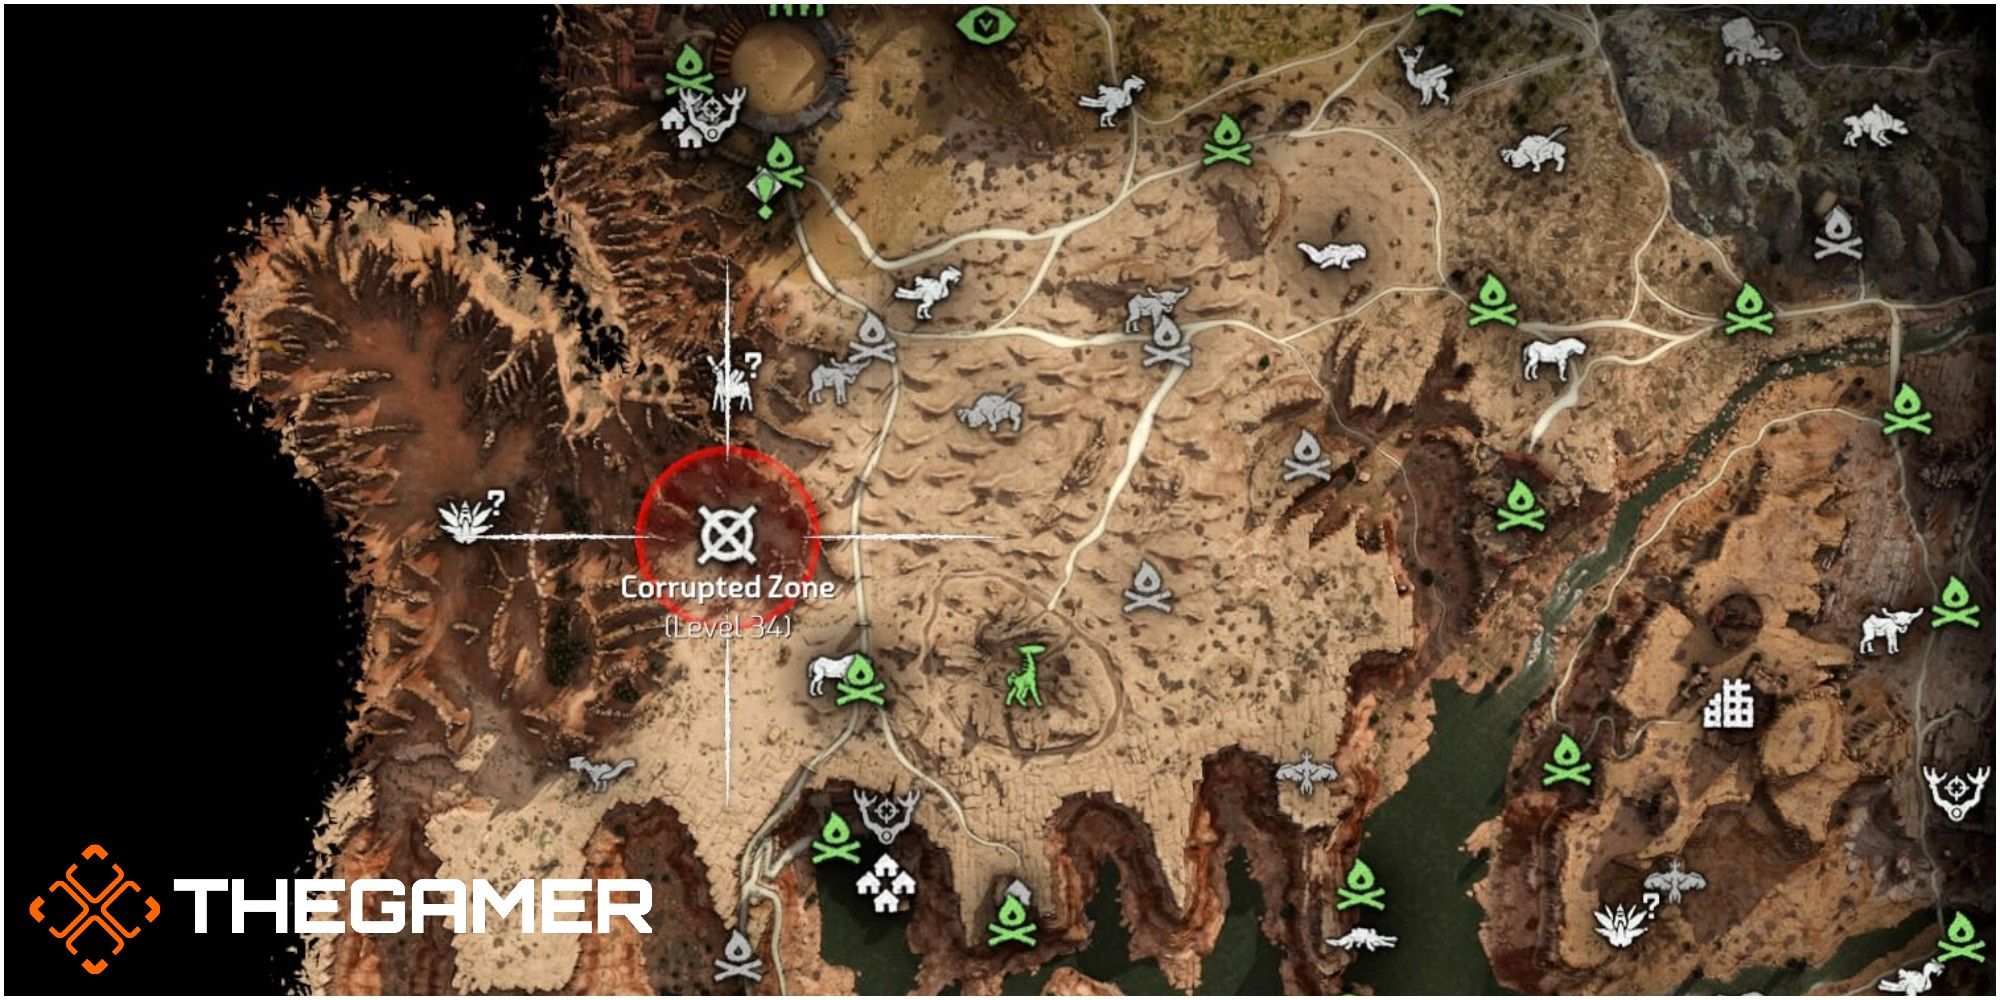
Recommended Level: 34
Machines: Two Behemoths and three Broadheads
Take your time when you are close to this area. The Corrupted Zone has quite a few high rocks surrounding it and you should look around to find one to climb up.
The best way to take on the machines in this area is to fight them from a high vantage point, otherwise, it could go very badly very quickly.
When you have found a point that you feel comfortable from, use your Focus to scan the area below you and tag the two Behemoths.
Ignore the other machines for the time being and concentrate all of your efforts on the Behemoths.
RELATED: Horizon Zero Dawn: Tips You Need To Know When Fighting Machines
Fighting them from high up is no guarantee that you will be safe as this machine can lift rocks and hurl them at you. However, it's far better than being down in the danger zone with them.
Use your fire-type arrows to set the Behemoth alight and then use either Sticky or Blast Bombs from your Blast Sling to damage it. You can also use your Focus to highlight the weak spots on the machine and aim at them with Hard Point arrows.
Repeat these steps again once the machine isn't on fire. It takes a while to take a Behemoth down but you will eventually destroy it.
You need to do this exact approach again with the second Behemoth.
When the big machines have been taken care of, it's your choice how you attack the remaining Broadheads. They are destroyed quite quickly when they are on fire so you can set them alight and leave them, or you can attack them with Hard Point arrows.
Corrupted Zone Ten

Location: Southeast of Maker's End

Recommended Level: 27
Machines: Two Ravagers and one Fire Bellowback
When you are close to the Corrupted Zone, stay low and try to sneak closer without alerting the machines.
Use your Shadow Tripcaster to set up Fire and Blast Tripwires around the edge of the Zone. This will help slow down the machines when they come after you, as well as dealing damage to them if they trigger them.
Take out the Ravagers first. The Fire Bellowback may be bigger, but it's not as agile as the Ravagers, so they will cause you more problems.
Use your fire-type arrows to set them alight and then bombard them with Hard Point arrows.
Also, if they are too close for comfort, use the Blast Bombs in your Blast Sling to deal a hefty amount of damage to them. Typically when machines are hit with bombs, it can knock them over and give you a chance to put some space between you.
Keep moving around this area but be aware of your surroundings, it's very easy to find yourself trapped here.
When the Ravagers have been dealt with you can turn your attention to the Bellowback. If you have time, lay down some more tripwires and try to lure the machine through them.
Use your fire-type arrows and aim them at the Cargo Sac at the rear of the machine (the big green see-through part). This serves two purposes:
- Corrupted Machines are vulnerable to fire and burn quickly whilst taking more damage.
- If you destroy the Cargo Sac with fire-type arrows, it will cause an explosion of that element which engulfs the machine and causes a lot of damage.
If you follow those steps, the Bellowback should go down quite quickly.
Corrupted Zone Eleven

Location: South of Pitchcliff
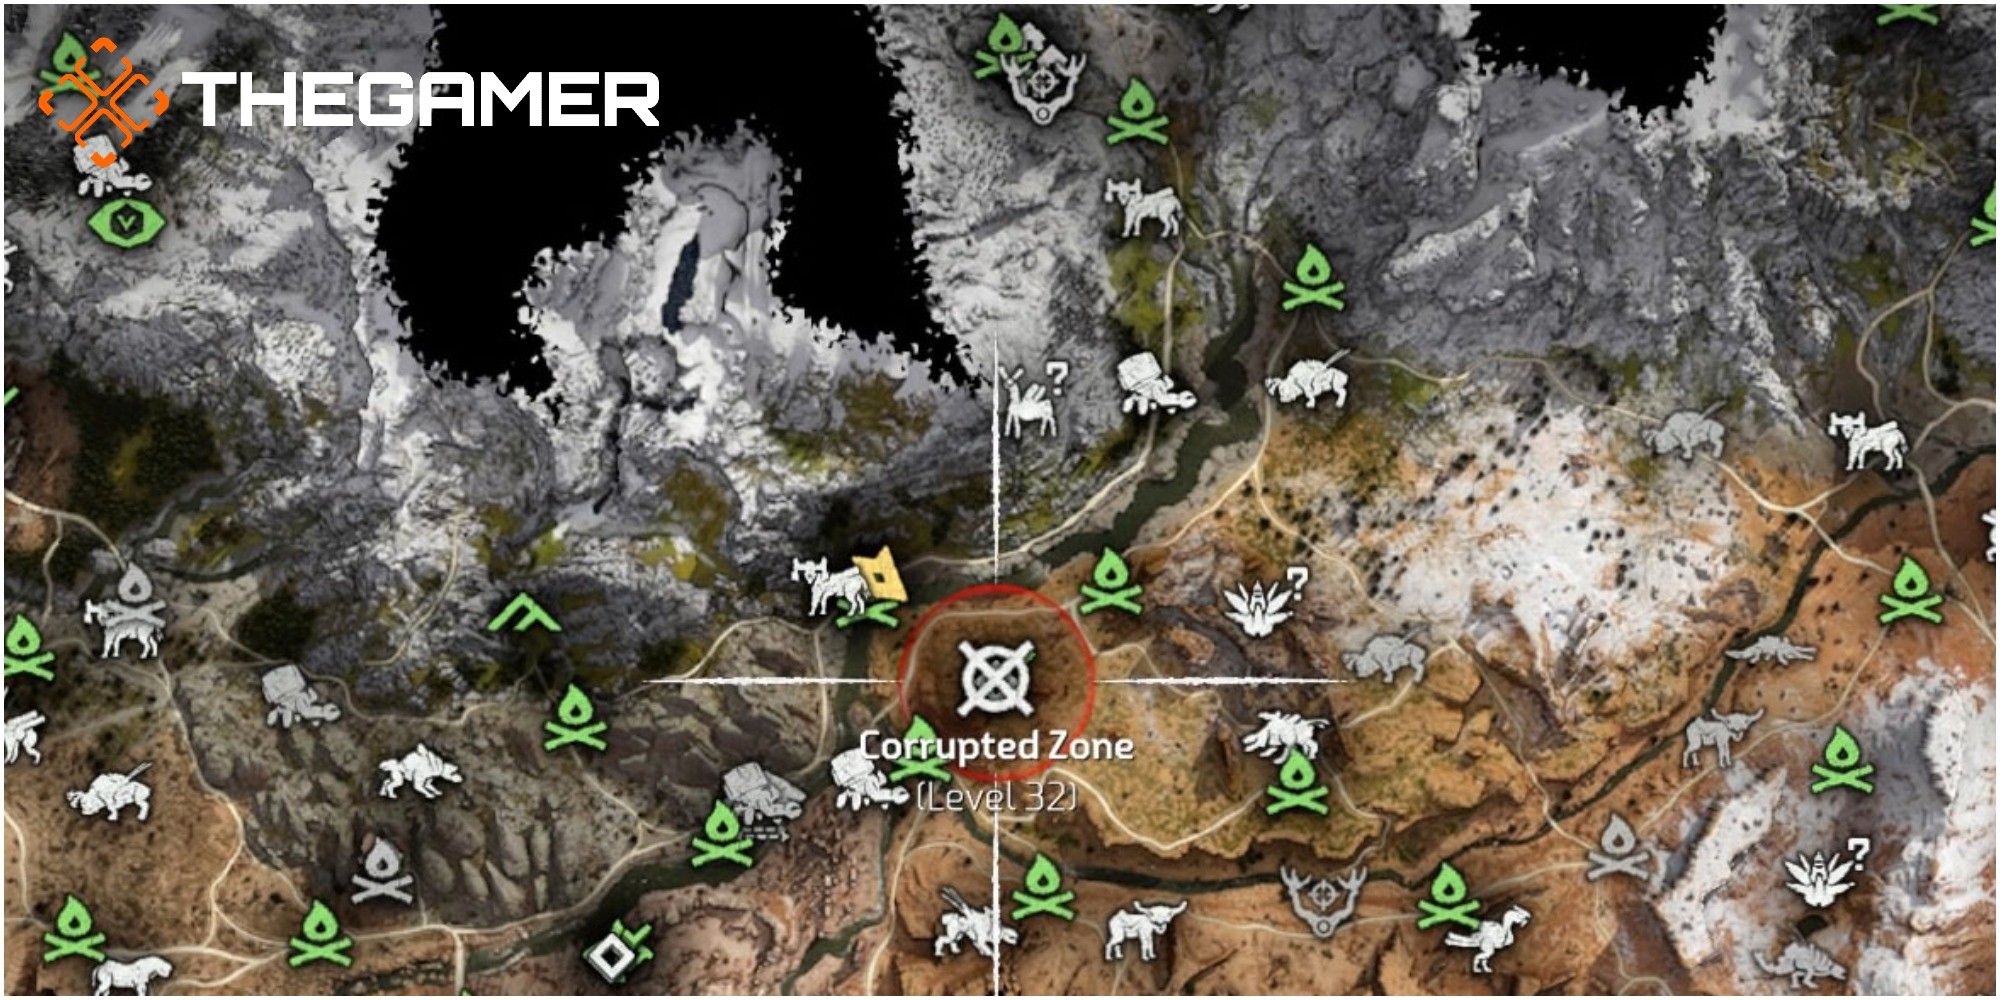
Recommended Level: 32
Machines: Two Rockbreakers
You need to quickly find higher ground when you are in this Zone.
You do not want to fight these machines on the ground, as they will always have the upper hand if you do this. Rockbreakers are formidable opponents and they are one of the most powerful machines you will come across.
They can disappear underground, evading even your Focus. This is why you need to find a spot high up and stay there.
Once you have found your spot, taking these machines down is all about persistence.
Use your fire-type arrows to set them alight and you can then fire Hard Point arrows at them.
They are particularly weak on their claws, so destroying these will damage them and it has the added bonus of removing their ability to disappear underground.
Also, using any type of bomb from your Blast Sling is a good idea.
You just need to persist with your attacks whilst staying safe on higher ground and eventually you will be rewarded with two Rockbreaker kills.
When you have cleared all eleven Corrupted Zones, you will be rewarded with an achievement/trophy!
NEXT: Horizon Zero Dawn: The Ultimate Guide To Power Cell Locations