
If you step away from your computer for a bit, you know that whenever your system is inactive for a certain period of time, It automatically goes into sleep mode. If you don’t like entering your password again after every break, you can turn the automatic sleep mode off. This tutorial will show you how to stop your system from sleeping on Windows 11.
Stop System Sleeping Windows 11
The sleep mode essentially saves energy. However, if you wish to stop it from sleeping every time you step away from your system, you can follow the steps below to stop it:
[There are many ways that you can change the sleep settings, but I will show you the one that I find the easiest]
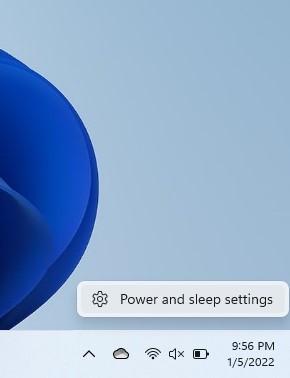
Step-1: Right-click on the battery icon in the bottom right corner of your taskbar.
Step-2: When you right-click the icon, an option will pop up. Make sure that you click specifically on the Battery icon to get the pop-up. Click on the option that shows up – Power and Sleep settings.
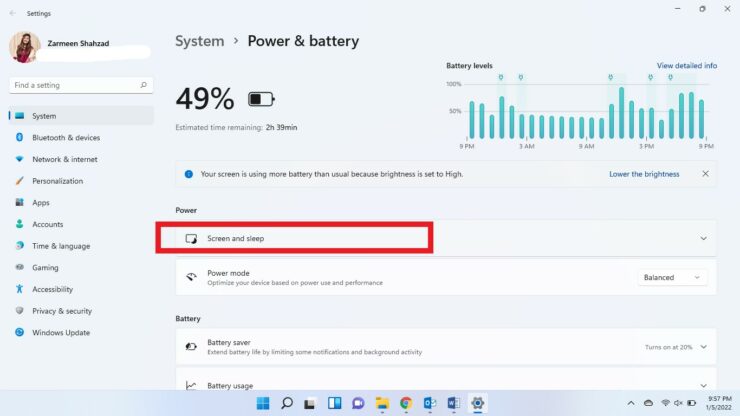
Step-3: Click on the Screen and Sleep option to expand it.
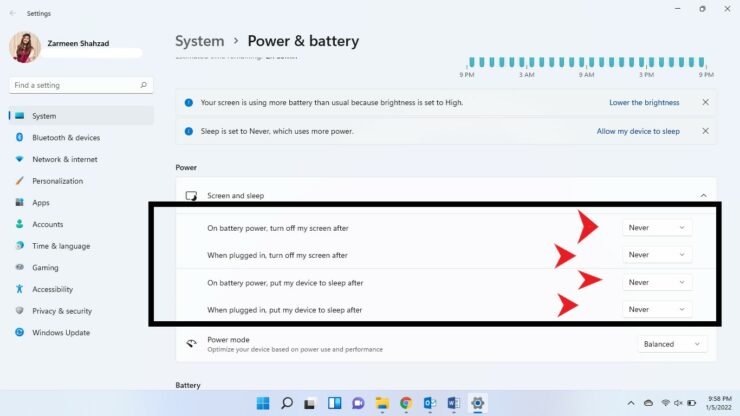
Step-4: You will see different options with drop-down menus next to them. Change all the time to Never.
Step-5: After you are satisfied, close the settings app.
After this, you will never have to worry about your system going into sleep mode automatically.
The post How to Stop Your System From Sleeping on Windows 11 by Zarmeen Shahzad appeared first on Wccftech.