Quick Links
- Find The Castaway
- Find The Portal To The Sea Of The Damned
- Find The Ship Hull Entrance And Complete The Puzzle
- Walk Through The Rooms, Then Find The Handle
- Light The Lanterns And Make Your Way Through The Room
- Make Your Way To The Waterway
- Open The Gate And Enter The City
- Free The Captain
- Find The Key To Let Out The Cursed Captain
- Finish The Chess Game With Captain Bones' Special Recipe
- Head Back To The Tavern And Follow The Clue To Dougie
- Find The Second Cursed Captain
- Finish The Game Of Chess
- Head To The Lighthouse And Complete The Puzzle
- Go Up To The Lighthouse And Move The Sails
- Follow The Torches To The Shipwreck
- Go To The Ship With The Red Sails
- Release Jack Sparrow
- Fight The Flying Dutchman
The first tall tale you will come across in Season 3 of Sea of Thieves is called A Pirate's Life and it introduces you to the crossover with Pirates of the Caribbean. It will take you into several new areas, and each one is more interesting than the last. There are several commendations for you to collect, and this walkthrough can help you collect them all.
RELATED: Complete All Commendations In Sea Of Thieves: A Pirate’s Life And You Unlock This New Shanty
The puzzles are not too difficult to solve, but some may throw you for a loop if you don't know what you are looking for. A Pirate's Life Tall Tale is the first of many this season, and it is your duty in Sea of Thieves to see them all through to the end.
Find The Castaway

The first thing you need to do is find the Castaway on the beach at any outpost, and this is the same way you start The Sunken Pearl Tall Tale. You will need to vote on this first tall tale by interacting with the pirate ship on the box next to their hut. Once this is done you can speak to the Castaway and begin your first tall tale adventure.
Find The Portal To The Sea Of The Damned
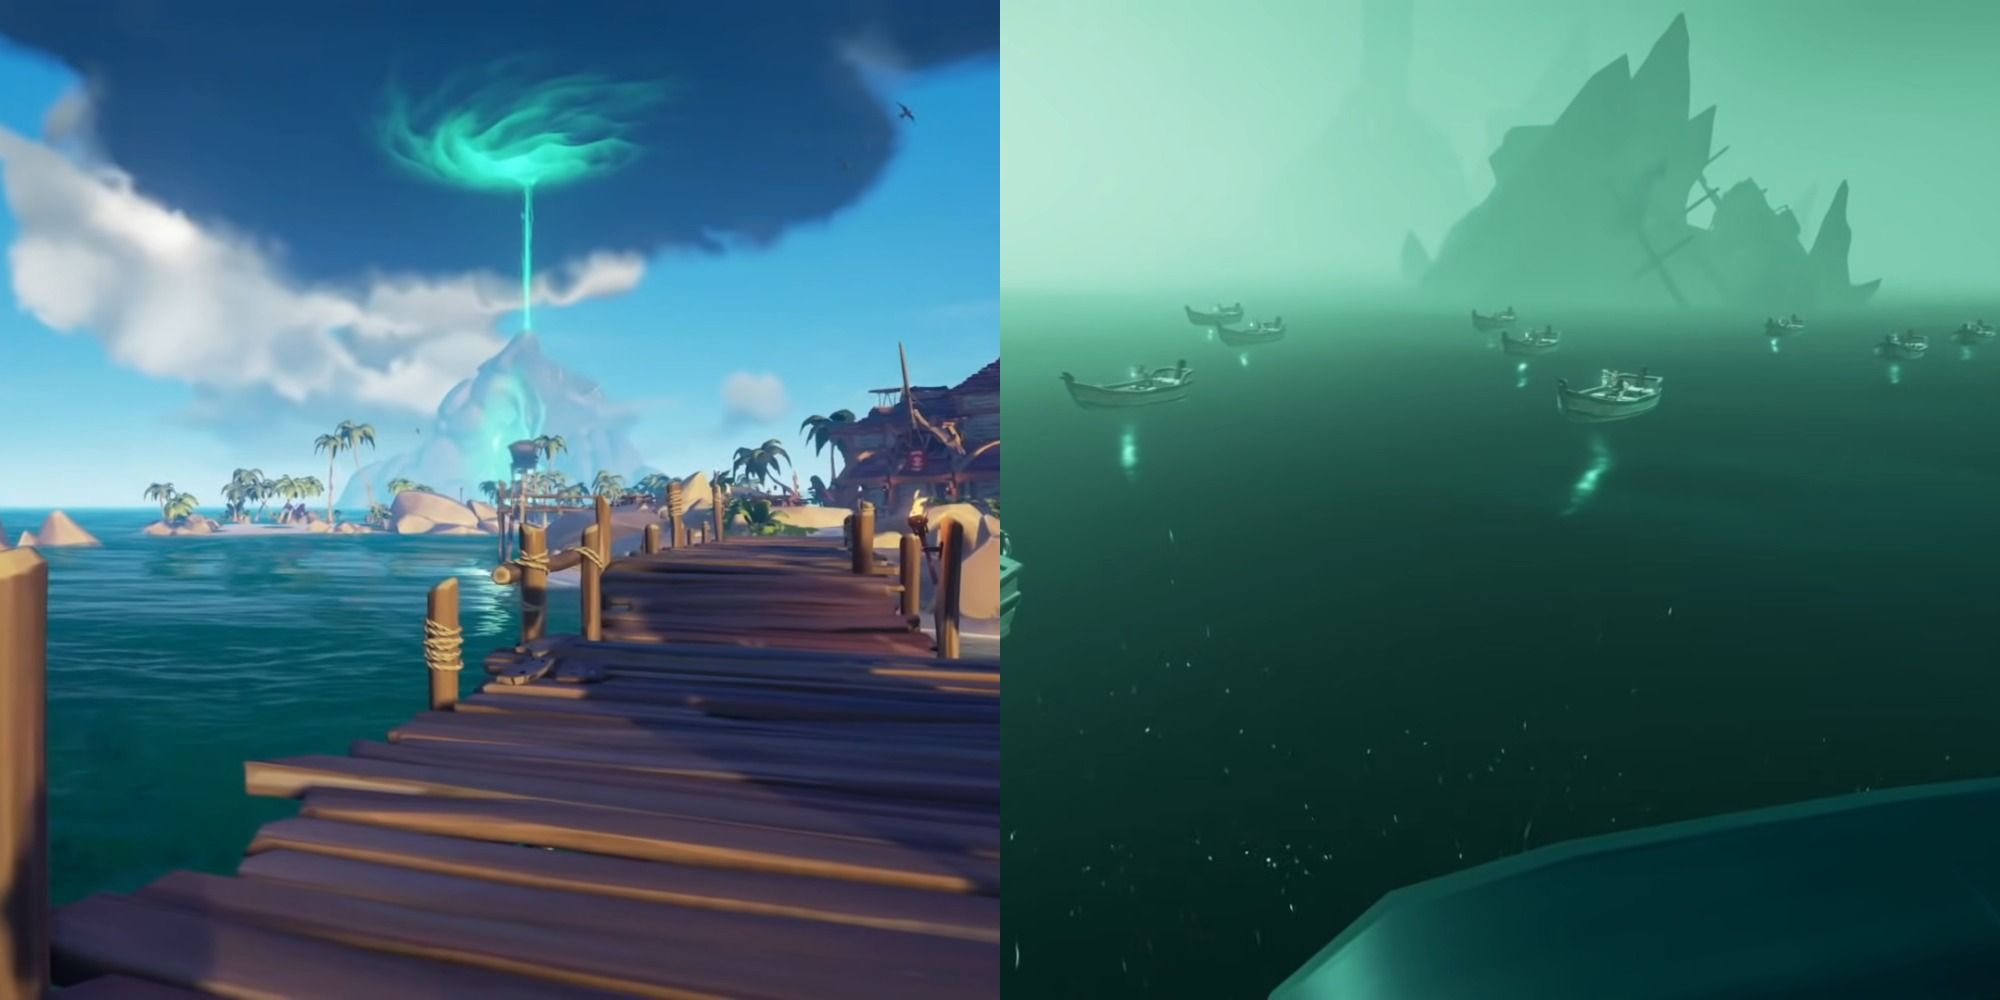
The Castaway will demonstrate what the opening of the Portal of the Damned looks like and you will have to go to it. This will appear as a green light in the sky and you need to sail to it, and then into it.
You will be taken along waterways until you finally enter a whole new world known as the Sea of the Damned. It is obvious when you reach it as a cut scene will occur right before you can head ashore to the island.
Find The Ship Hull Entrance And Complete The Puzzle

Once you swim ashore you want to look for an entrance that has the inside of the ship hull lining the sides of the cavern. This is where you need to go and after a short walk, you will enter a small room.
The first puzzle you need to complete is found here and it starts by you going up to the fire and placing the Flame of Souls in your lamp by raising it. Next, head to the doorway with the two ships and either side with skeletons and light the lantern in each of them.
The next room you come across will once again have you lighting the lanterns in an area. Two are in the hands of skeletons, and one of them you will have to move their arm. The final lantern is in a rowboat down a side cavern, so it might take some searching before you find this one.
Walk Through The Rooms, Then Find The Handle

After you complete the lantern lighting puzzles you will then need to walk through the various rooms and just observe the ghost pirates as you go along. Eventually, you will come across a door that needs a handle.
There is a waterfall nearby that you need to walk through and it will lead you to a very dark room. You will notice a bright glint coming from the corner and it will lead you to a skeleton. The handle will be sticking out of it, and you need to pull it out then use it to open the door.
Light The Lanterns And Make Your Way Through The Room

The first thing you will need to do is light the lantern on the boxes to bring up the ghostly rowboat. Next, you need to continue through the room and interact with various devices to give you access to the next section.
You will come across the same device you would use to lower and raise the anchor on your boat. Spin this until the bridge is raised and you can cross. This will take you to a pulley that you will also need to interact with in order to raise a platform that will allow you to cross.
RELATED: Sea Of Thieves: How To Change Your Character
Finally, at the end, there will be another lantern, and interacting with this will bring the ghostly rowboat over to you which will lower a bridge to give you access to the next area.
Make Your Way To The Waterway
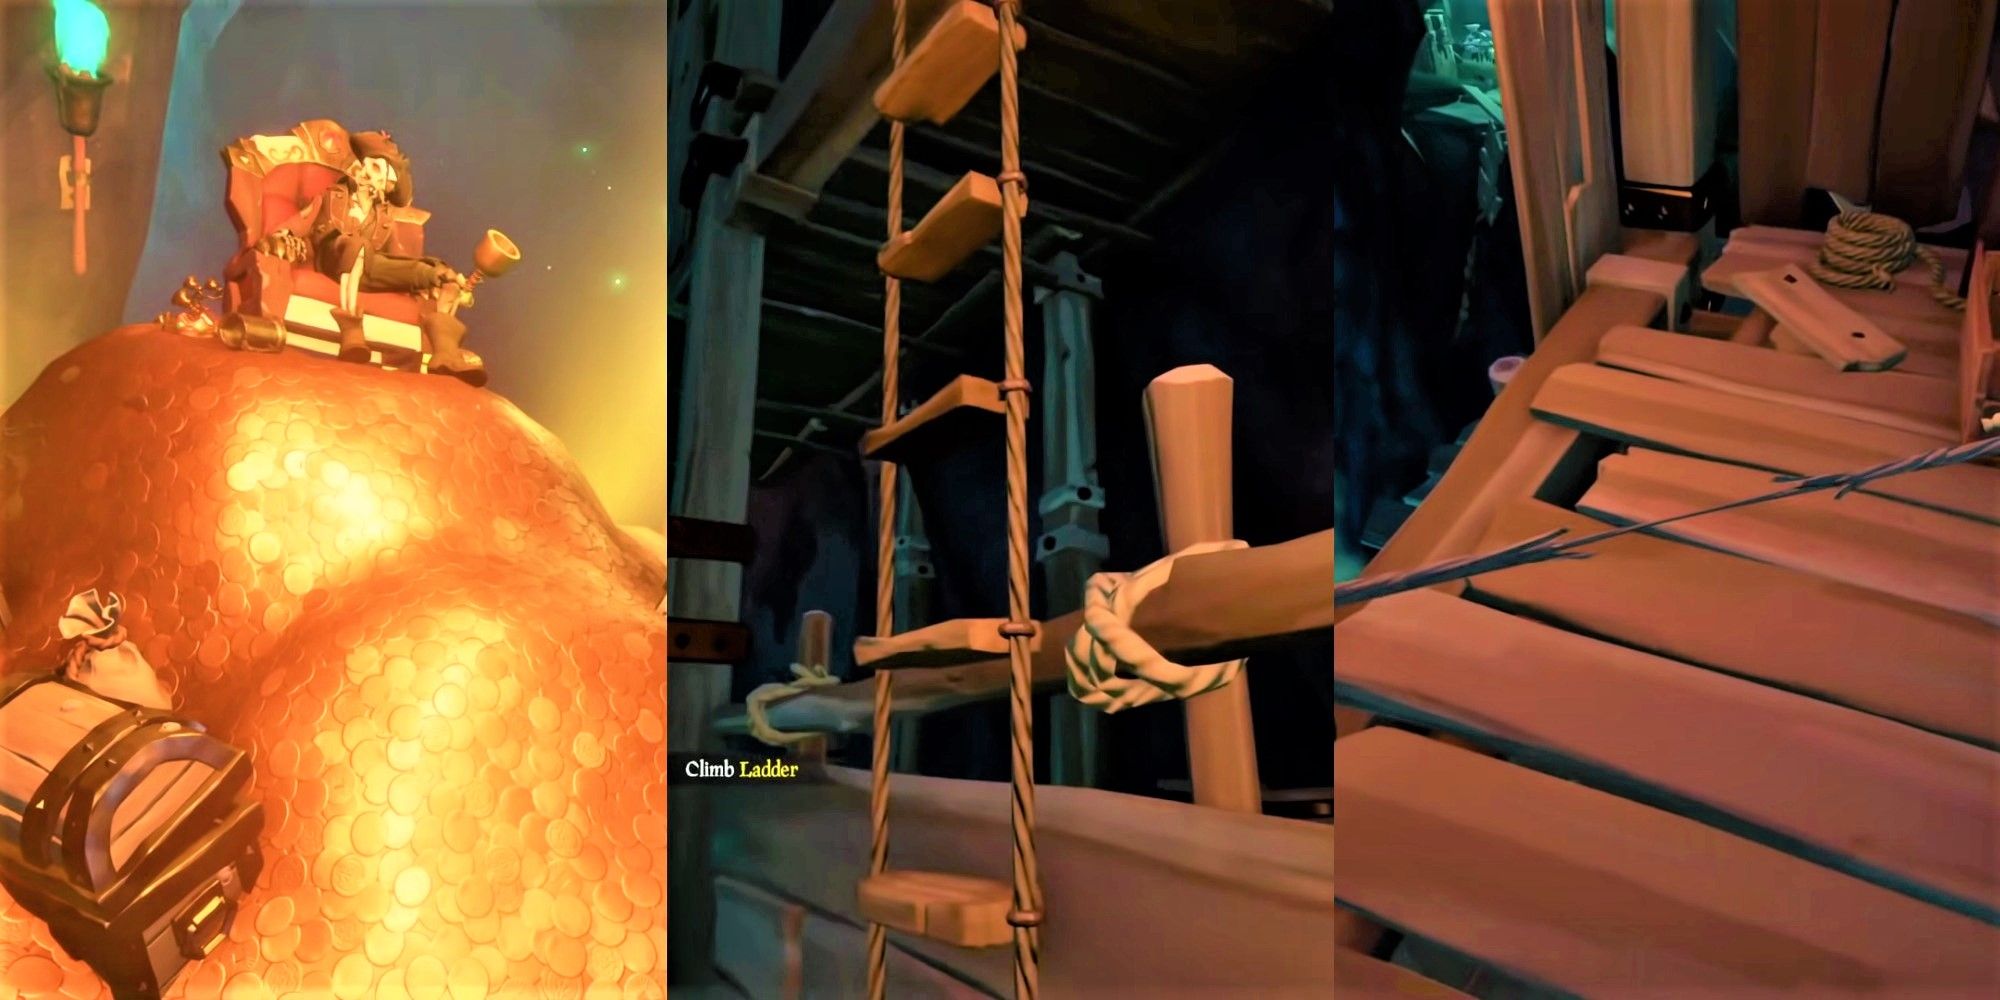
Cross the bridge and head into the next area where you will see a giant cavern filled with treasure. Move past this room until you reach the rope ladder. Climb the ladder and cut the rope at the top to lower the bridge, and hope that no beard errors interrupt your progress.

After you cross the bridge you will need to interact with a pulley to bring over a platform for you to jump onto. Jump to the other side and then cut the next rope to bring down another platform. Eventually, you will come across some running water that you need to jump into as it will take you to the next area.
Open The Gate And Enter The City

The biggest portion of this tall tale is the city, but first, you need to open the gate before you can enter it. Pull out your lantern and head up the stairs to your left, then light the brazier on the ground. This will activate the city and cause the gate to open up for you. This will begin the next leg of the tall tale called Tales of the Dead.
Free The Captain

You need to head to the center of the city where you will see a cage hanging between some masts which contain the Cursed Captain. There will be a ship you can cross and you need to make your way to an area with several pulleys that activate platforms. Jump across the platforms and head to the top of the mast, then use your sword to cut down the Cursed Captain.
Find The Key To Let Out The Cursed Captain

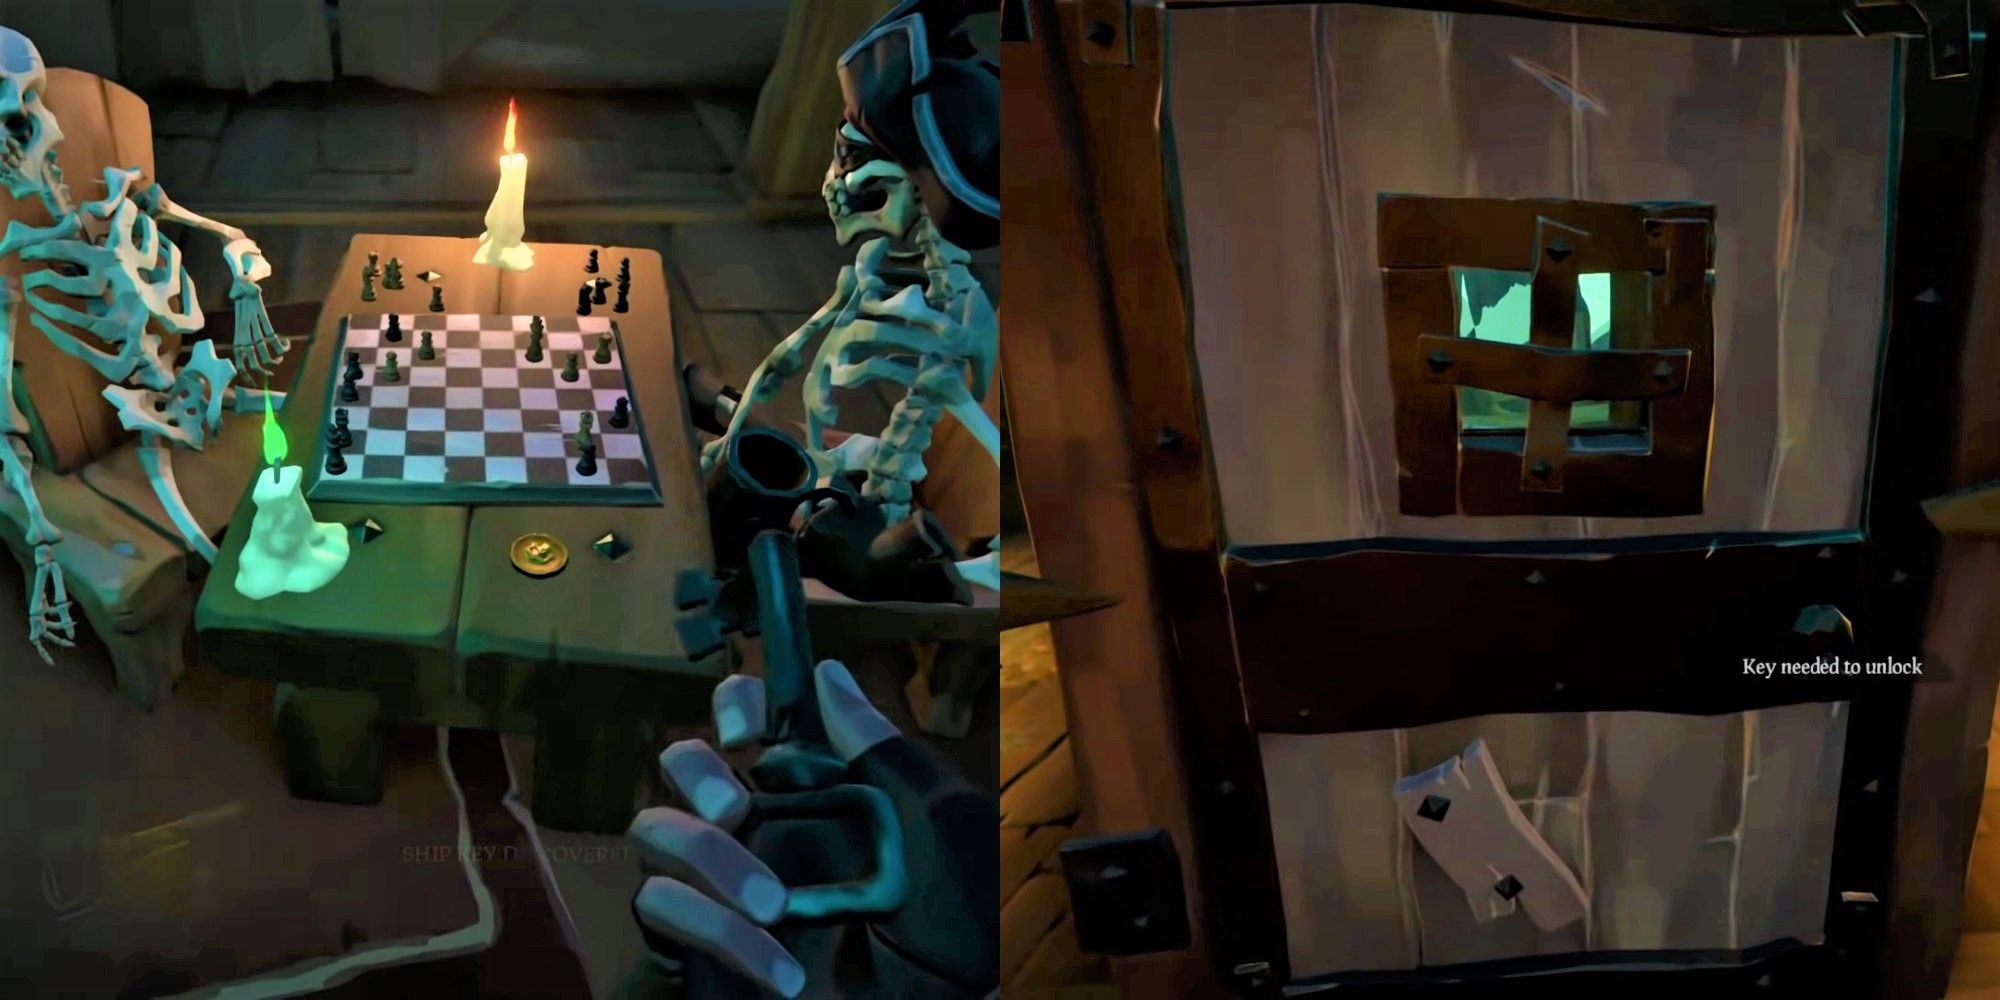
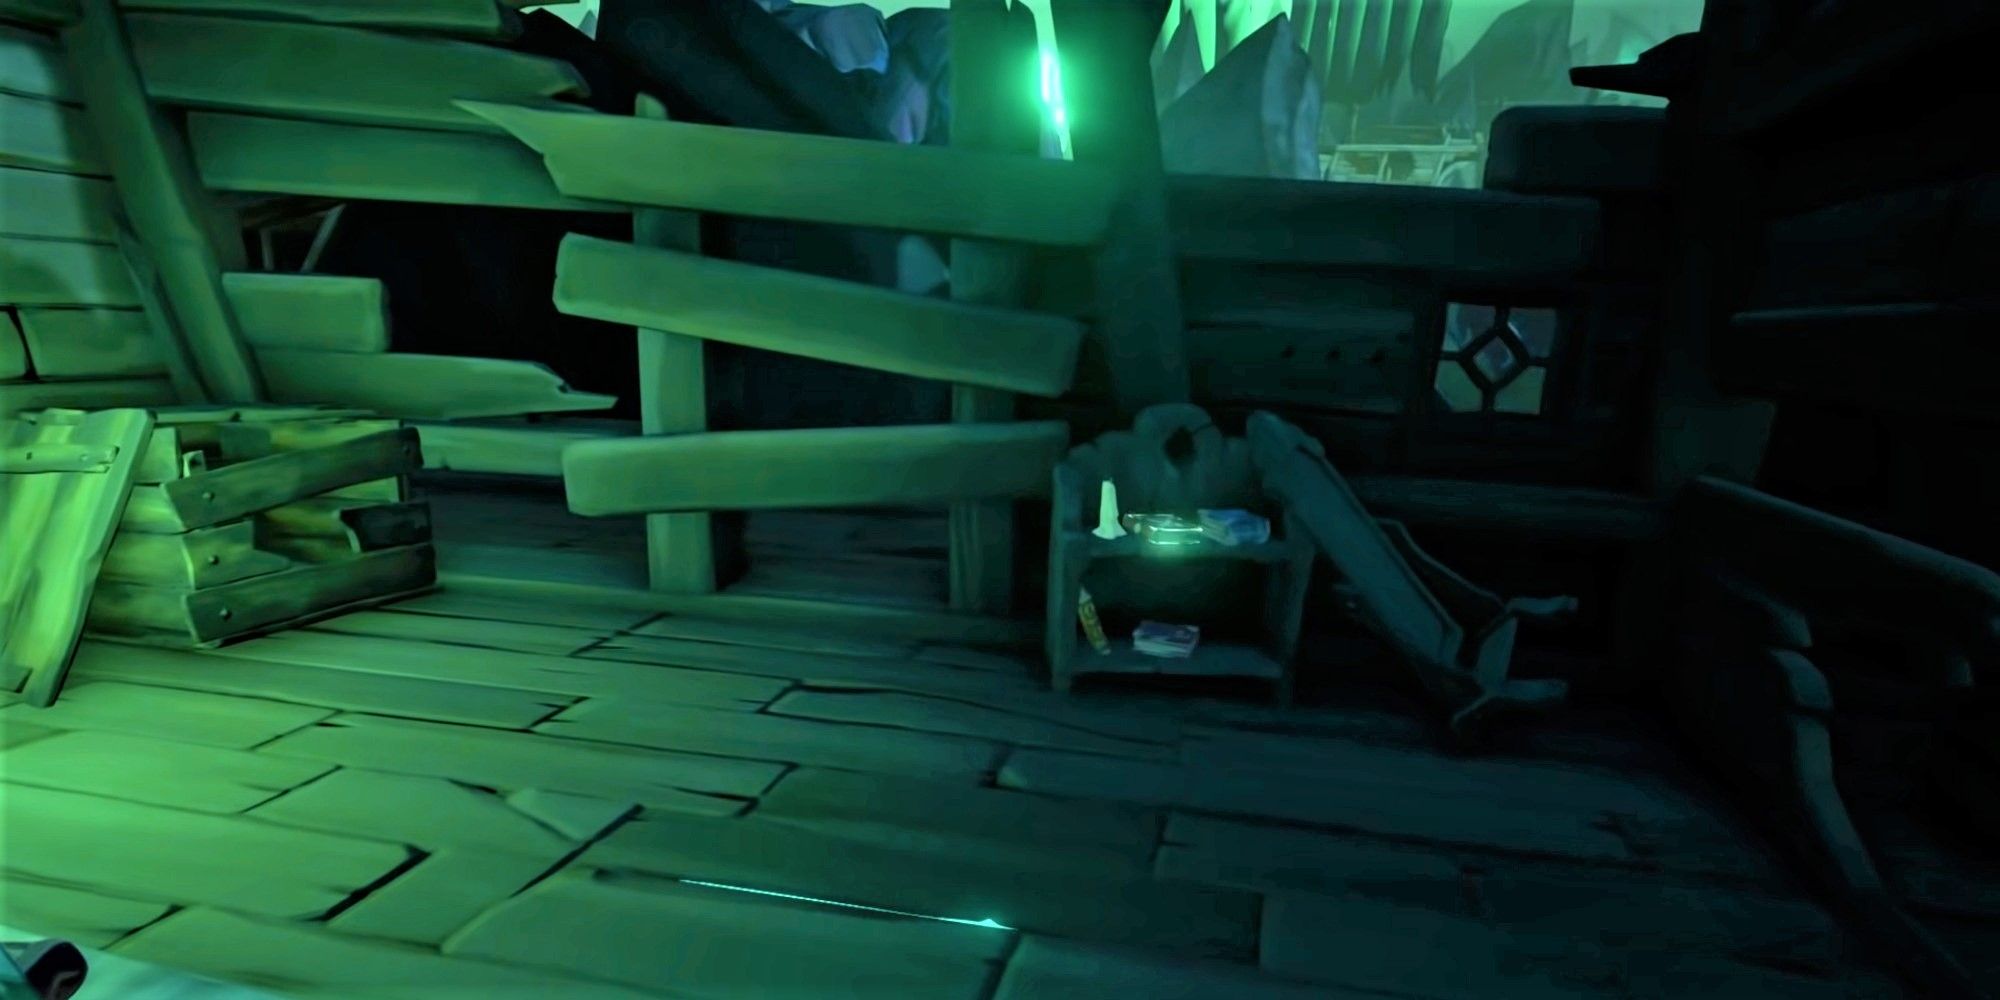
The cage is now on the ground, but you need a key to unlock it. This can be found in the tavern and once you walk inside you will see something shimmer atop the light. Follow the rope holding it up as it leads to a pulley which will drop the fixture to the ground.
Collect the key, then open the cage and release the Cursed Captain.
Finish The Chess Game With Captain Bones' Special Recipe

Now that the Cursed Captain is released you you can head over to the two skeletons playing chess. Place his head here as you will need him later. Also, look to the table on your left in this room as the first journal will be sitting here for you to take.
Light the candle on the table, then head back to the area with the platforms and pulleys. You will find Captain Bones' Special Recipe in an alcove to the right of the two platforms. If you need more help finding it this guide can serve as a great reference.
Once you have it, head back to the skeletons and put it in the cup on the right. This will cause the skeleton's head to explode, which is where you will put the Cursed Captain's skull. However, first, you need a buy-in which requires you to follow a set of clues.
Head Back To The Tavern And Follow The Clue To Dougie

Head to the tavern and go up to the Captain's Quarters by following the ramps all the way up to the top. You will need to light the lantern on the table, which will then reveal an 'X' on the map. This is where you can find the treasure, but before you go make sure to grab the journal.
RELATED: Sea Of Thieves: Which Ship Is Best? Brigantine, Sloop, Galleon
Before you head back down to the tavern look across to the other side of the ship and you will see the second journal on the table.
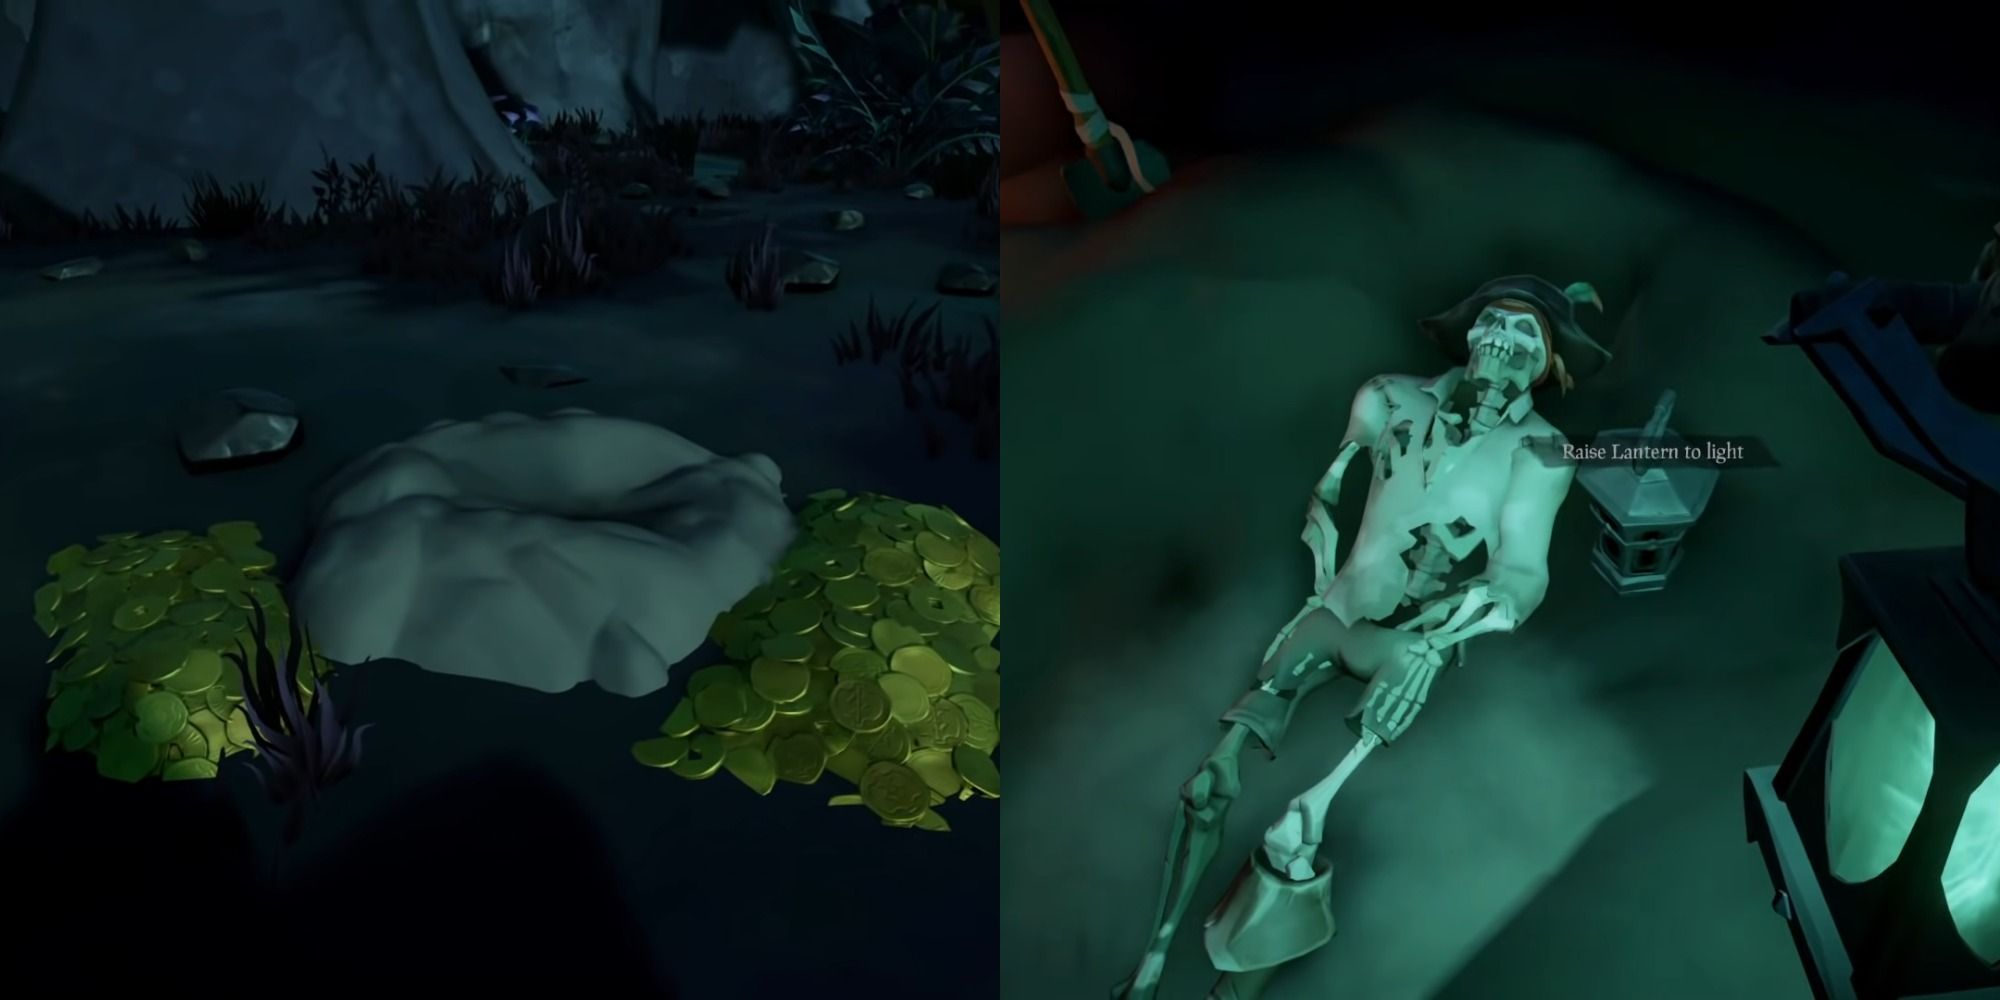
Follow the clue on the map until you reach a spot where it looks like the treasure was dug up. You will see a trail of gold pieces leading away from it and you need to follow these until you find yourself underneath a platform. Take out your shovel and start digging until you reveal the skeleton of Dougie who will direct you to your next spot.
Find The Second Cursed Captain
There is another cursed captain on the island who is in a broken ship and laying on a bed. If you look to the table to the right you will see the third journal for you to collect.
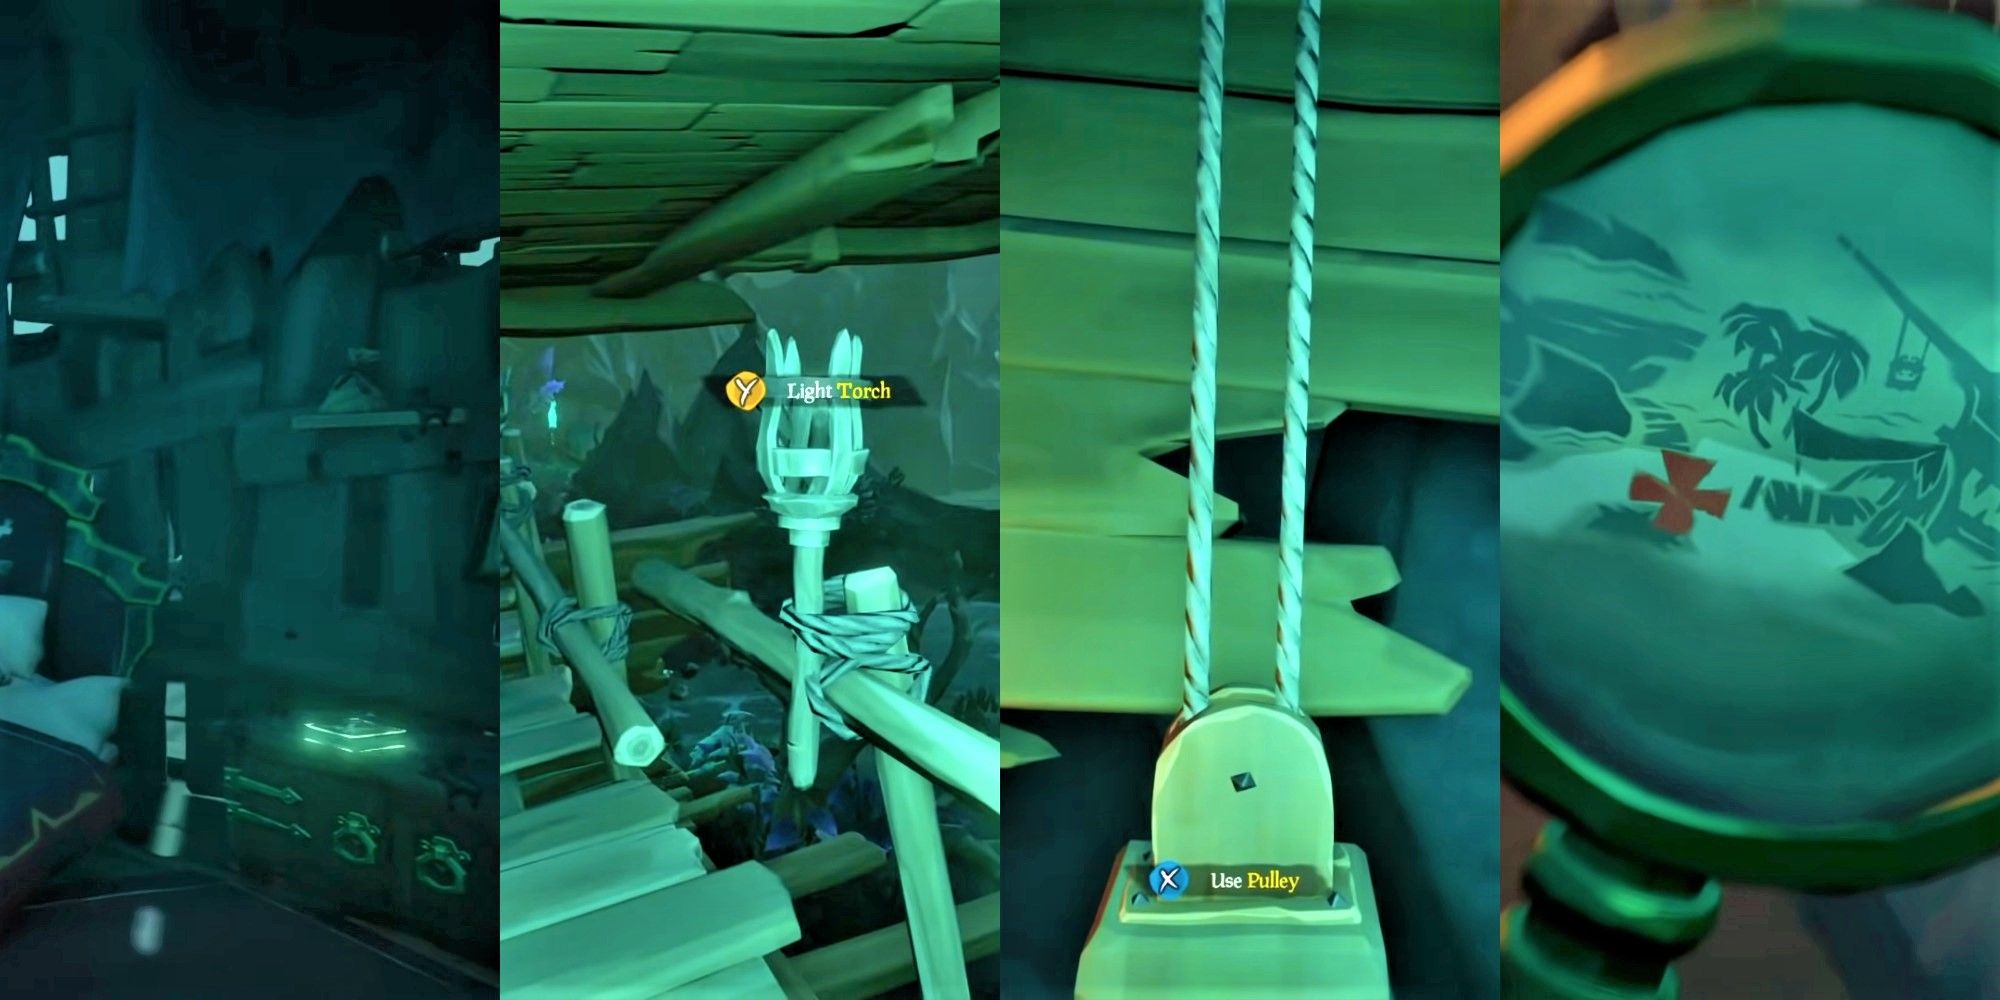
Next, head to the upper deck of the ship and light the torches outside, then activate the pulley to let the light into the room. Head over to the cursed skeleton captain in the bed and move his arm until the magnifying glass shows a big red 'X' on the map.

This will lead you to a rock in front of the tavern near the water which is where you need to dig. Once you have the chest, you need to take it back to Dougie who will then give you the key to unlock it. This will give you Poor Dougie's Medallion which can be used as your buy-in.
Finish The Game Of Chess
Take the medallion and head back to the skeleton chess game. Place it on the table, then place the Cursed Captain's Skull on top of the skeleton who lost theirs after drinking their tankard. This will give you a key that can be used to open the door near all of the pulleys where you found the Special Recipe earlier.
Open the door and collect your gold, which is one way to make a lot of money, then go back and retrieve the Cursed Captain's skull once again.
Head To The Lighthouse And Complete The Puzzle
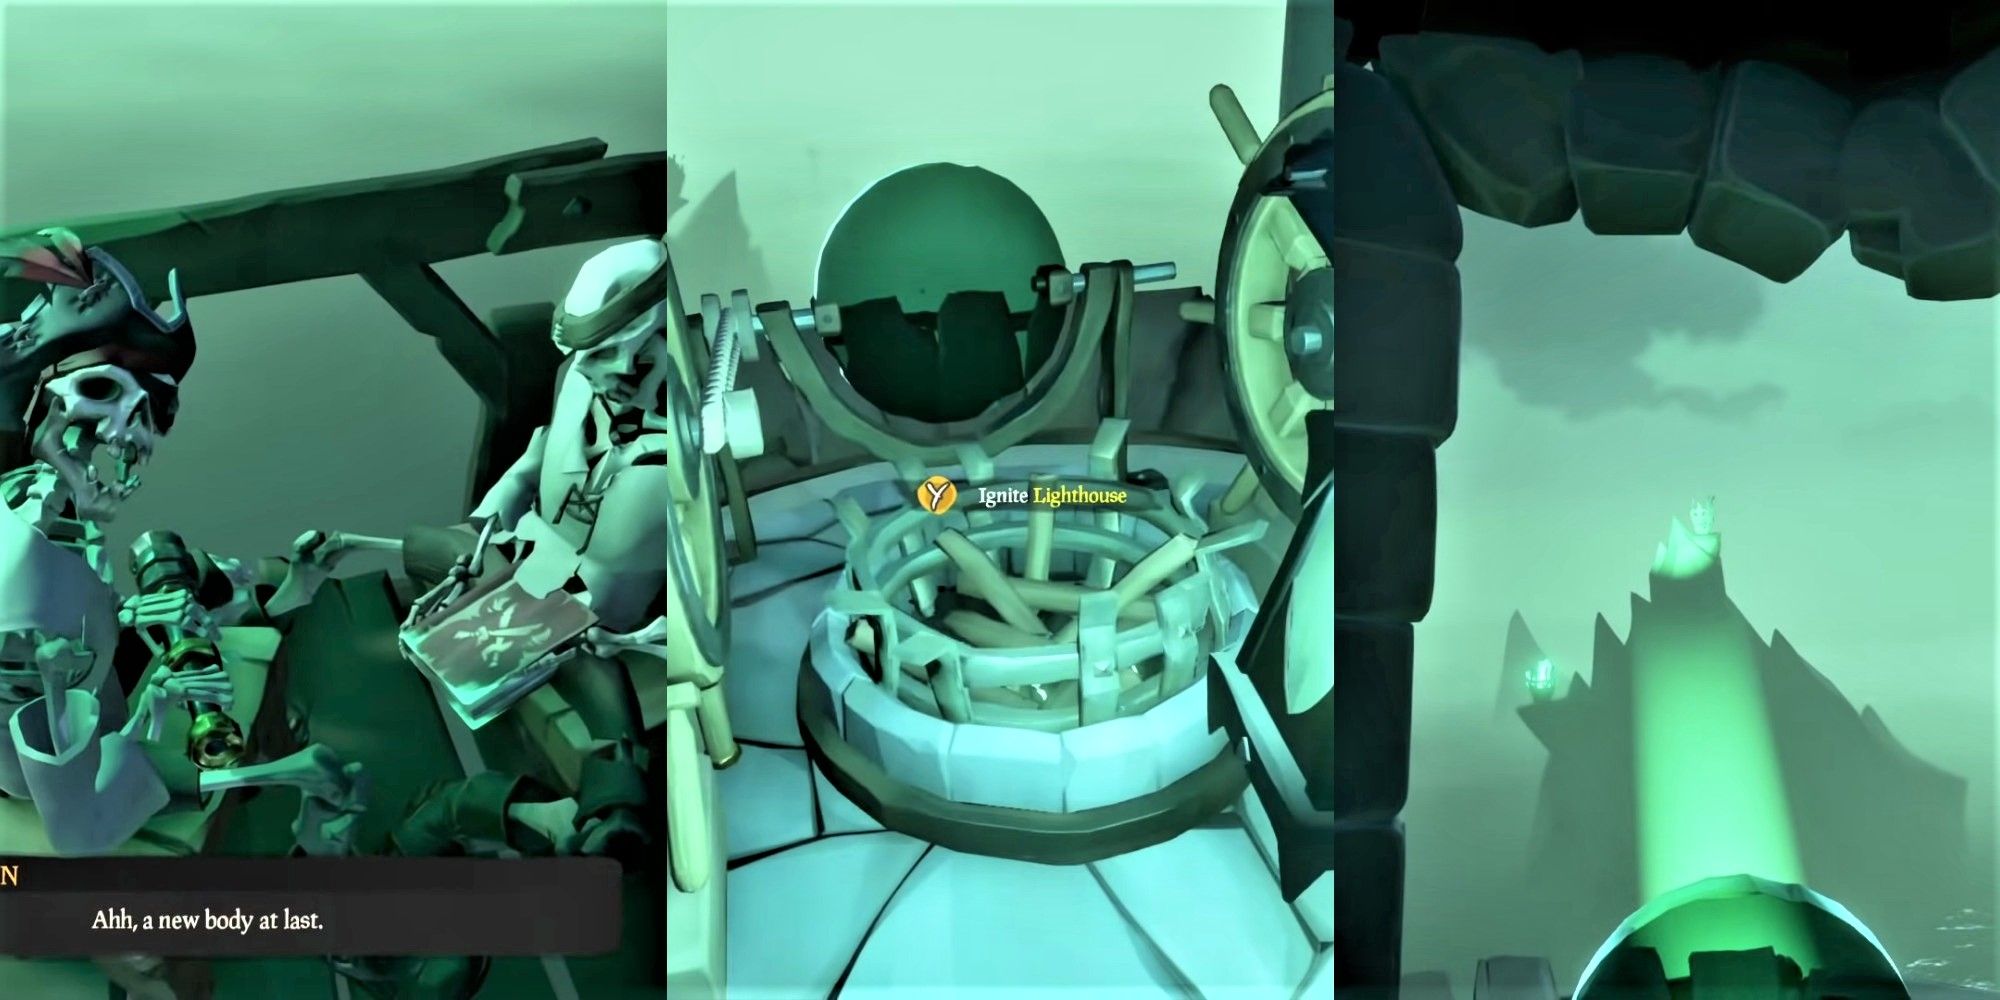
Take the Cursed Captain's skull to the lighthouse, which is through the door you just unlocked to retrieve the treasure. Place his head atop the skeleton that is sitting next to the other with a journal in their hand.
RELATED: Sea Of Thieves: How To Crossplay Co-Op Between PC and Xbox
While he is chatting with the skeleton, climb the rope ladder to the top of the lighthouse and light the brazier with your lantern. Next, spin the wheels in order to maneuver the light and light up the braziers on the rocks across from you.
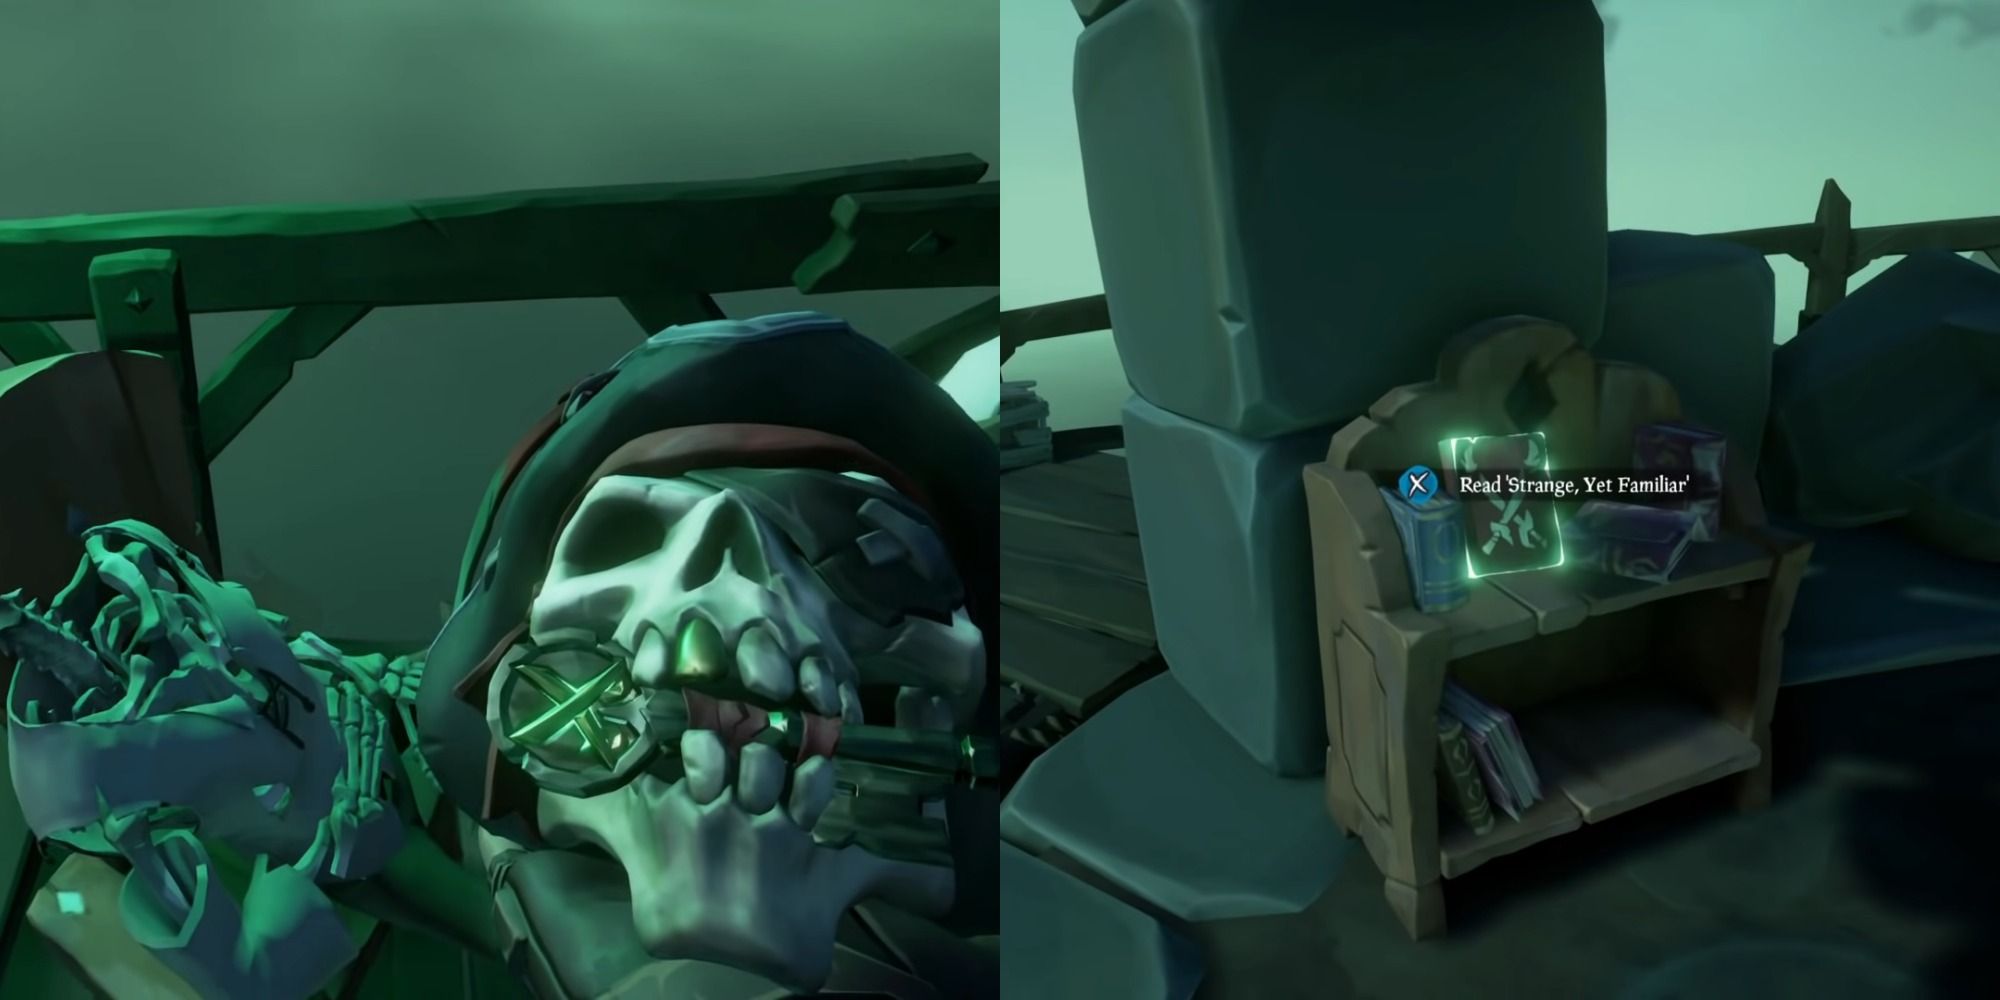
Once they are all lit head back down and grab the Cursed Captain's skull, which now has a key in its mouth. Also, don't forget to grab the journal off the bookshelf to the right of the skeletons behind a wall.
Go Up To The Lighthouse And Move The Sails
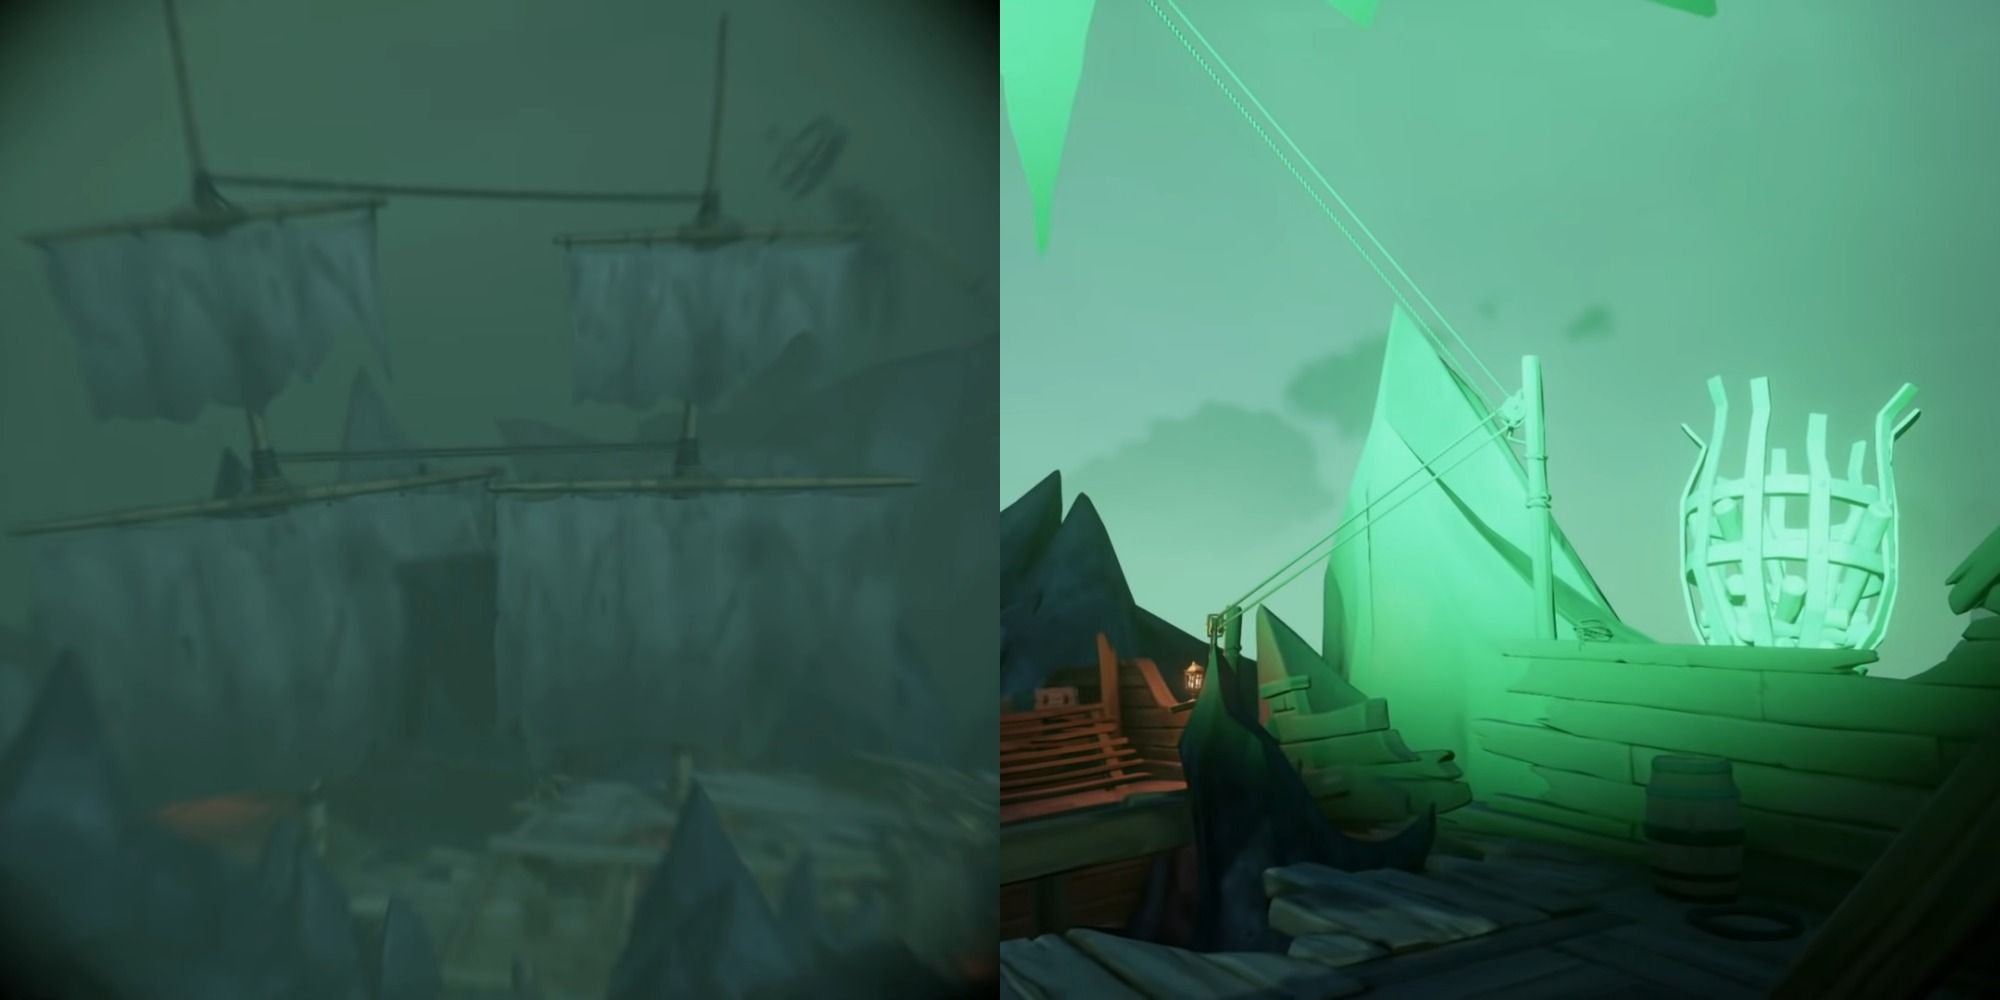
You need to head back up to the lighthouse as there is one more brazier that requires a bit more work. You will see some tattered sails to the right of the red ship and you need to aim your beacon at these. Next, go back to the treasure room you unlocked earlier and head to the roof of it.
You will find a pulley that will allow you to move the sails and you need to angle them so the brazier can be lit.
Follow The Torches To The Shipwreck

After the final brazier is lit follow the torches back toward the front of the city where you entered and follow the path down to a shipwreck. There will be a key on the top deck on a skeleton, which is easier to find than the Silver Blade Key, as well as five monkey journals for you to collect.
You will have to use the key you found to open the Captain's Quarters to retrieve the final two journals.
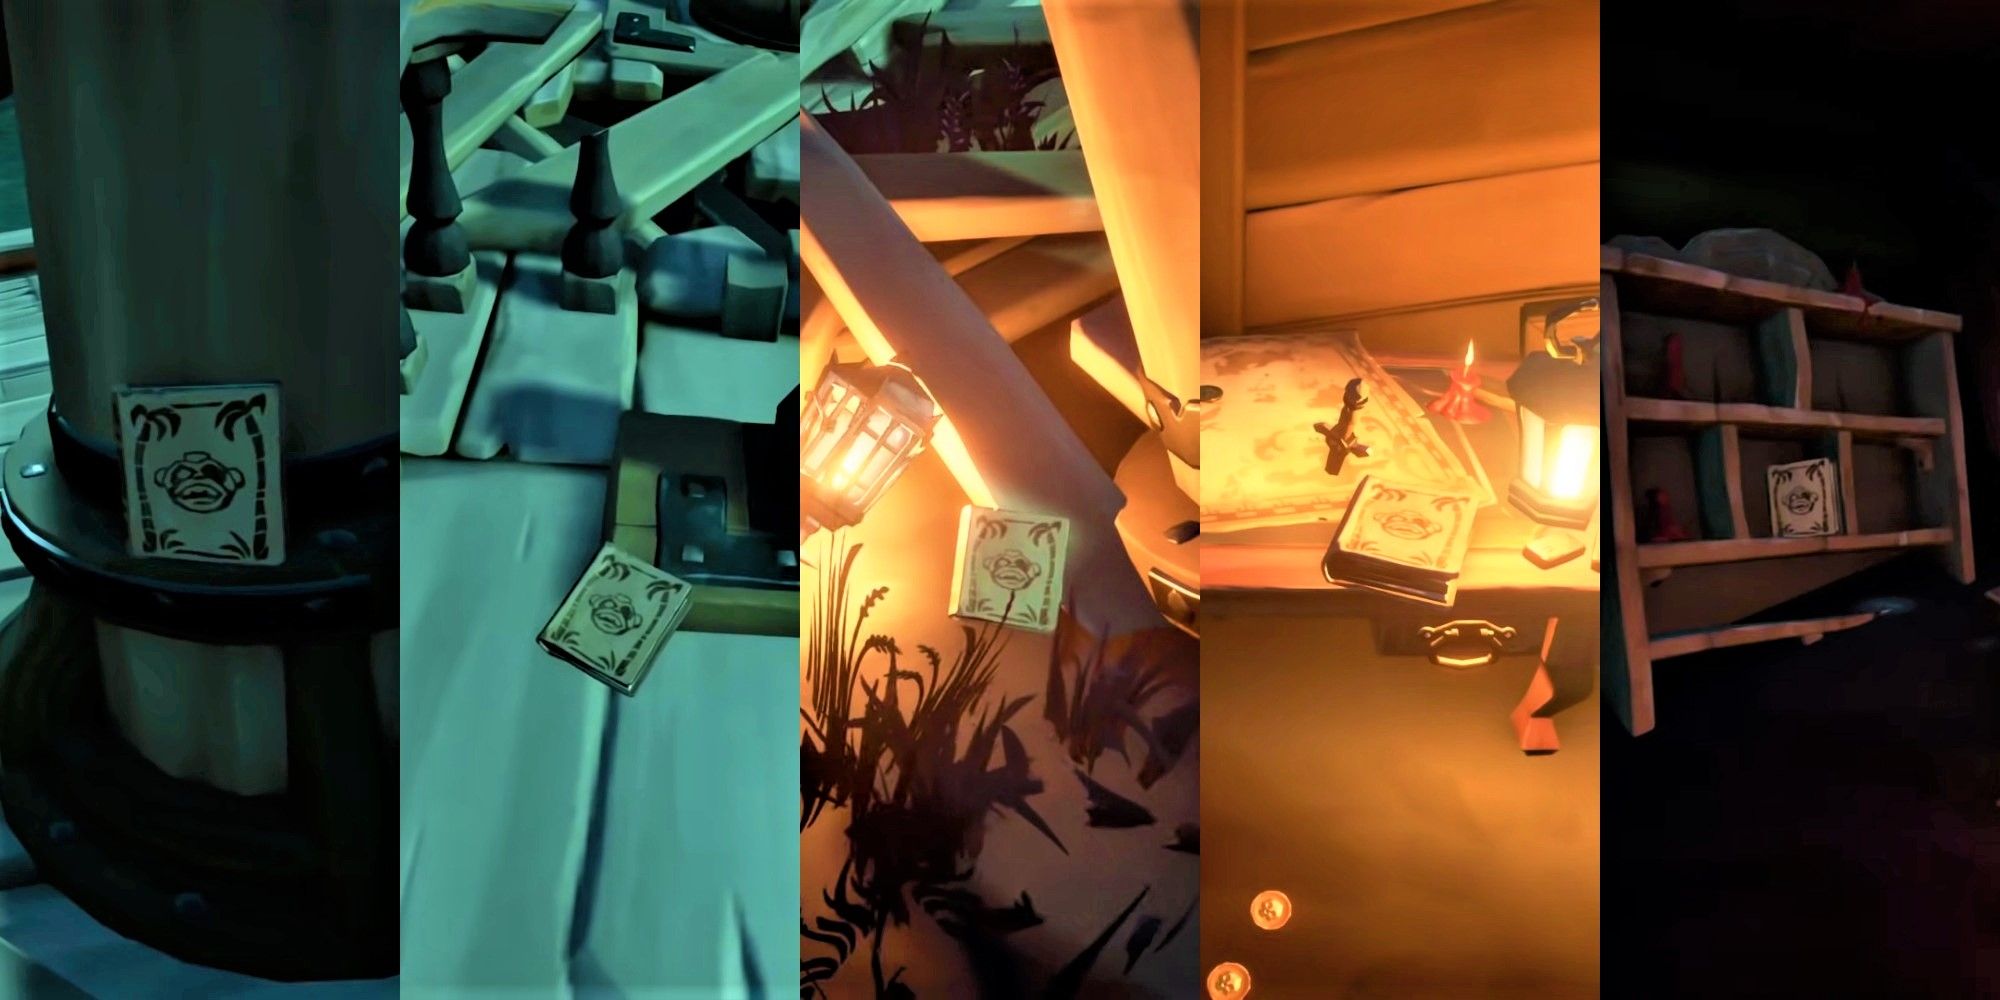
The journal locations are as follows:
- On the mast
- To the left of the skeleton with the key
- Next to a lantern on the ground
- On the table in the Captain's Quarters
- On the bookshelf in the Captain's Quarters
Go To The Ship With The Red Sails

Once you have collected all the journals you can take the Cursed Captain's skull with the key to the ship with the red sails. Place the skull on the skeleton outside the door at the base of the ship so he can open the door for you.
After the door opens collect the skull and head to the top deck. Go into the Captain's Quarters and place the head atop the skeleton, which is the Cursed Captain's actual body. He will then release the key which you can now take to open the door behind him.
However, before you do make sure to collect the journal off the bookshelf to the right.
Release Jack Sparrow

Walk through the door you unlocked and collect the treasure. Once you have done this go over to the rowboat and lower it into the water. Next, take it over to the Ferryman and it will raise your boat out of the water.
Head to the deck and light the Well of Fates, which can be used to customize your ship's lanterns, and it will open the grate below it. Go down the stairs and light the torches on the wall to unlock doors until you finally reach Jack Sparrow. The trickiest one is hidden behind the sarcophagus lid which must be moved out of the way.

Eventually, you will reach Jack Sparrow who is trying to nab the keys from a dog. Pet the dog and the keys will be yours, and then you can release Sparrow from his holding cell.
Fight The Flying Dutchman
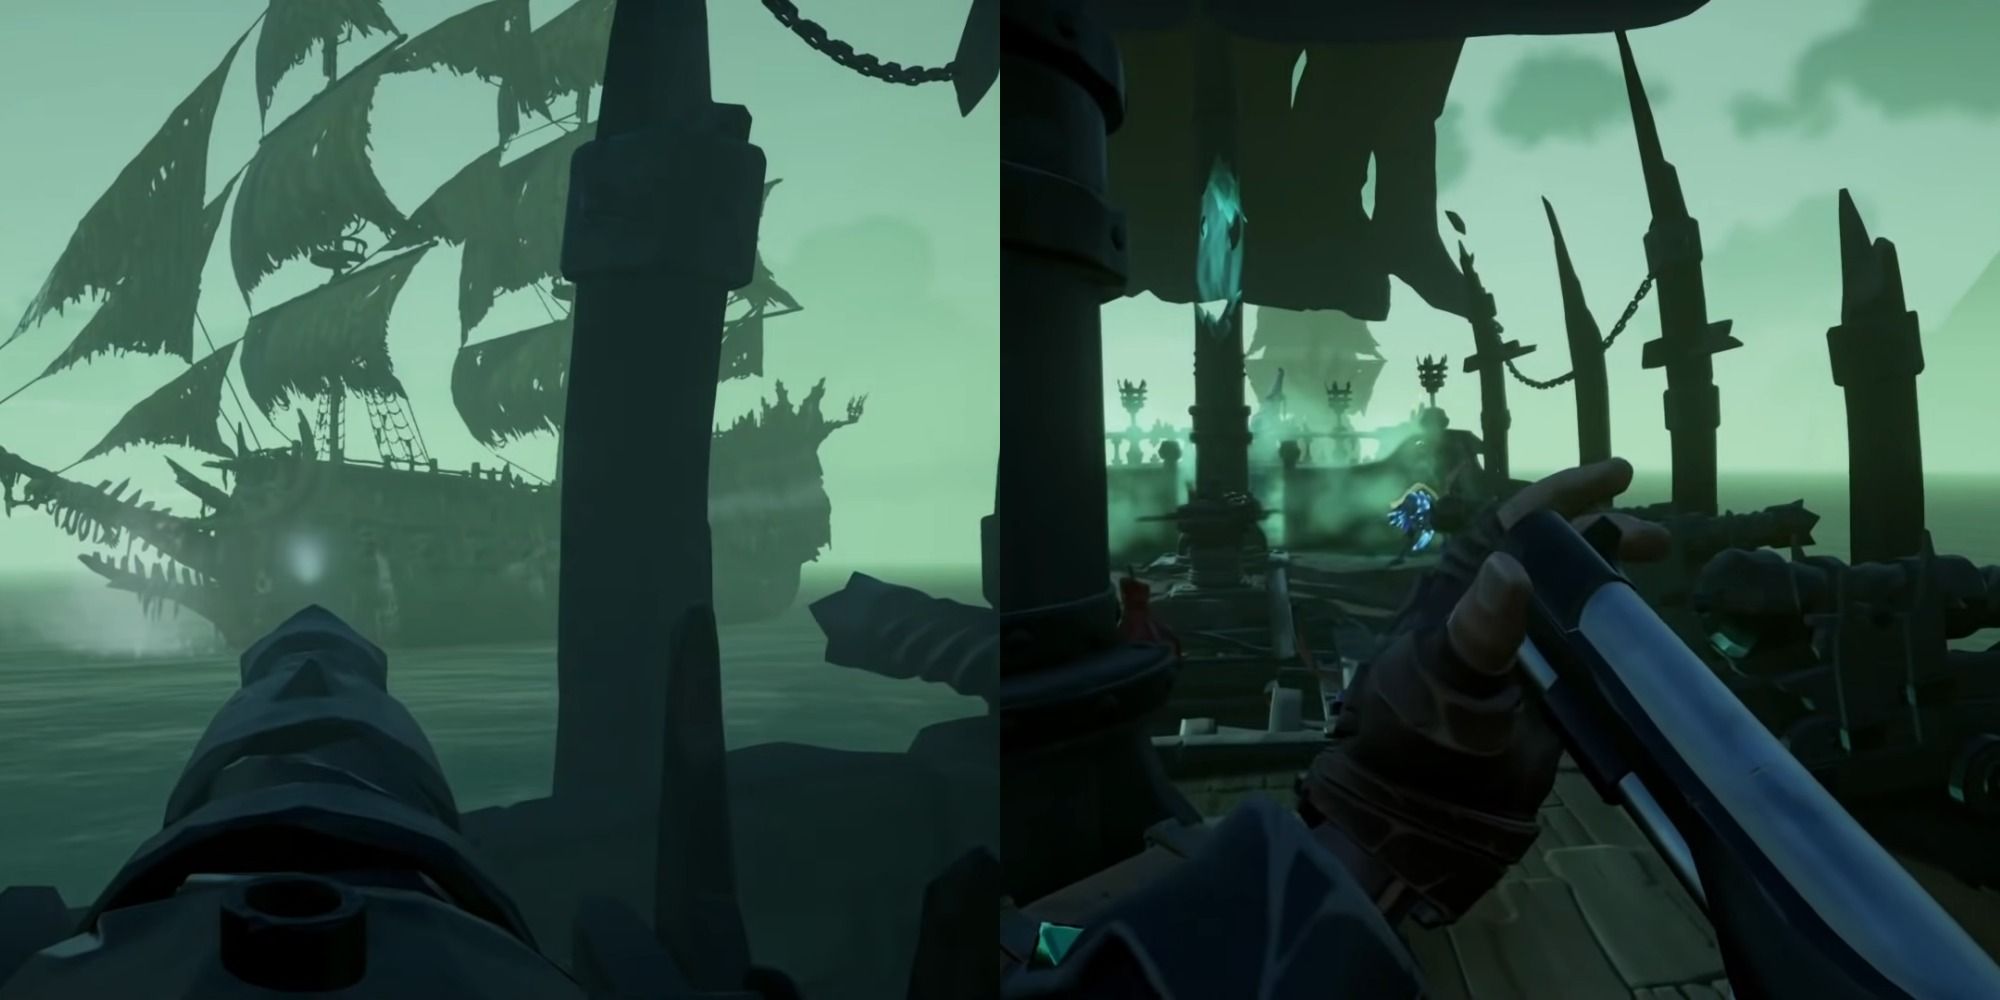
The Flying Dutchman will appear after Sparrow's release and it is up to you to fend it off. You will use the cannons to shoot at it, and then some of the new enemies will jump aboard the ship. The fight ends when the treasure is stolen from Jack Sparrow and then he falls into the Sea of the Damned.

It all ends with you back on your ship and back in the main game, and now you can go on to complete the next tall tales in this series, and eventually reach The Dark Brethren Tall Tale.
Next: Every Curse In Sea Of Thieves (& How To Obtain Them)