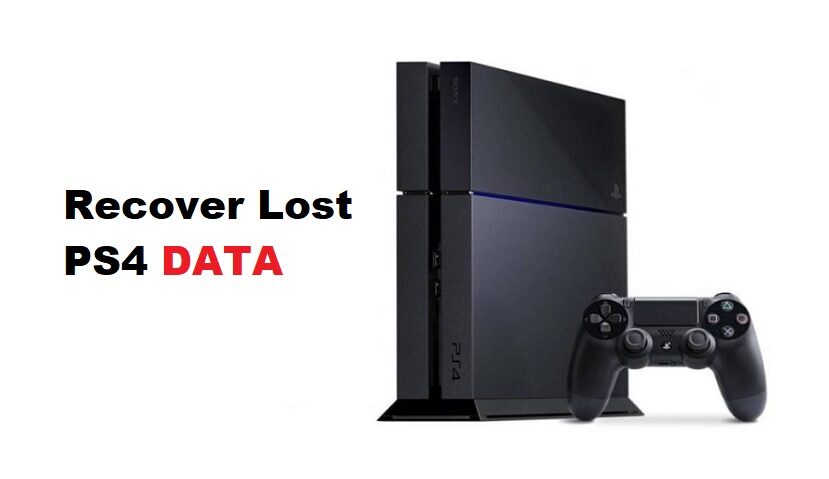

Poob lossis yuam kev rho tawm cov ntaub ntawv game los ntawm koj lub PlayStation 4 (PS4) hard drive tuaj yeem yog qhov kev paub dhau los. Hmoov zoo, muaj ntau txoj hauv kev los rov qab cov ntaub ntawv ploj lossis tshem tawm cov kev ua si thiab coj koj cov kev ua si zoo rov qab mus rau lub neej. Hauv phau ntawv qhia no, peb yuav taug kev koj los ntawm cov txheej txheem ib ntus ntawm kev rov qab koj cov ntaub ntawv game muaj nuj nqis los ntawm koj PS4 HDD, nrog rau cov ntaub ntawv muaj zog rov qab software, xws li Stellar Cov ntaub ntawv rov qab as one of the reliable solutions available.
Kev npaj ua ntej rov qab
- Backup koj cov ntaub ntawv tam sim no:
Before attempting to recover lost game data, make sure you have a current backup of your PS4 system data. This ensures that any new game progress is not overwritten during the recovery process.
- Download a Data Recovery Software:
- Visit the official website of a trusted data recovery software provider, such as Stellar Data Recovery.
- Download the software compatible with your operating system (Windows or Mac).
- Install the downloaded software by following the on-screen instructions.
- Xyuas kom muaj chaw cia txaus:
Ensure you have enough free space on your computer’s hard drive to save the recovered data.
How to Create a Backup of Your PS4 Console Data?
Txhawm rau tiv thaiv koj cov ntaub ntawv PS4, koj tuaj yeem tsim cov thaub qab siv USB drive formatted li FAT32 lossis exFAT. Xyuas kom tseeb tias USB tsav muaj ob npaug ntawm qhov chaw cia ntawm koj cov ntaub ntawv thaub qab PS4. Yog tias qhov chaw txwv, koj tuaj yeem xaiv tsis rov qab cov ntaub ntawv thov.
1- Sync Trophies nrog PSN:
- Los ntawm kev ua haujlwm screen, xaiv "trophies. "
- Nias lub OPTIONS khawm ntawm koj tus maub los.
- Xaiv "Sync Trophies With PSN"kom paub tseeb tias koj cov ntaub ntawv pov thawj yog hloov tshiab.
Npaj USB Drive:
- Insert the FAT32 or exFAT-formatted USB drive into your PS4 console.
3- Access Backup and Restore Settings:
- Nkag mus rau "chaw” on your PS4’s main menu.
- Scroll rau "system”Thiab xaiv nws.
- Xaiv "Thaub qab thiab Restore” nkag mus rau cov kev xaiv thaub qab.
4- Initiate the Backup Process:
- xaiv "Rov Qab” to begin creating a backup of your PS4 data.
5- Specify Data to Back Up:
- Confirm which data you want to include in the backup. It’s essential to back up saved data to prevent the loss of game progress.
6- Customize Backup File Name:
- Personalize the backup file name according to your preference.
7- Pib qhov thaub qab:
- Thaum koj tau xaiv koj cov kev xaiv, nias "Rov Qab” txhawm rau pib txheej txheem thaub qab. Koj PS4 yuav luam cov ntaub ntawv xaiv mus rau USB tsav.
8- Eject the USB Drive:
- Tom qab cov thaub qab tiav lawm, tshem tawm USB tsav ntawm koj lub console kom zoo.
Please keep in mind that if you’ve never signed in to PlayStation Network (PSN), koj tsuas tuaj yeem rov kho cov ntaub ntawv khaws tseg rau thawj PS4 console uas tau siv rau thaub qab. Txhawm rau rov kho cov ntaub ntawv khaws tseg mus rau qhov sib txawv PS4 console, koj yuav tsum xub kos npe rau PSN ua ntej pib txheej txheem thaub qab thiab rov ua dua.
Yuav rov qab tau koj cov ntaub ntawv PS4 Console siv USB Drive li cas?
Rov kho cov ntaub ntawv ntawm koj lub console PS4 cuam tshuam nrog kev tshem tawm tag nrho cov ntaub ntawv uas twb muaj lawm, thiab qhov kev txiav txim no tsis tuaj yeem thim rov qab, txawm tias koj txiav txim siab thim rov qab ib nrab. Nws yog ib qho tseem ceeb uas yuav tsum tau ceev faj kom tsis txhob txhob txwm ua kom tshem tawm cov ntaub ntawv tseem ceeb.
Here’s how to go about the data restoration process using a USB drive:
1- Access Backup and Restore Settings:
- Nkag mus rau cov ntawv qhia zaub mov tseem ceeb thiab xaiv "chaw. "
- Scroll rau "system”thiab xaiv nws.
- xaiv "Thaub qab thiab Restore” to access the restoration options.
2- Insert the Backup USB Drive:
- Ntxig lub USB tsav uas muaj cov ntaub ntawv thaub qab rau hauv koj lub console PS4. Cov tsav no yuav tsum tau npaj thaum lub sijhawm thaub qab.
3- Pib qhov txheej txheem Restore:
- Nyob rau hauv "Thaub qab thiab Restore"menu, xaiv"Restore PS4"kom pib cov ntaub ntawv rov qab.
4- Xaiv cov ntaub ntawv thaub qab:
- A list of available backup files will be displayed. Choose the backup file you wish to restore.
5- Confirm the Restoration:
- Paub meej tias koj qhov kev txiav txim siab los rov qab xaiv cov thaub qab los ntawm kev xaiv "Yog” Cov txheej txheem kho dua tshiab yuav pib.
Thov nco ntsoov tias thaum cov txheej txheem rov qab pib, tag nrho cov ntaub ntawv uas twb muaj lawm ntawm koj lub console PS4 yuav raug tshem tawm, thiab nws tsis tuaj yeem thim rov qab. Yog li ntawd, siv ceev faj los tiv thaiv tej yam tsis txhob txwm poob ntawm cov ntaub ntawv tseem ceeb.
2. Recovering Lost PS4 Game Data with Data Recovery Software
Losing or accidentally deleting game data from your PlayStation 4 (PS4) hard drive can be a heart-wrenching experience. Fortunately, there are ways to recover lost or deleted game data and bring your gaming progress back to life. In this guide, we will walk you through the step-by-step process of recovering your precious game data from your PS4 HDD, with a powerful data recovery software, such as Stellar Data Recovery as one of the reliable solutions available.
Step 1: Connect the PS4 HDD to Your Computer:
- Use a USB cable or an external hard drive enclosure to connect your PS4 HDD to your computer.
- Ensure the connection is secure to avoid any interruptions during the recovery process.
Kauj ruam 2: Nruab thiab qhib qhov Xaiv Cov Ntaub Ntawv Rov Qab Software:
- Locate the data recovery software you downloaded and installed in the previous step.
- Tua tawm lub software los ntawm ob-nias nws lub icon.
Kauj ruam 3: Xaiv lub tsav thiab luam theej duab:
1- Nyob rau hauv cov ntaub ntawv rov qab software lub interface:
- Nrhiav thiab xaiv PS4 HDD ua lub hom phiaj tsav rau scanning.
- Xaiv qhov tsim nyog scan hom, xws li "Quick Scan” for recently deleted files or “Txheeb scan"rau kev rov qab zoo dua.
- Nias rau ntawm "luam theej duab” button to start the scanning process.
Kauj ruam 4: Saib ua ntej thiab rov qab cov ntaub ntawv poob Game:
- Tom qab lub scan tiav, lub software yuav tso saib ib daim ntawv teev cov ntaub ntawv rov qab tau, nrog rau koj cov ntaub ntawv ploj.
- Coj mus rhaub rau "ua si"Lossis"Cov Ntaub Ntawv Teev Tseg” category to locate your lost game progress.
- Saib ua ntej cov ntaub ntawv kom paub tseeb tias lawv tsis zoo thiab xaiv cov uas koj xav rov qab.
Step 5: Save Recovered Data:
- Choose a location on your computer where you want to save the recovered game data.
- Nyem qhov "Rov qab” khawm lossis ib qho kev xaiv zoo sib xws muab los ntawm software los pib txheej txheem rov qab.
- 3. Tos rau lub software kom ua tiav qhov rov qab, thiab ib zaug ua tiav, paub meej tias koj cov ntaub ntawv game tau rov qab ua tiav.
3. Tiv thaiv cov ntaub ntawv poob yav tom ntej
- Tsis tu ncua thaub qab:
To avoid future data loss:
Set up regular backups of your PS4 system data to an external storage device or a cloud service.
- Cov kev coj ua ruaj ntseg:
- Tuav koj PS4 HDD nrog kev saib xyuas kom tsis txhob muaj kev puas tsuaj rau lub cev.
- Store it in a safe, dust-free environment to prolong its lifespan.
xaus
Losing game data on your PS4 can be frustrating, but with the right tools and precautions, you can recover your valuable progress. Stellar Data Recovery, among other reliable data recovery solutions, provides a user-friendly and effective way to restore lost or deleted game data from your PS4 HDD. Remember to maintain good backup habits and take care of your PS4 hard drive to minimize the risk of data loss in the future. Happy gaming!