
If you want to share your Wi-Fi password with someone and you forgot what it is, or if you need the password for some other reason, you can easily check it on your Windows 11-systemer. This tutorial will show you how to view Wi-Fi passwords on Windows 11 computers. You can check the current connection’s password and the previously connected connection’s passwords.
View Wi-Fi Passwords Windows 11
Viewing Wi-Fi passwords is easy, and it is okay to forget them. If you are logged in and want to use the password on some other device, too, you can easily check it through the connected PC.
View Wi-Fi Passwords Windows 11 Connected PC
Step-1: Open the Windows settings app using the shortcut keys Vinn + jeg.
Step-2: Plukke ut Nettverk og Internett fra venstre rute.

Step-3: Velg Avanserte nettverksinnstillinger option from the right pane when the Network settings open.
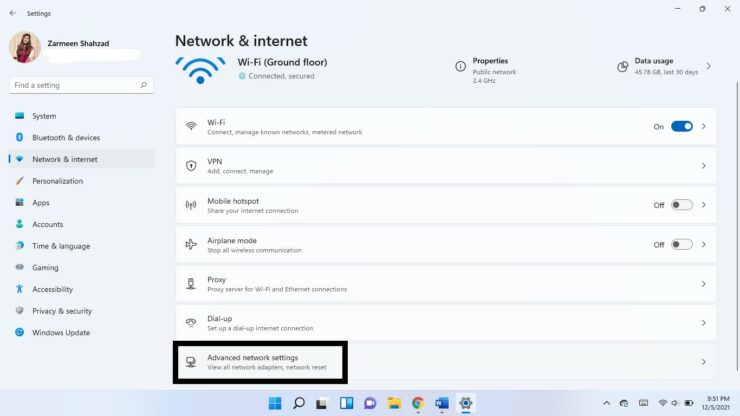
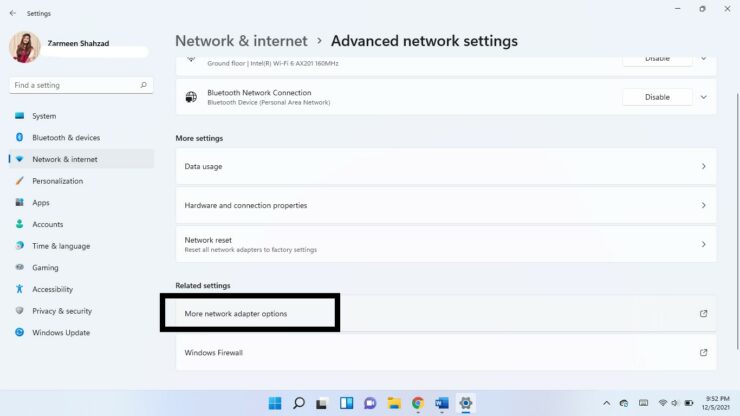
Step-4: på Beslektede innstillinger delen, klikk på Flere nettverkskortalternativer.
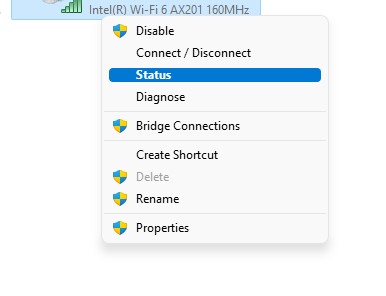
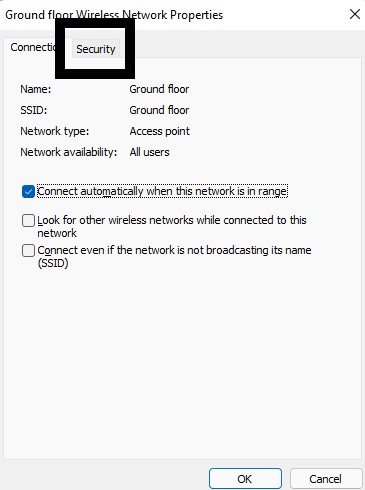
Step-5: Høyreklikk on the Wi-Fi connection and select status.
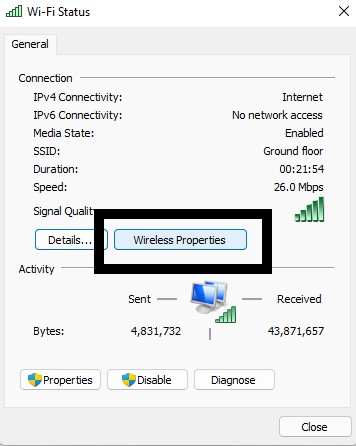
Step-6: Plukke ut Trådløse Properties.
Step-7: Velg Sikkerhet fanen.
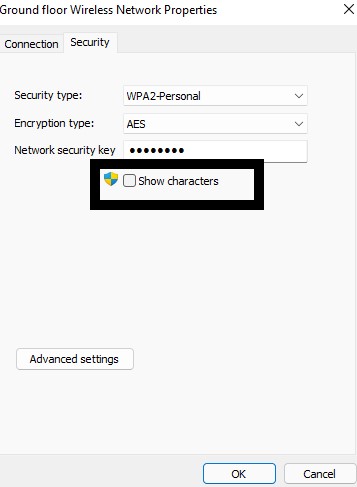
Step-8: Velg Vis tegn eske.
Previously Connected Wi-Fi Passwords
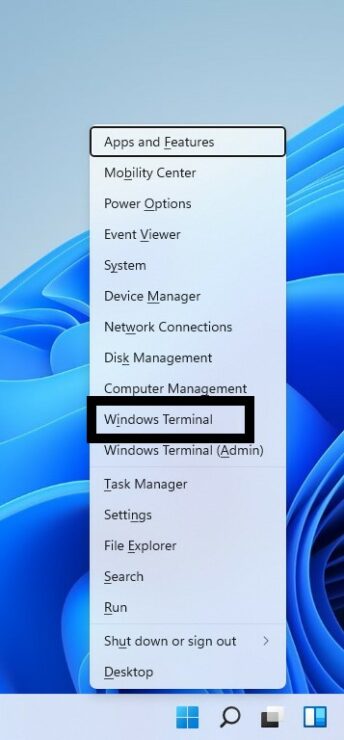
- Use the shortcut keys Vinn + X å åpne WinX menyen.
- Plukke ut Windows Terminal
- Skriv inn følgende kommando og trykk Enter:
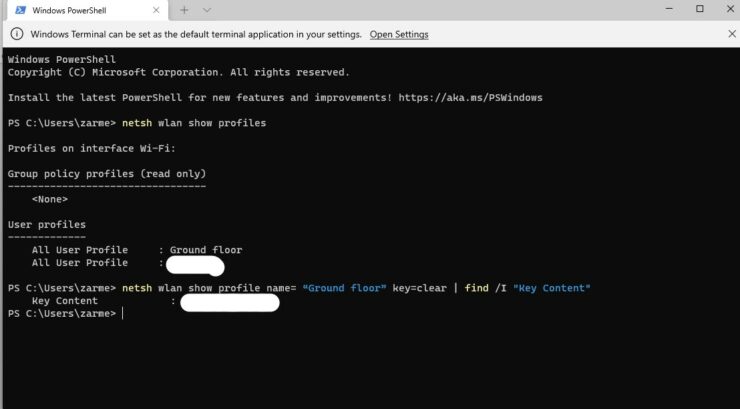
netsh wlan vis profiler
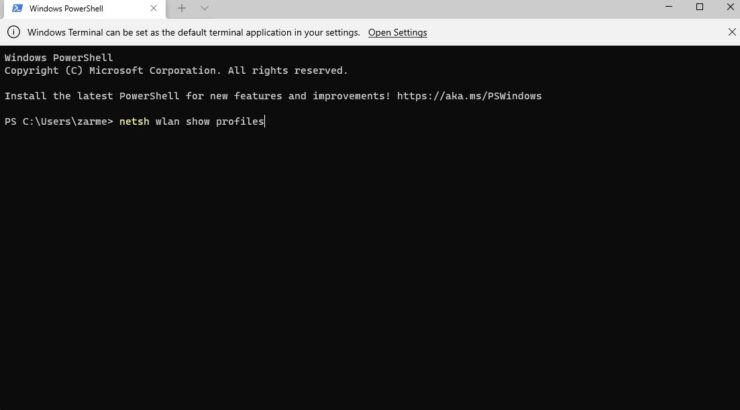
- You will get a list of the profiles previously connected. Find the one you want to check the password for and write it down somewhere.
- Now type the following command and replace ABC with the name of the profile you want to check the password for:
netsh wlan show profile name= “ABC” key=clear | find /I “Key Content”As soon as you press enter, you will see your password written next to Key Content.
Gi oss beskjed hvis dette hjalp.
Innlegget Slik viser du Wi-Fi-passord på Windows 11-datamaskiner by Zarmeen Shahzad dukket først på Wccftech.