Quick Links
- Order Some Food
- Find The Jet's Control Panel
- Reveal The Flight Controls
- Contact Your Handler
- Activate The Defense System
- Open The Flare Hatch
- Operation: Jet Set Speedrun Guide
The second level of I Expect You To Die 2 has you warding off evil plans while traveling on an autonomous jet. There's a bit less time sensitivity than the previous level, but the puzzles are a little harder to compensate for that.
RELATED: I Expect You To Die 2 – Operation: Stage Fright Guide
There are a lot of things that can kill you in Operation: Jet Set so be careful when interacting with the objects around you. Other than that, it's an oddly laid-back level with lots of dialogue to listen to and enjoy.
Order Some Food
You will begin this level by being prompted to order some food. On the desk in front of you, you'll find a menu with some interesting-sounding foodstuffs, all of which would kill you outright. If it wasn't obvious, do not drink the wine or light the cigar either.
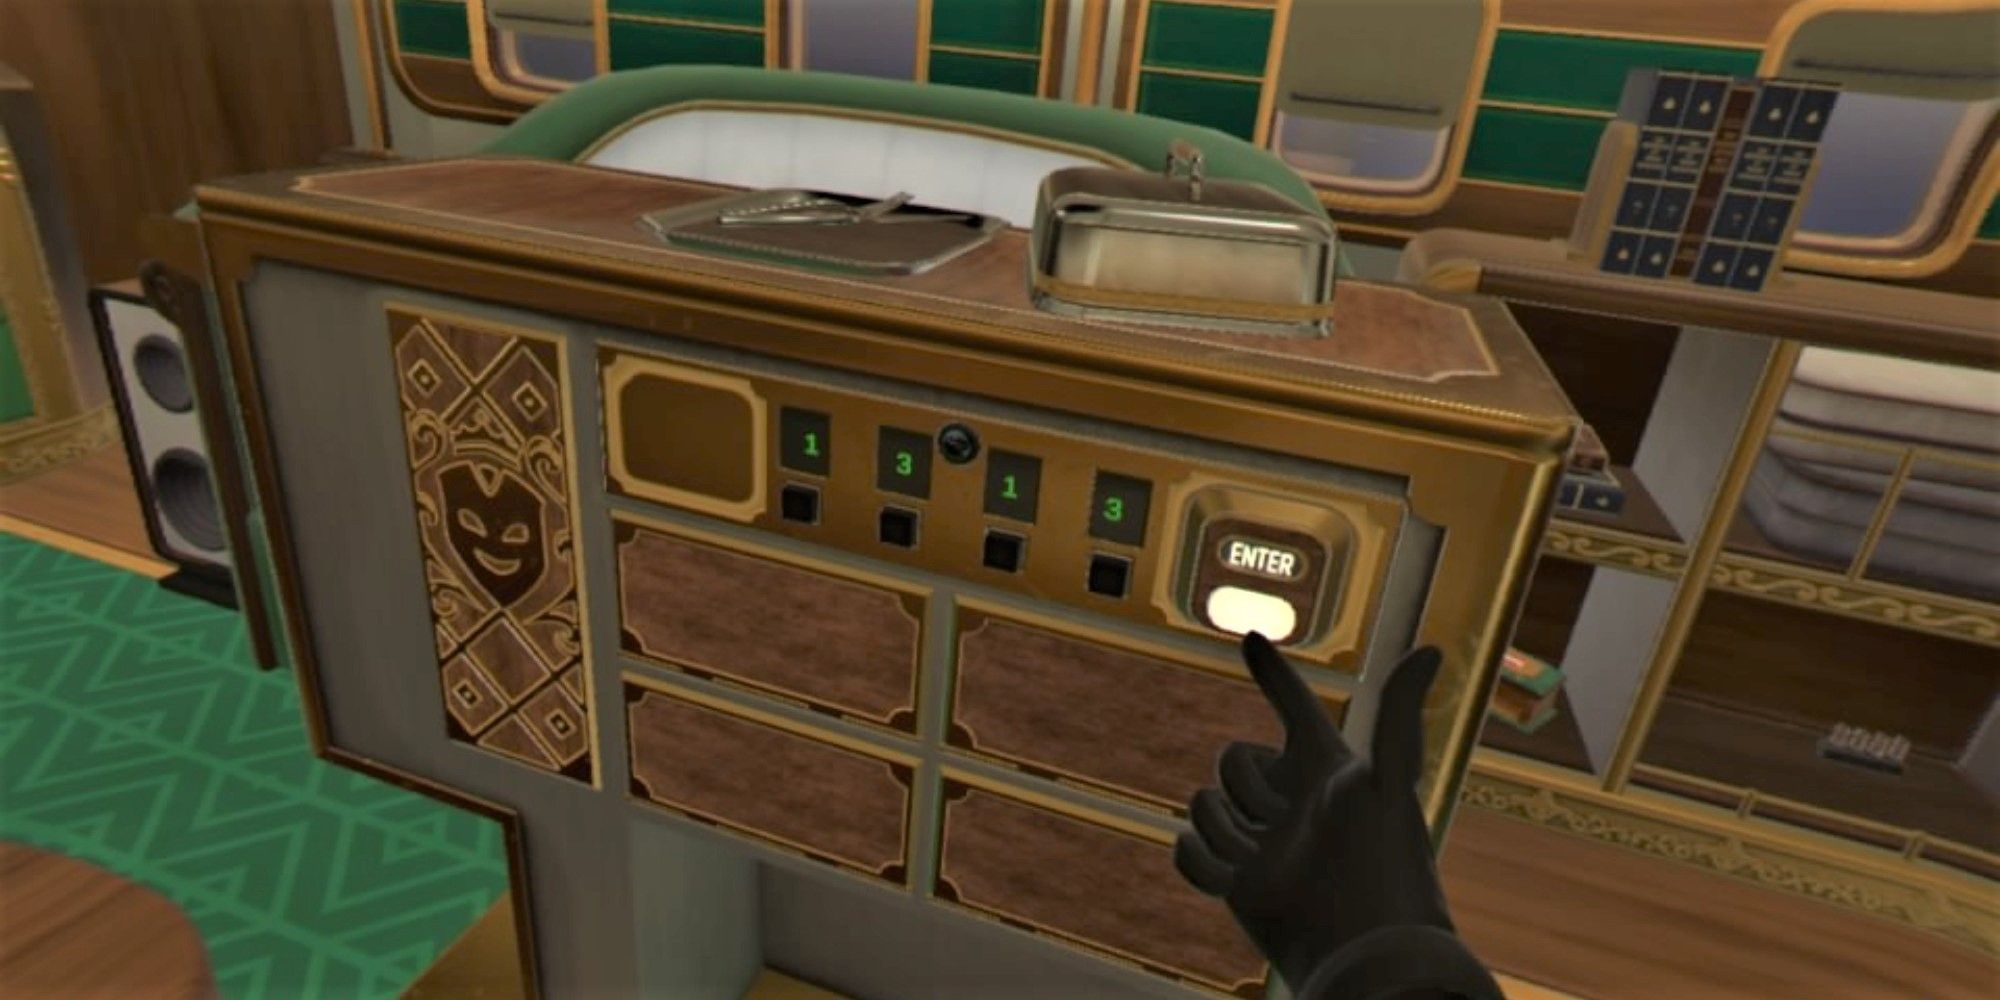
- Press the lit-up button right-hand side of the table. This will summon the food trolley, a contraption that requires a four-digit code to select your food of choice.
- Input any code and press the button on the right of the trolley. The jet's defense systems will boot up.
-
Immediately pick up the metal plate or cloche and hold it in front of you — you will use this metal item to reflect some incoming laser beams.
- The first laser will come from the chair opposite you. Reflect the laser back into the emitter to break it.
- The second laser comes from the portrait of John Juniper slightly to your right. It will come from his eye, so be ready.
- The final laser comes from an inconspicuous emitter to the right of your seat and on the ceiling.
- Once you have disabled each laser by reflecting them back at themselves, you're safe for the time being.
Find The Jet's Control Panel

With all that just happened, suspicion would be a natural response. It's time to look for some sort of control panel for this autonomous jet that you can use to make sure you're safe.
- While you still have the food trolley with you, you'll want to open the panel on the left-hand side. To do this, retrieve the postcard from behind Juniper's portrait (it should have burned when you reflected the laser at it).
- Enter the code found on the back of the postcard: 1313. It will reveal a mask and a small device with pins on it.
- Put the mask and the device on your table, then press the button on the table again to dismiss the food trolley.
- Look behind you to your right to find five books lined up. The middle book is brown — try to pull it towards you to reveal the flight controls to your right.
Reveal The Flight Controls
Just revealing this panel wasn't enough, you now need to complete a short puzzle to access the jet's controls.
-
There are four slots on the large panel to your right, in which you will need to put four different pinned devices:
- The first device was found with the mask in the food trolley.
- The second device can be found on the bottom shelf in the cabinet to your right, next to a cigar dispenser.
- The third device is inside the cabinet underneath the portrait of Juniper.
- The fourth device is behind the chair opposite you. Use the lever on the chair's side to push it backward, revealing the device.
-
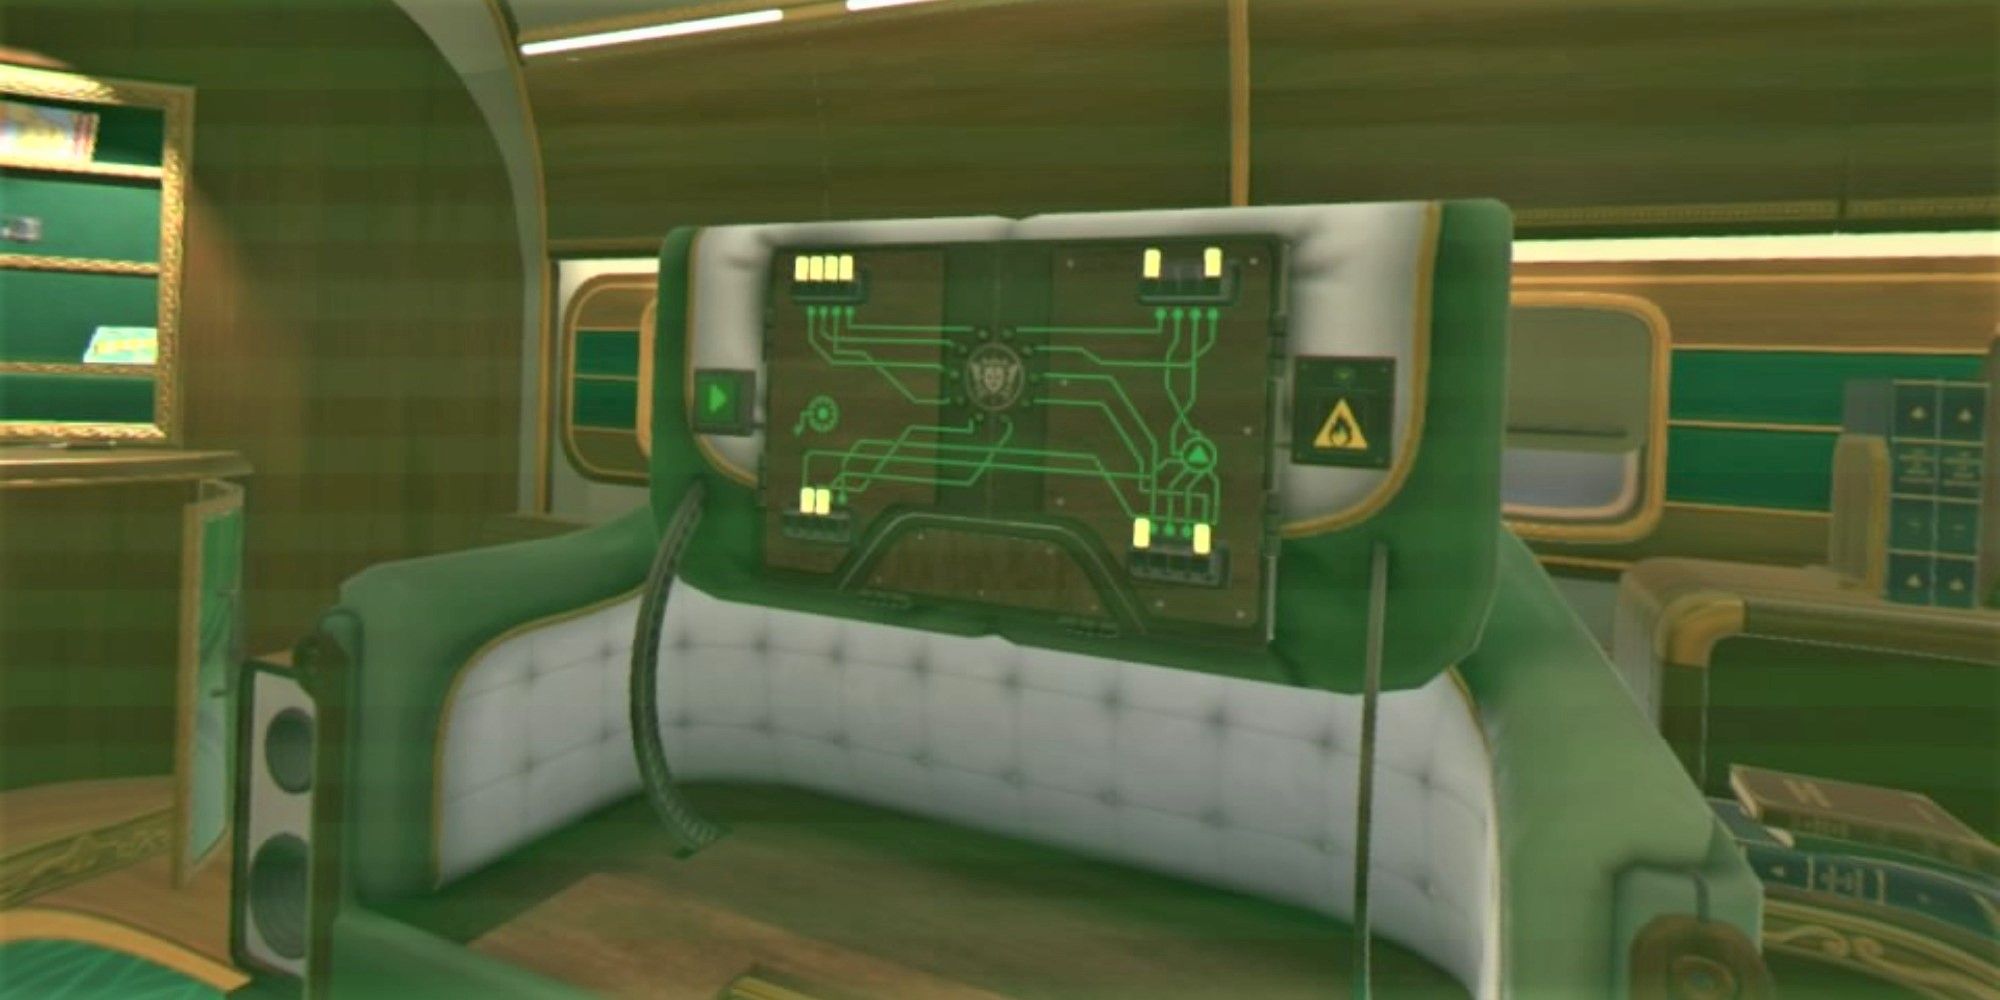
Put the mask on to reveal the puzzle on the flight control panel. You must match the pins in your four devices to the wires that lead to the circle in the center.
- The device with four pins goes in the upper-left slot.
- The device with two pins in the center goes in the lower-left slot.
- The two identical devices go into the two slots on the right.
- Press the button to reveal the actual controls. You can take the mask off now if you like.
- If you follow the above instructions without putting on the mask at all, you will get the No Mask Needed Souvenir.
Contact Your Handler
The big reveal at this point is that you are in deeper trouble than you realize, at least, if you hadn't figured that out already. Luckily, there's something you can do about it.
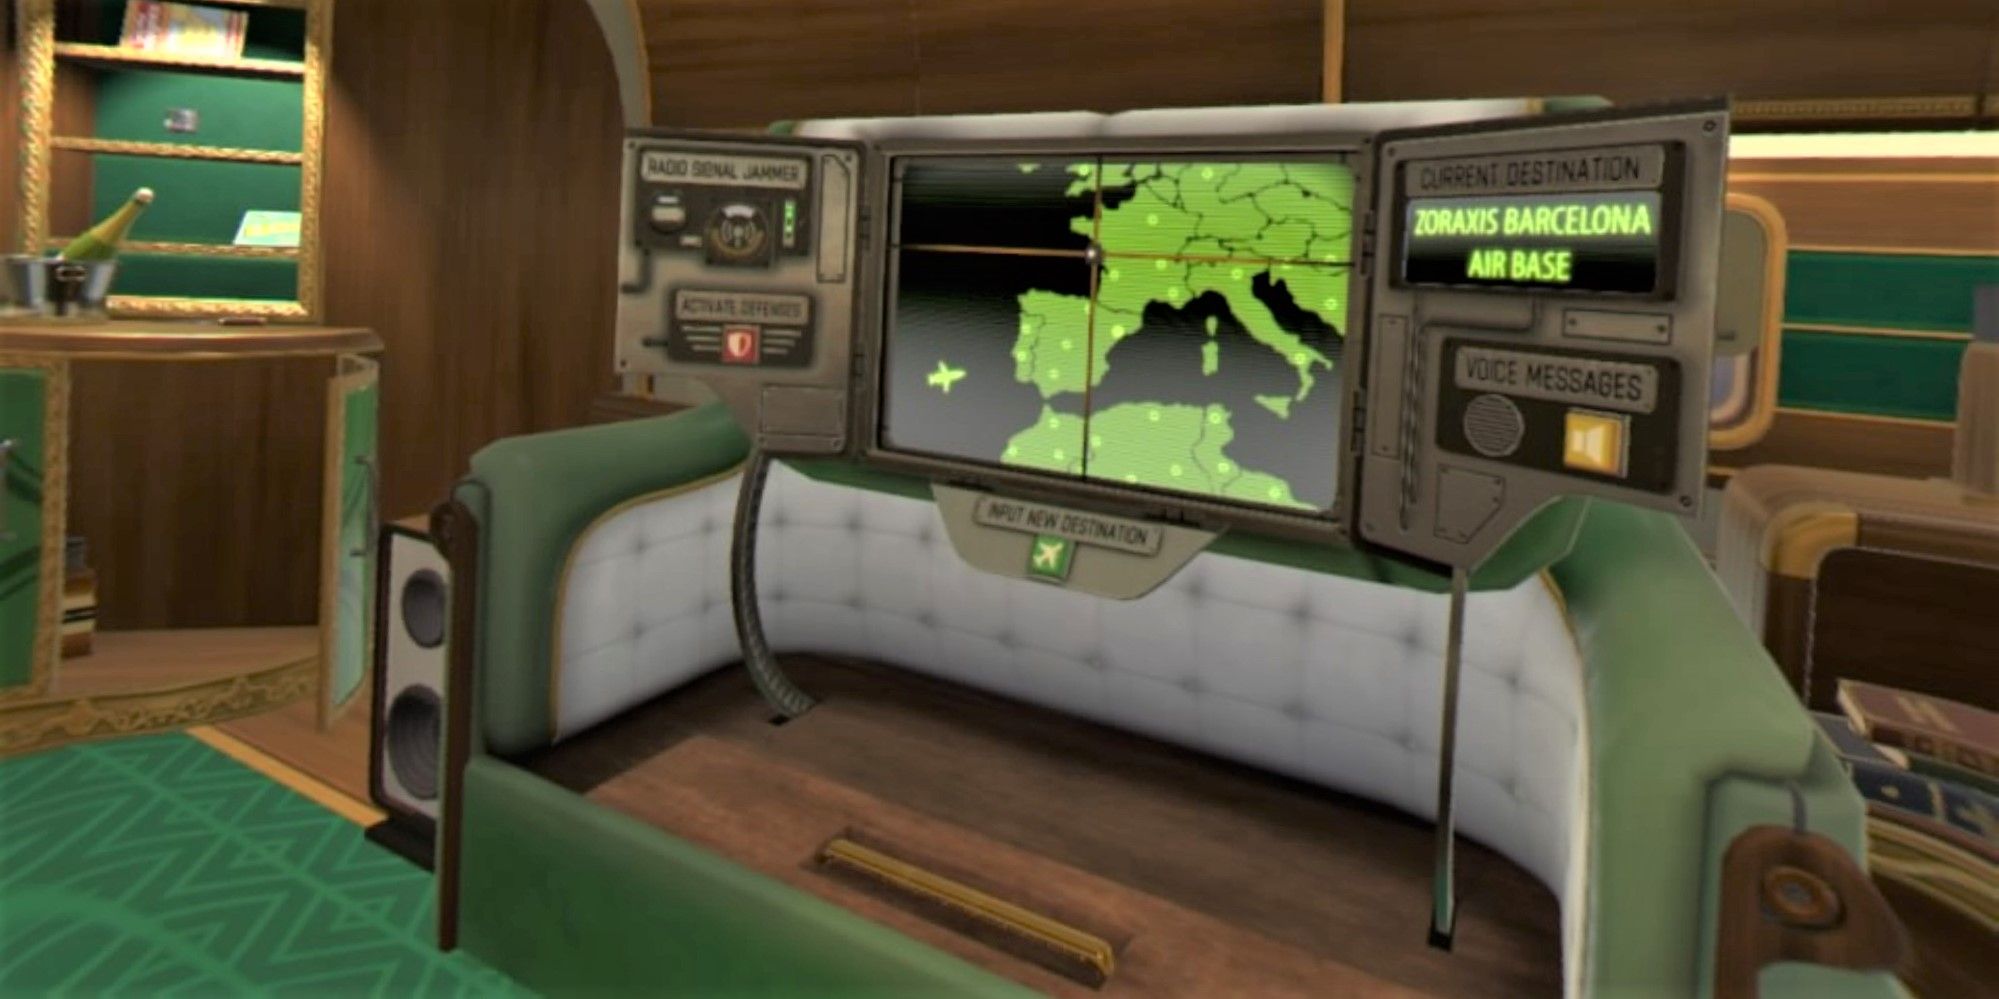
- First of all, remove the Signal Jammer sign on the upper-left of the flight controls console. This will let your handler speak to you and give you instructions on what to do next.
-
Once your handler learns that the jet is heading towards enemy headquarters, he will give you permission to land in a safe location — Lisbon.
- On the large map, move the targeting reticle to Lisbon in Portugal.
- If you don't know where Lisbon is, you can consult the Iberian Peninsula tourism pamphlet that rests on the shelves behind Juniper's portrait.
- Press the Change Flight Destination button.
- Juniper will then announce that a missile has been launched to intercept you. Press the Activate Defenses button on the left.
Activate The Defense System
The next part of the level involves following your handler's orders very closely. He will kindly repeat anything if you miss what he says.
- On the table in front of you, two dials will have appeared on your left. Turn them both to the right to reveal new panels.
-
Turn to your right and look underneath the map to find a handle — pull it up to reveal various items.
- Grab the oxygen mask and put it on, you will need it shortly.
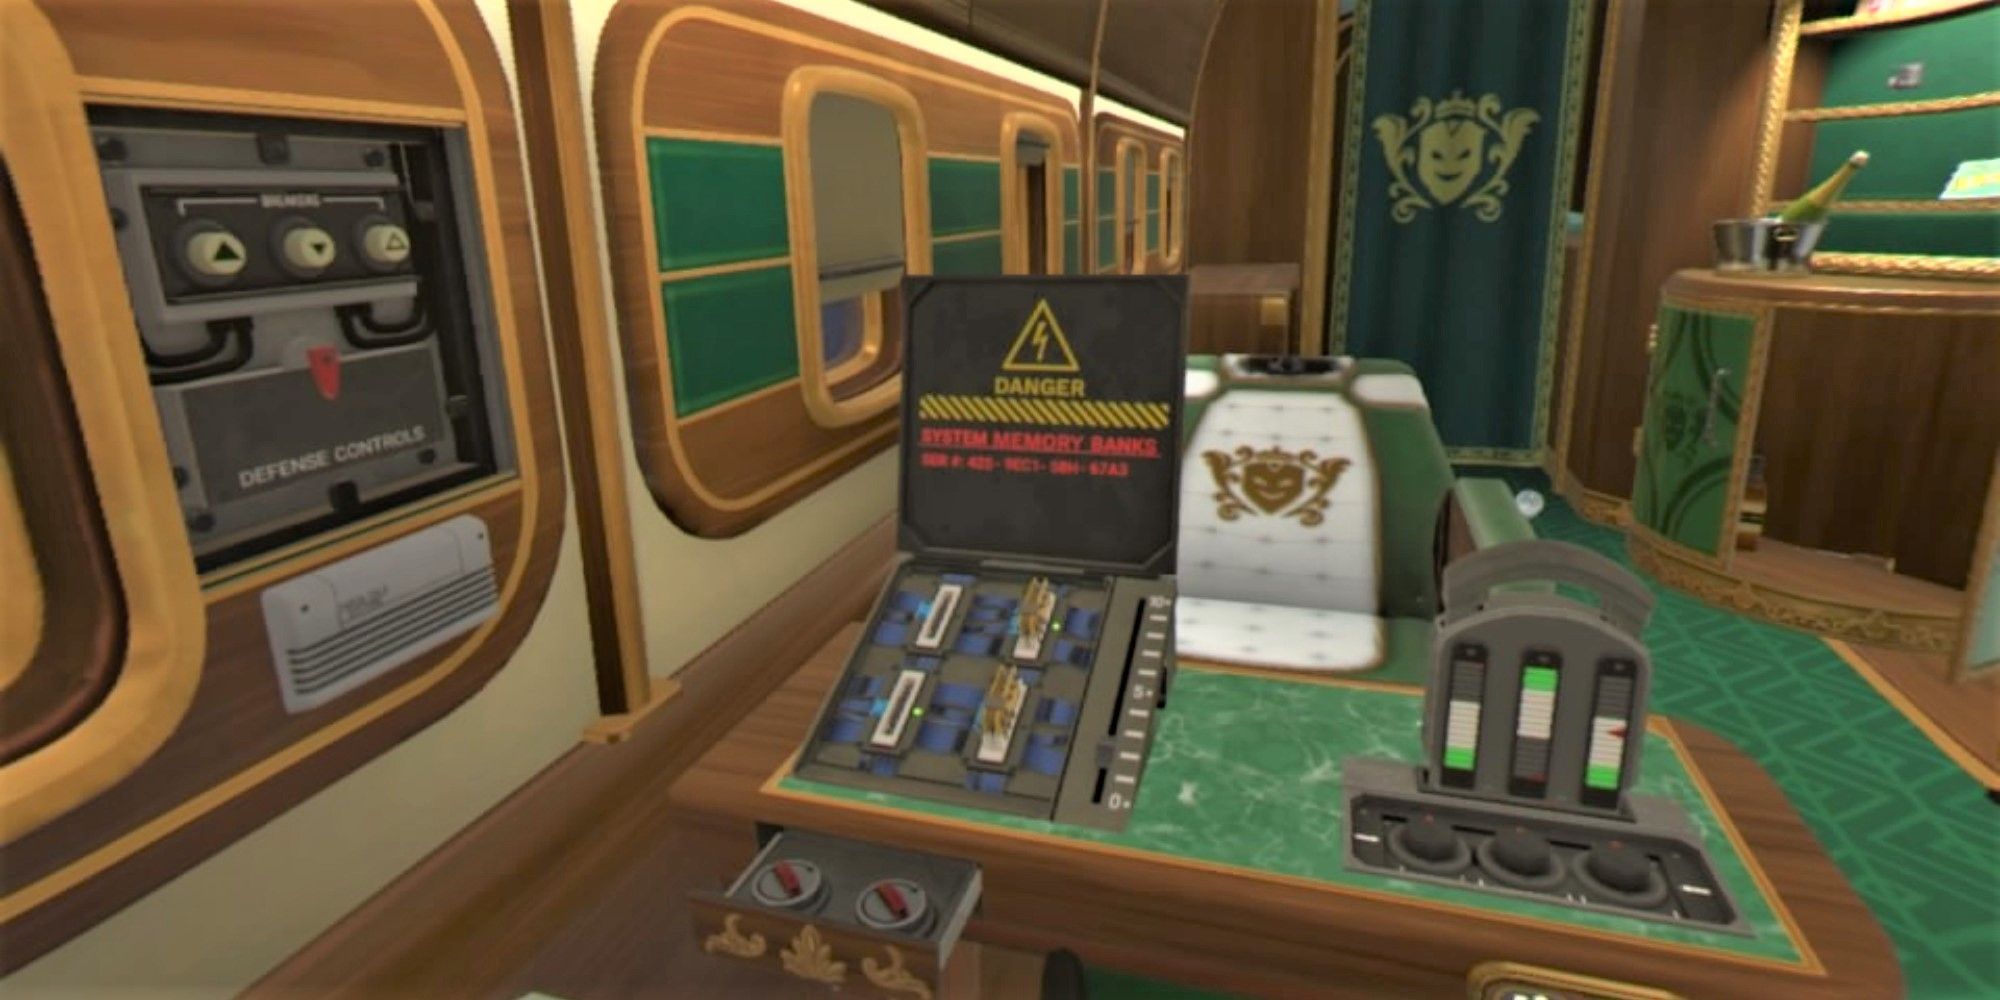
- Grab the device on the far-right and place it in the slot on the right-hand panel on your table labeled "Aircraft Navigation Calibration Override Matrix."
- On the wall panel to your left, press both buttons that have upward-facing triangles on them — the one on the left and the one on the right.
- On the left-hand device on the table, move both card-shaped devices into the slots on the left. Then, move the slider on the right up to the number six.
-
Now, using the dials beneath the Override Matrix on the right, move each needle until they are all in the green area as signified by the device you slotted in above.
- Move the center dial first, then the right-hand dial, and then the left-hand dial. This avoids any overcorrection.
- There will be some dialogue. When you hear your handler mention seeing the missile on his radar, use the dials again to move each needle into the black area on the device.
- Set the slider that you set to six earlier right back down to the number two.
- Open the Defense Control panel on your left by moving the red latch out of the way. Then, flick the two switches on the right — the ones that have top hat shapes on them.
Open The Flare Hatch

While everything you did up to now was perfect, the defensive flares cannot be launched at the incoming missile as the hatch will not open properly.
- Make sure you have the oxygen mask on. If you don't know where it is, it can be found in the secret compartment underneath the flight control console.
- Open the window directly on your left if you haven't already.
- Across the jet underneath where Juniper's portrait was, there is an ice cube pick. Retrieve it and use it to smash open through the window.
- Simply use your telekinetic powers now to open the hatch all the way and watch as the flares intercept the missile.
Operation: Jet Set Speedrun Guide

Unlike the last level, this level's speedrun doesn't require you to skip any significant parts of the level. It will, however, require you to remember a lot of details — you only have three minutes to do everything this level asks of you.
- Immediately summon the food trolley and try to use code 1313. It will still activate the laser defenses but it will also reveal the compartment with the mask and the device immediately after.
-
To make the laser portion quicker, you don't actually have to break the lasers.
- Push the chair opposite you backward to point the laser at the ceiling, it will do no harm for the rest of the level.
- Use the game's locking feature to disable the other two lasers. Place the metal plate and the metal cloche in front of the other lasers and lock them in place — they shouldn't be a worry and the level will continue anyway.
- As the lasers are firing, pull back the brown book to reveal the flight control panel. Collect the devices as quickly as possible and slot them into the correct places — you will have to use your memory for this.
-
Immediately pull the Signal Jammer off the console and then move the targeting reticle to Lisbon on the map. Mash the Change Flight Destination button until the destination changes, and then the Activate Defenses button until the next part of the level starts.
- While you are waiting for the dialogue to resolve, pull up the secret compartment and put the oxygen mask on. Quickly break through the window with the ice cube pick before the next stage of the level begins.
-
You'll have to carry out all of the actions that the handler usually feeds to you before he is able.
- You can complete every task at the same time apart from dialing the needles to the black area and sliding the slider back down to two.
- When you hear the line of dialogue about seeing the missile on the radar, complete these tasks.
- As soon as you can, slide the hatch all the way open.
- If you managed this in under three minutes, you'll have completed the speedrun!
NEXT: I Expect You To Die 2 Review