Quick Links
- Send John Juniper Some Wine
- Send John Juniper The Mimic Mask
- Cause A Panic
- Take Out The Henchmen
- Escape With The Briefcase
- Operation: Party Crasher Speedrun Guide
The third level of I Expect You To Die 2 is a really fun one. This time, you get to be the one wreaking havoc and pulling the strings. That said, this level's puzzles are nothing to sniff at, and going in unprepared can easily be your downfall.
RELATED: I Expect You To Die 2 – Operation: Eaves Drop Guide
Do you know your chardonnays from your rieslings? Do you know how to operate a dumbwaiter? Do you know how to operate a state-of-the-art castle defense system? This level will test all of this and more. Use this guide to put yourself at ease.
Send John Juniper Some Wine
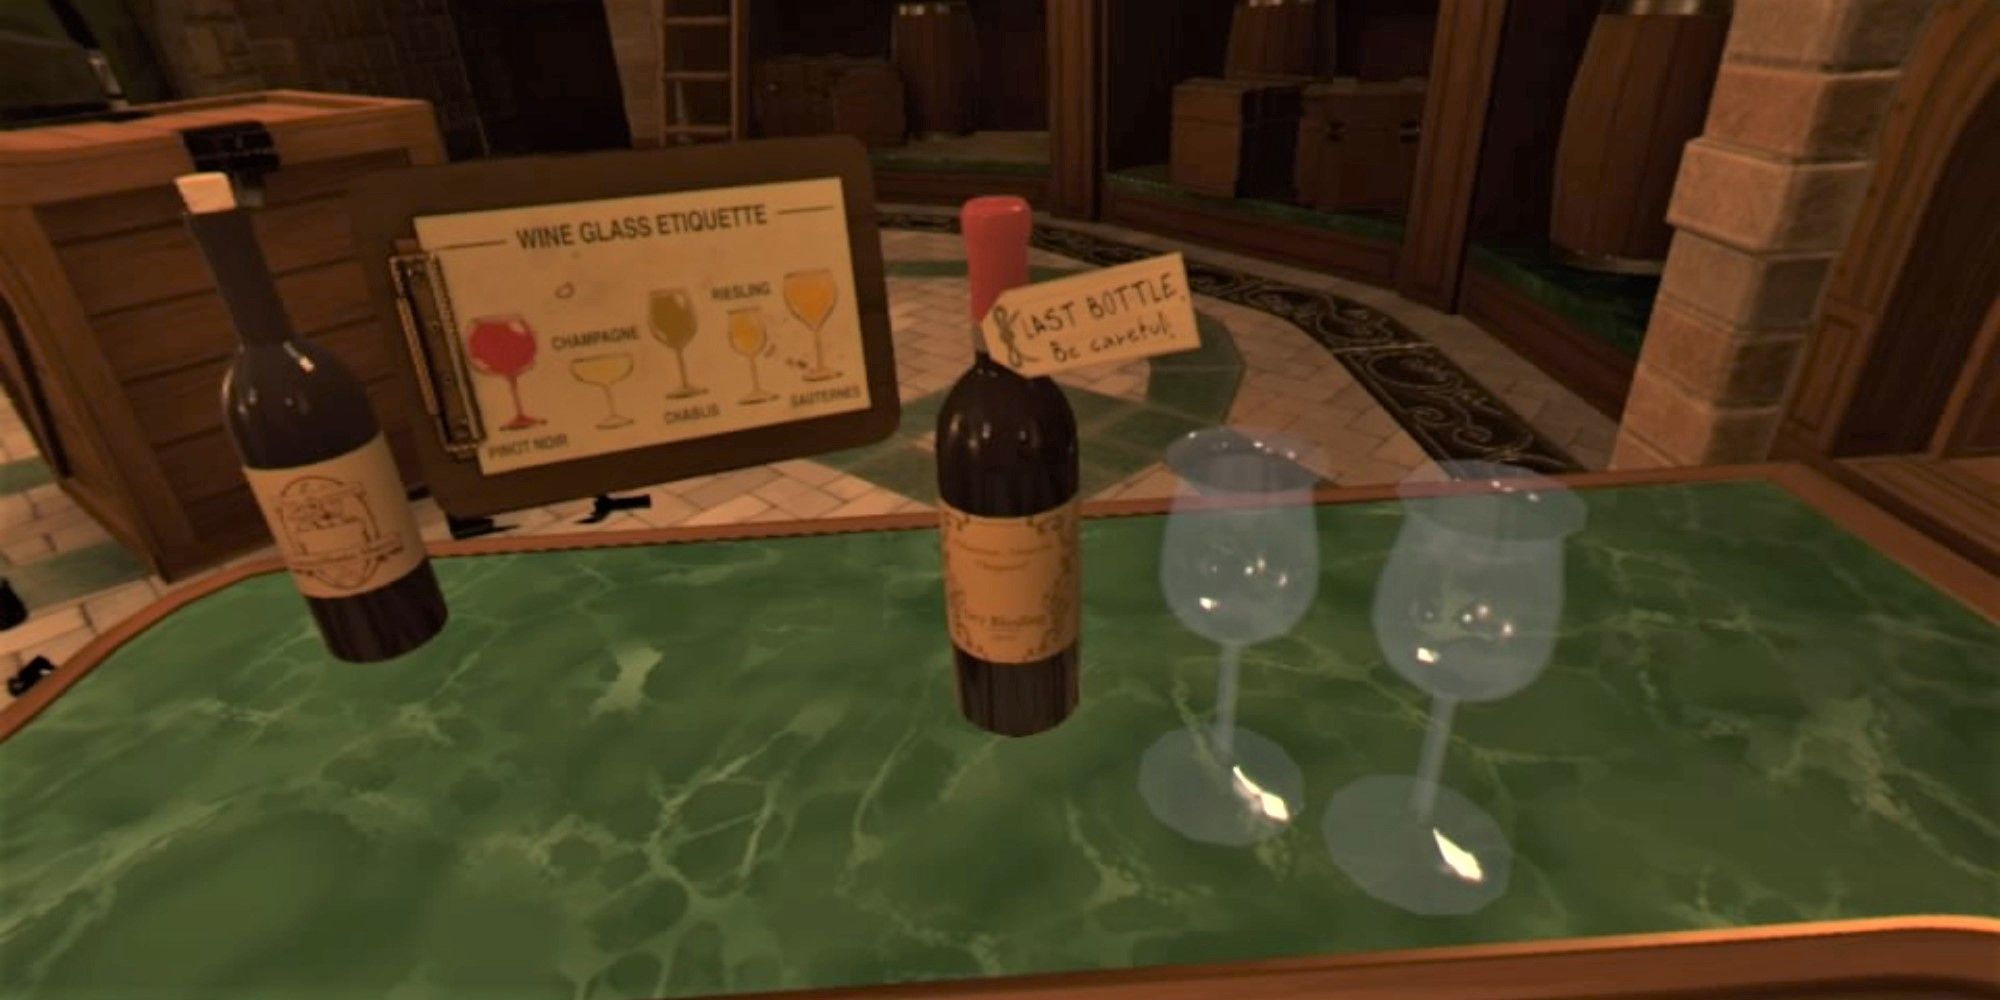
The first task on the list is a rather simple one with very easy instructions, but it sets up a mechanic that you'll use multiple times over the course of the level: the dumbwaiter.
- Early on in the level, Juniper will order you to send up some wine — he's under the impression that you are one of his henchmen, Gibson.
- Look around to your left to find lots of wine bottles on a shelf, bring them towards you. You're looking for the wine bottle labeled "Last Bottle." Put this bottle into one of the slots in the dumbwaiter.
-
To your right, there is a rack of wine glasses. As the Last Bottle is a riesling, pick up the riesling glasses and put them in the dumbwaiter.
- The riesling glasses are located one level away from the top. You can use the wine glass guide on the desk in front of you to make sure you have the right ones.
- To send the dumbwaiter to Juniper, move the lever upwards and watch as the display tells you it's reached the ballroom. Let go of the level and press the Call button.
Send John Juniper The Mimic Mask
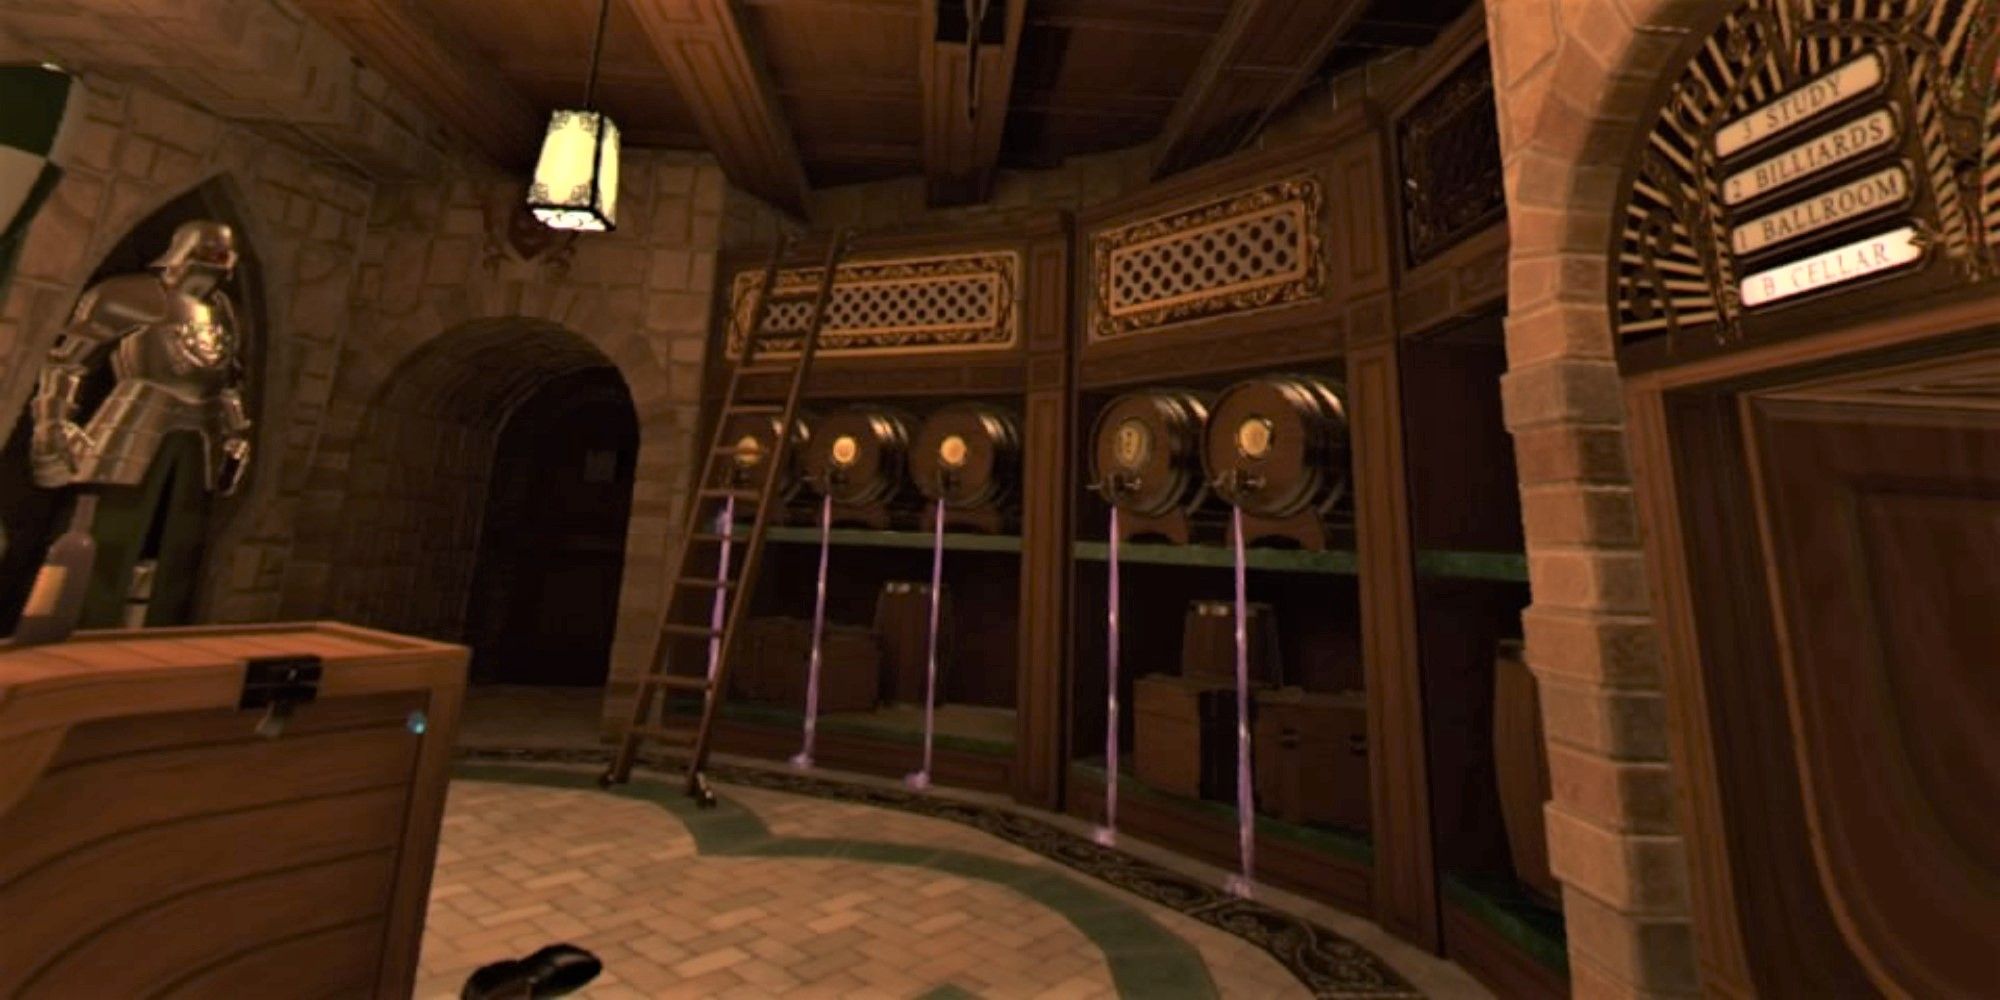
Now that you have convinced Juniper that you are Gibson, he will order you to send up the Mimic Mask. Curiously, your only clue as to the location of the mask is a key that Juniper sends down in the dumbwaiter.
- Note the five barrels sitting across from you with taps attached. They all have labels on them apart from the fourth one across, which has some sort of keyhole. Put the key into this barrel.
- A large axe will hang perilously from the ceiling and all five wine barrels will start pouring onto the ground.
-
Move the ladder slightly to the right and then turn off the taps of the first, third, and fourth barrels.
- The solution to this puzzle can be found on a piece of paper inside Gibson's hat, which is found on the crate in the middle of the room.
- Solving this puzzle will turn off all the taps and reveal a hidden compartment with multiple masks (including the Mimic Mask) and some smoke grenades.
- Retrieve the Mimic Mask and put it in the dumbwaiter. Send it up to the ballroom as you did with the wine earlier.
Cause A Panic
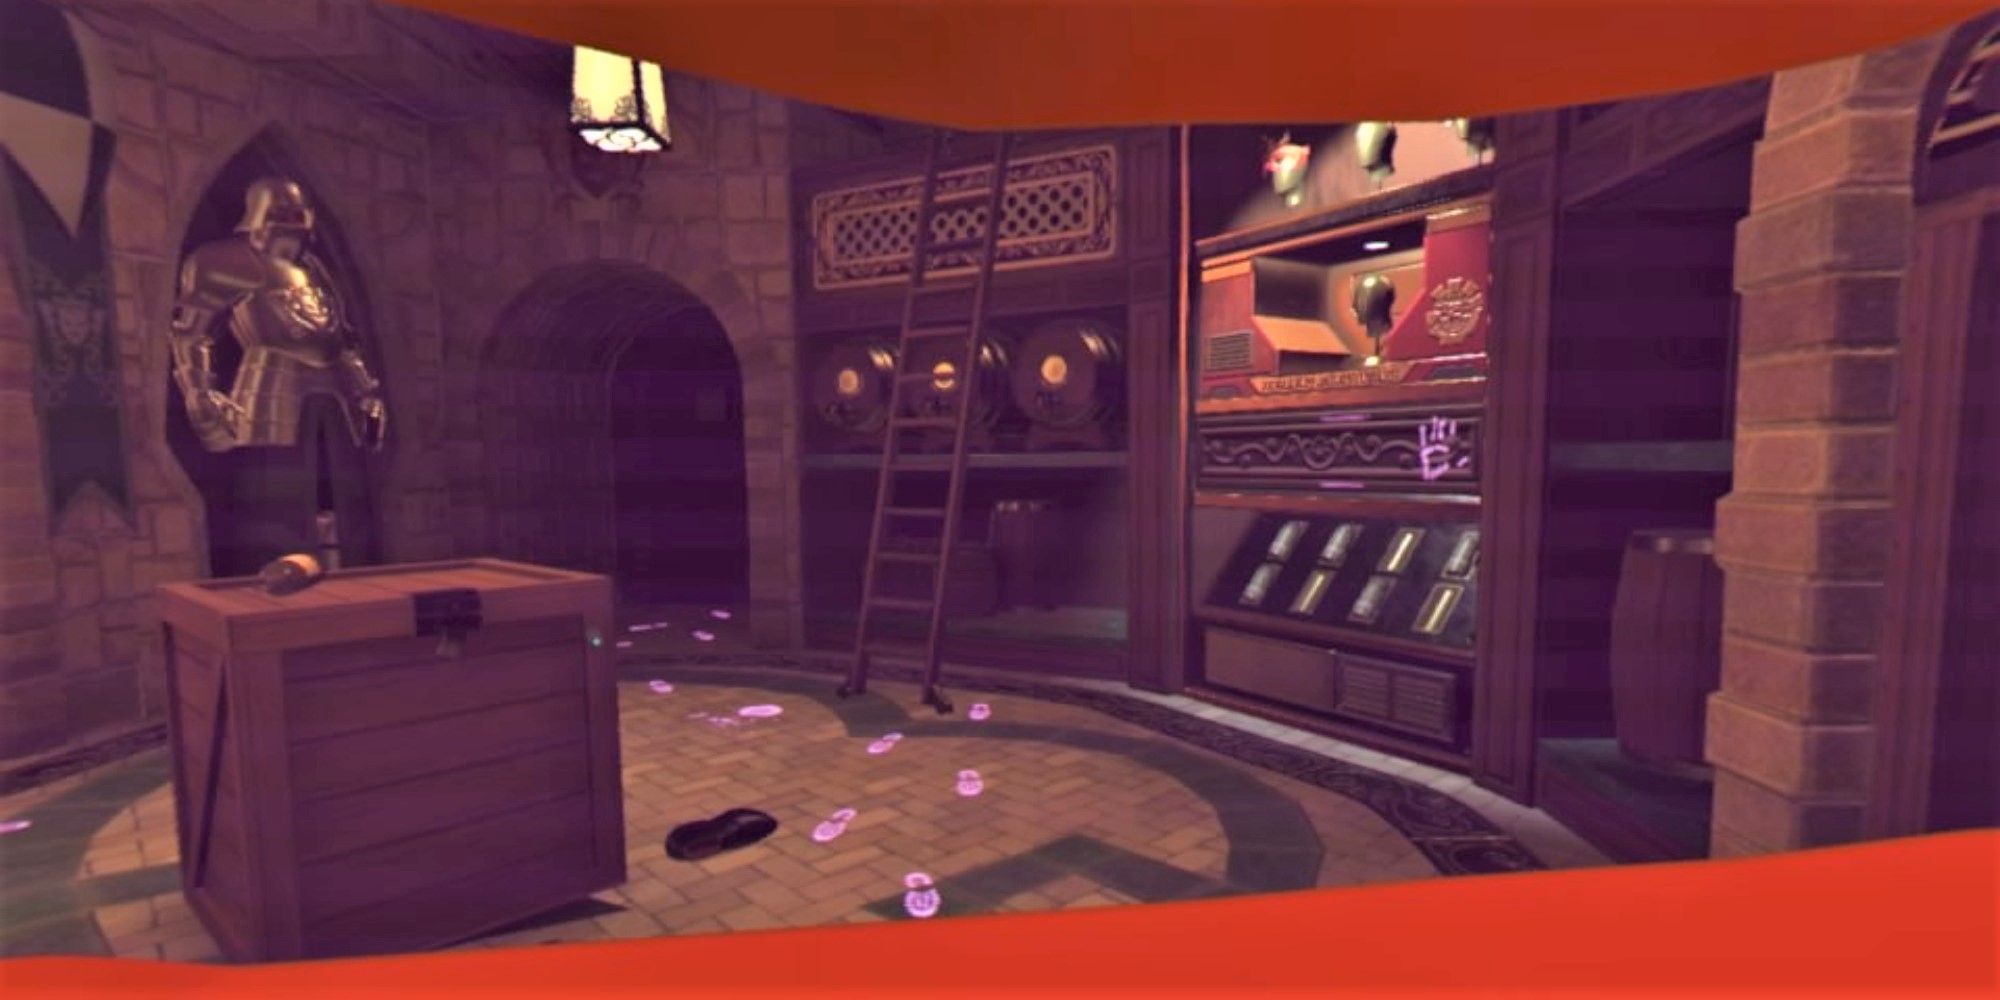
The aim of the game now is to cause a panic. This will put Juniper on edge and one step closer to sending the all-important briefcase down to the wine cellar.
-
There are three more masks left on the wall opposite. Take the red mask that has a compartment of its own and put it on. You will see that the room is covered in purple footprints and handprints. These are clues to two separate puzzles.
- Firstly, look to your left at the very large barrel, which has a shield and two swords on the front. The swords have purple fingerprints on them, as do two swords on the rack above the barrel.
- Take the swords off of the front of the barrel and replace them with the fingerprinted swords above. This will reveal the barrel to be a secret exit that you can open. This will be crucial later and is very important to open now.
- Secondly, you will see a large handprint on the section of the wall between the masks and the smoke grenades. Press it to reveal a button, which you should also press.
-
Pressing the button will turn the table in front of you into a console. You can use this to create a panic upstairs that will put Juniper and his henchmen on guard.
- The easiest way to do this is to lift the two glass covers protecting the buttons labeled "Defensive Mines" and then press both buttons.
- Alternatively, you can take one of the smoke grenades, take the pin out, and then send it up to the ballroom. This will get you a Souvenir.
- Once you have started a panic, the guests will leave and the henchmen will head up to the second floor.
Take Out The Henchmen
Juniper has six henchmen with him. By the end of this section, he will have three.
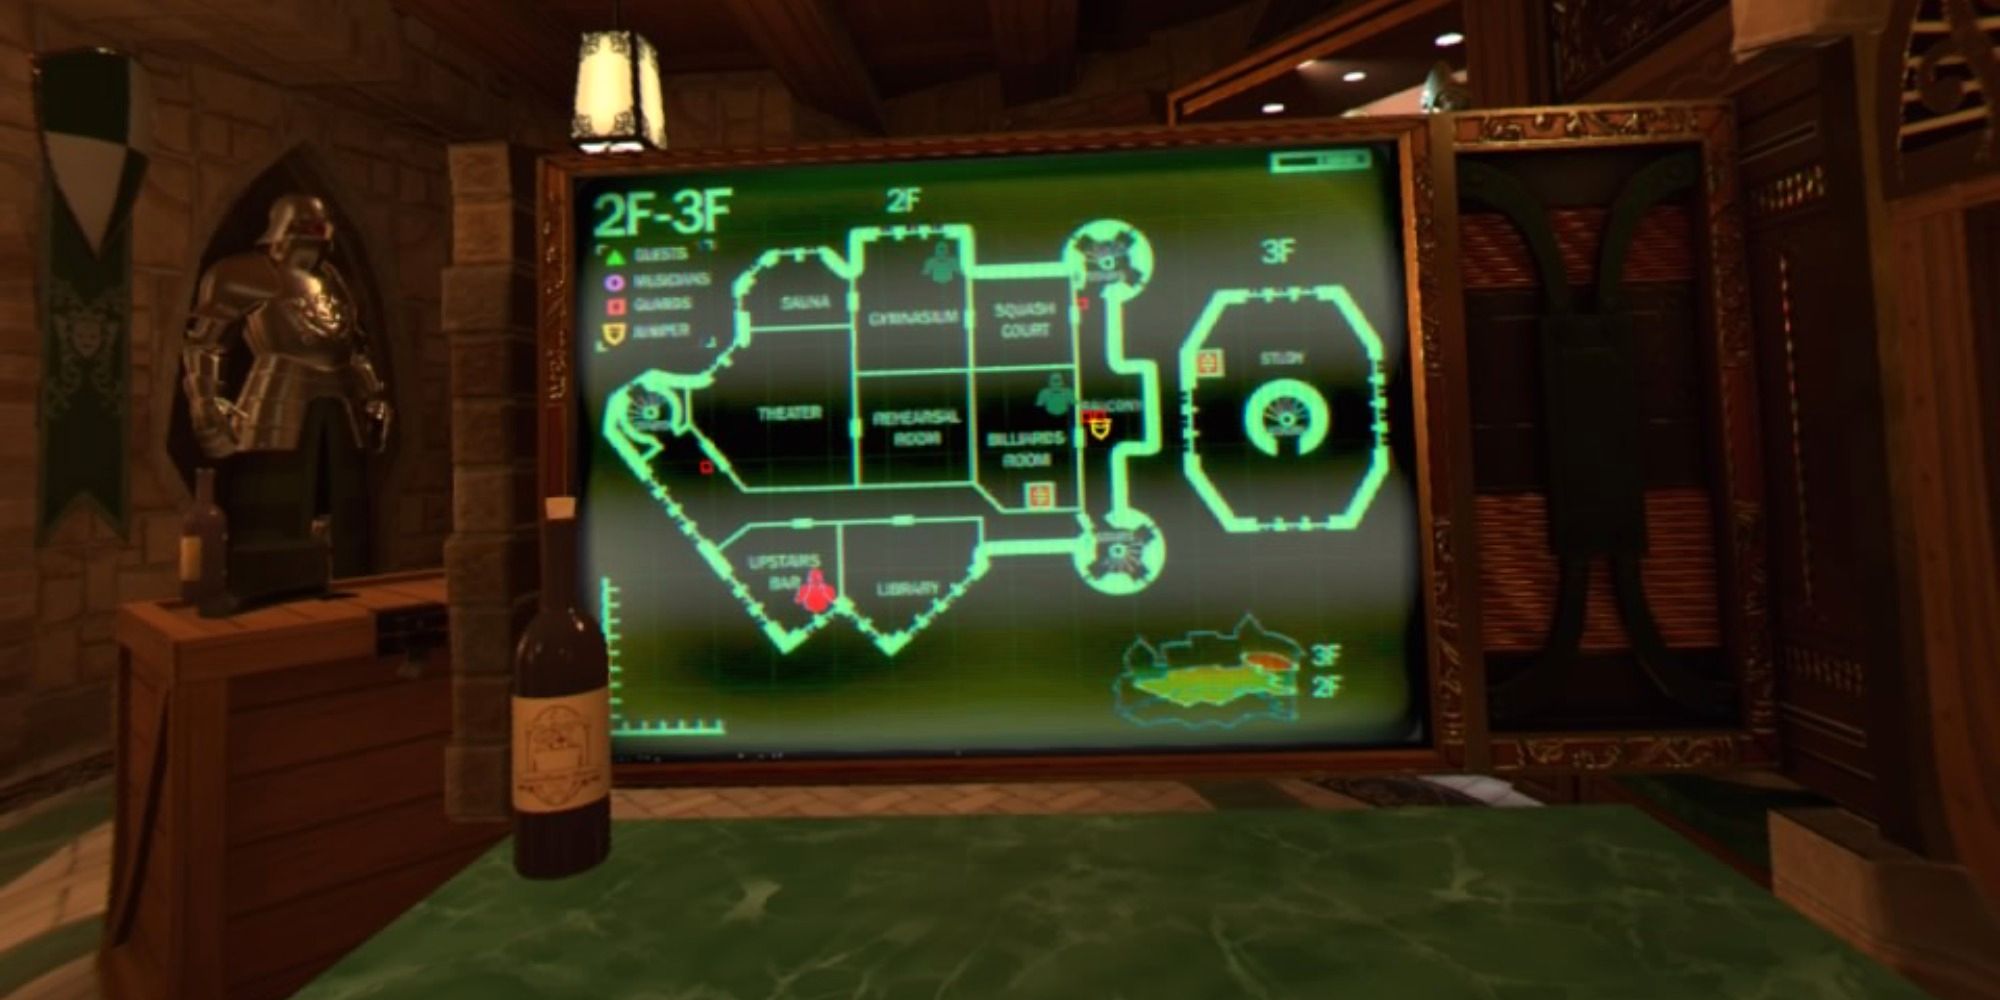
- On the console that you activated in the last section, flip the switch that summons the map. Turn the dial so that the needle is pointing at "2F" and the map will show you the second floor and the third floor.
- The little red boxes are Juniper's henchmen, and the three on the second floor are your current targets.
-
You will take out these henchmen using poison gas that emanates from various suits of armor dotted around the castle. On the right of the console, you can find the controls.
- Turn the dial so that it's pointed at the Gymnasium, where a henchman simply waits. With the dial set to the Gymnasium, the suit of armor there will spew poison gas when you pull the lever. Activate the gas for a moment until the red square disappears.
- Next, set the dial to Upstairs Bar. Wait until the roaming red square moves into the bar and activate the gas once more to take this henchman out.
- For the third one, you'll need to lure them into the Billiards Room. To do this, send the dumbwaiter up to the second floor and press the Call button. The henchman will investigate the Billiards Room — quickly set the dial appropriately and activate the gas to take them out.
- It is very important that you keep the gas lever down now until the gas capacity gauge is emptied. This will be very important shortly.
RELATED: I Expect You To Die 2 – Operation: Jet Set Guide
Escape With The Briefcase

With three fewer henchmen to protect him, Juniper will quickly lose his nerve. He will send the nuclear briefcase down the wine cellar, though that isn't the end of things.
- If you haven't already, open the large barrel on your left (instructions on how to do so can be found in the "Cause a Panic" section of this guide).
- Retrieve the briefcase from the dumbwaiter.
-
Juniper and some henchmen will soon be down and the real Gibson will give your secret away. Be prepared for their attack.
- The first thing they'll do is attempt to smoke you out with poison gas. If you have drained the tank already this will fail.
- The next thing they will do is try to shoot at you. It is possible to dodge the shot but it is far easier to block the bullet with the plate found just to your left.
- The final strategy they employ is to throw grenades at you, and they will never run out of them. You can stave off the explosions by sending the grenades out the gap in the door or to higher floors in the dumbwaiter (with a Souvenir available for sending one to the Study), but there's only one proper solution.
- Quickly pick up a thrown grenade and put it up against the walled-up exit inside the barrel. Close the door and wait for the explosion.
- Congratulations, you have escaped with the nuclear briefcase!
Operation: Party Crasher Speedrun Guide
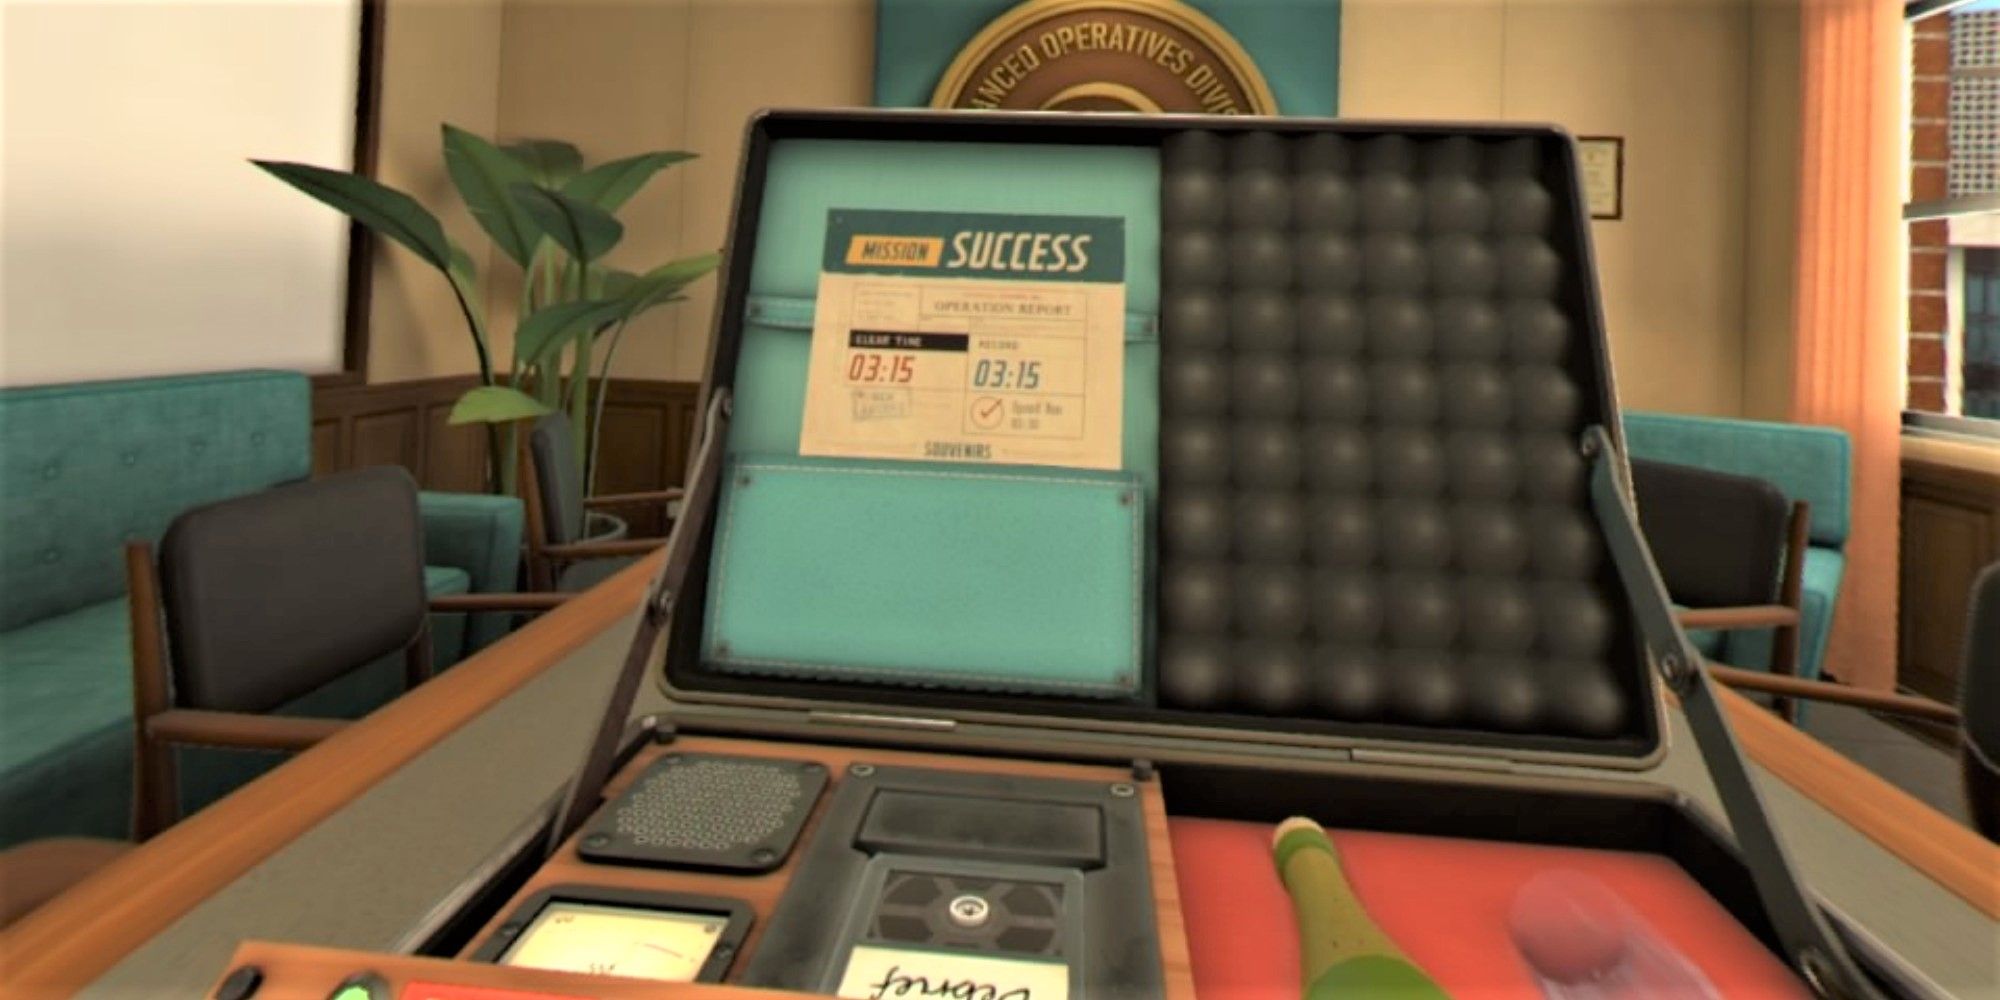
To achieve the speedrun time for this level you will have to really master the puzzles it contains. Learning how to manipulate the dumbwaiter as quickly as possible is also recommended. You need to finish the level in under three minutes and thirty seconds to be successful.
- Don't wait for Juniper's instructions when it comes to wine, just get the right bottle and right glasses up to him as soon as possible.
- You'll have to wait for the key, but you don't need to send the Mimic Mask to the ballroom, just summon the console and cause a quick panic by setting off the Defensive Mines.
-
Knock out the henchmen with the poison gas as quickly as possible, luckily you'll have a decent amount of time to get the map up and set everything up.
- If you are quick enough, you might find that it's more time-efficient to take out the henchman in the Upstairs Bar before the one in the Gymnasium as they'll be available to knock out sooner.
- Don't forget to waste all of the poison gas.
- Solve the sword puzzle as Juniper and his lackeys are heading down to the wine cellar. Remember that the correct knives in the rack are the second one along and the one right at the end.
- Block the gunshot with the plate and blow up the exit as normal with the eventual grenade.
- If you've managed these steps in under three minutes and thirty seconds you'll have completed the speedrun.
NEXT: I Expect You To Die 2 – Operation: Stage Fright Guide