Quick Links
- Get To Level 32
- Drop A Level
- Free The World Leaders
- Power The Elevator
- Incapacitate John Juniper
- Abort The Nuclear Launch
- Operation: Phoenix Rising Speedrun Guide
The final level of I Expect You To Die 2 can be something of a doozy. You'll have to solve puzzles on three different floors and the fate of the entire world is at stake. You'll have to put all the puzzle logic that you've accrued over the course of the game into action.
RELATED: I Expect You To Die 2 – Operation: Safe & Sound Guide
Deaths can come very quickly in this level, and the final puzzles are some of the most devious, but just persevere. Even the longer levels in this game are quick to restart and you'll know the puzzles like the back of your hand soon enough.
Get To Level 32
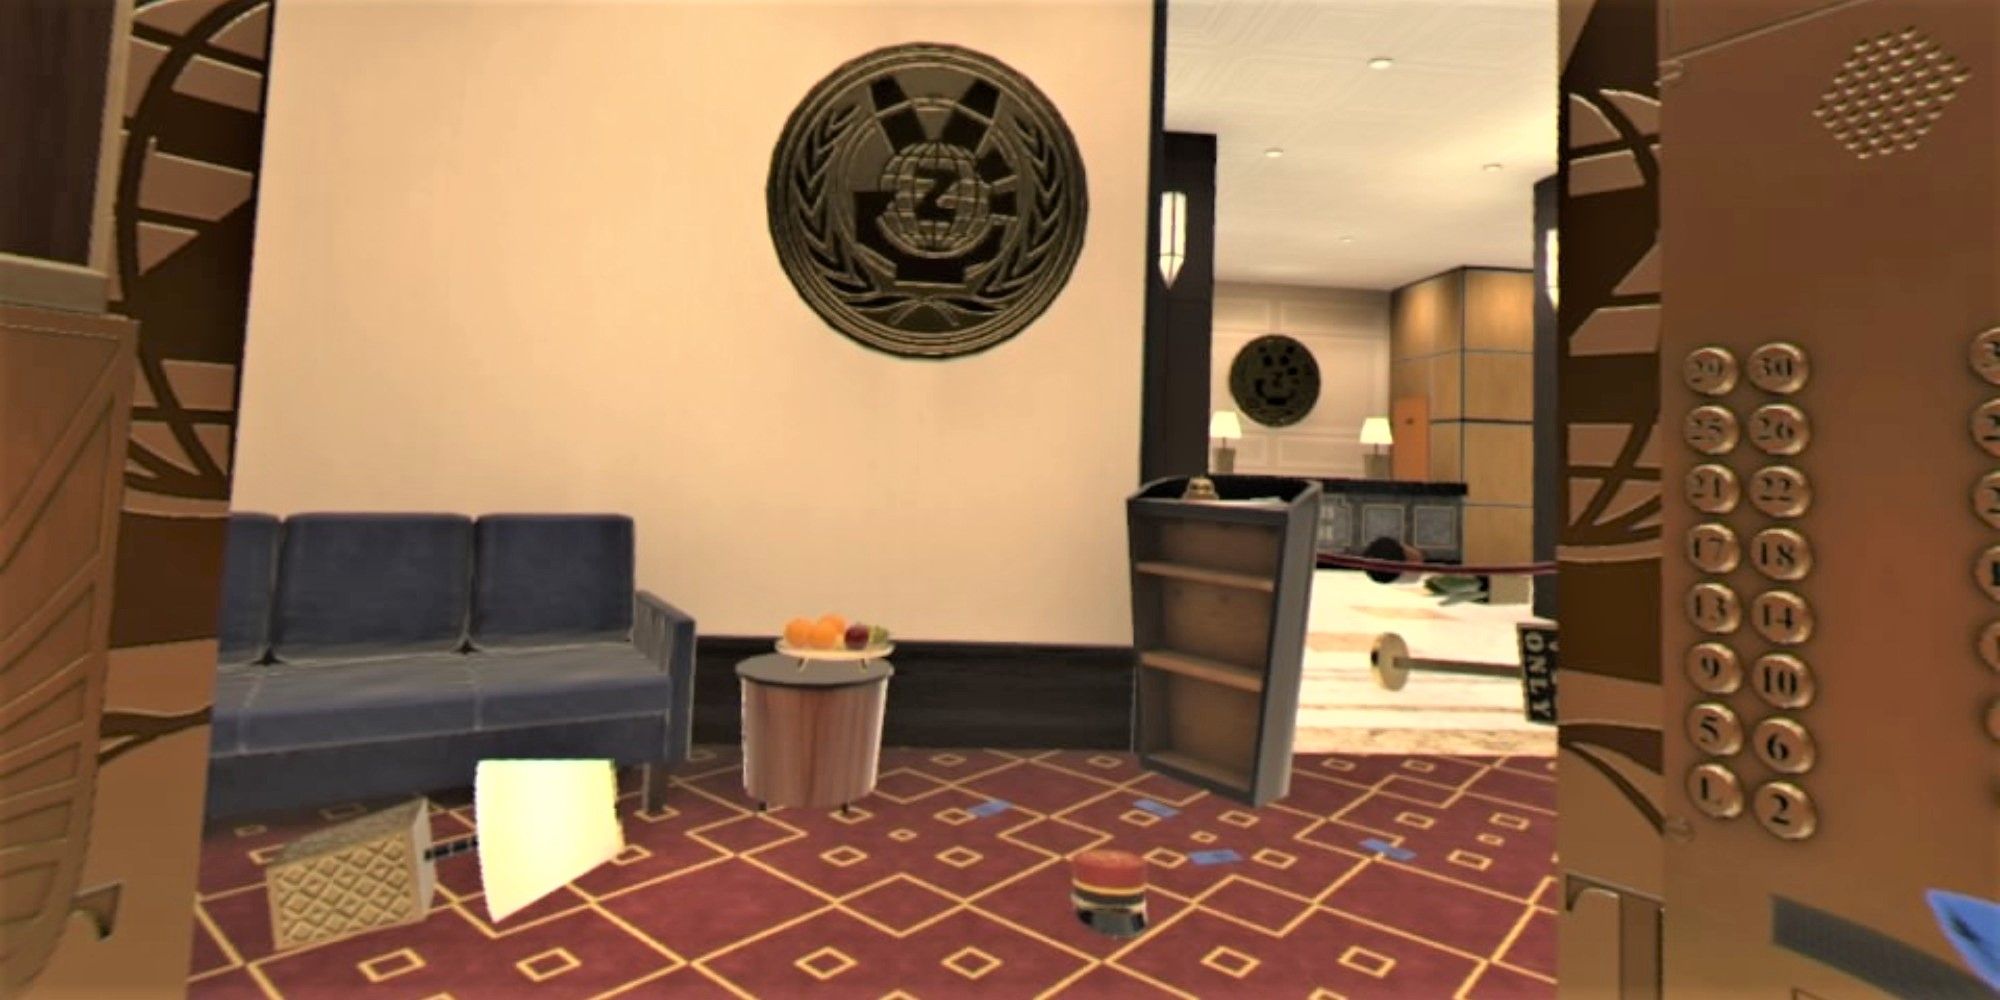
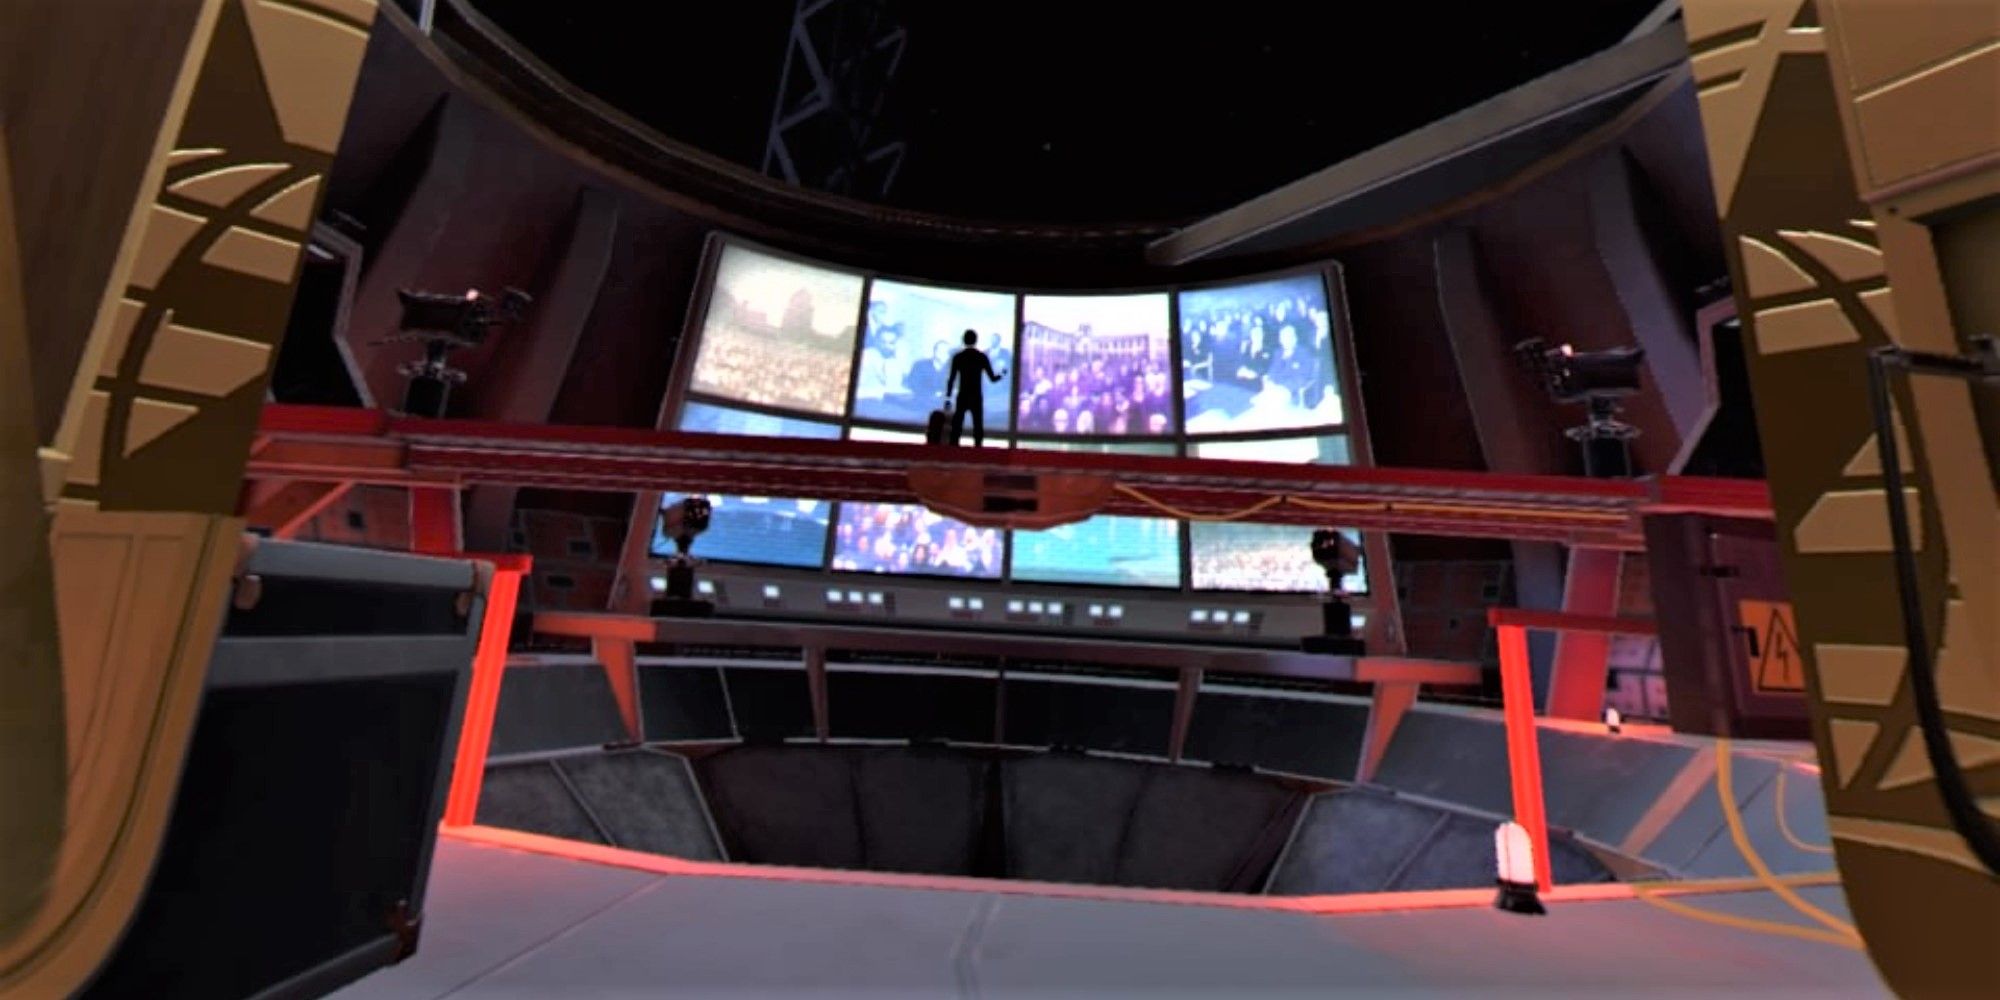
You will start this level in the tower's lobby in the elevator. You need to get to the very top of the building, as that is where you'll find the nuclear warhead that Juniper is intending to launch very soon.
- There are a number of blue tickets on the floor just outside the elevator. Examine them to find various letters and numbers on them. Only the one furthest from you is useful, it has A-7 on it.
- Insert this ticket into the slot at the bottom of the elevator panel on your right.
- Before you go, you may want to pick up the key beneath the fruit bowl in front of you. It's optional, but it's a key to this level's Hidden Trophy Souvenir.
- Press the lit-up 32 button. On your trip to the top of the building, you will be assaulted with bullets. They cannot kill you, but one will knock the elevator out of commission.
Drop A Level
Now that you are face to face with the nuke, things will get a bit more complicated. You'll find a general layout of the building/ the building plan on a blue sheet of paper in front of you if you wish to peruse it.
- If you brought the small key with you from the lobby, use it to unlock the padlock on your left. Remove the padlock and open the cabinet to find this level's Hidden Trophy.
-
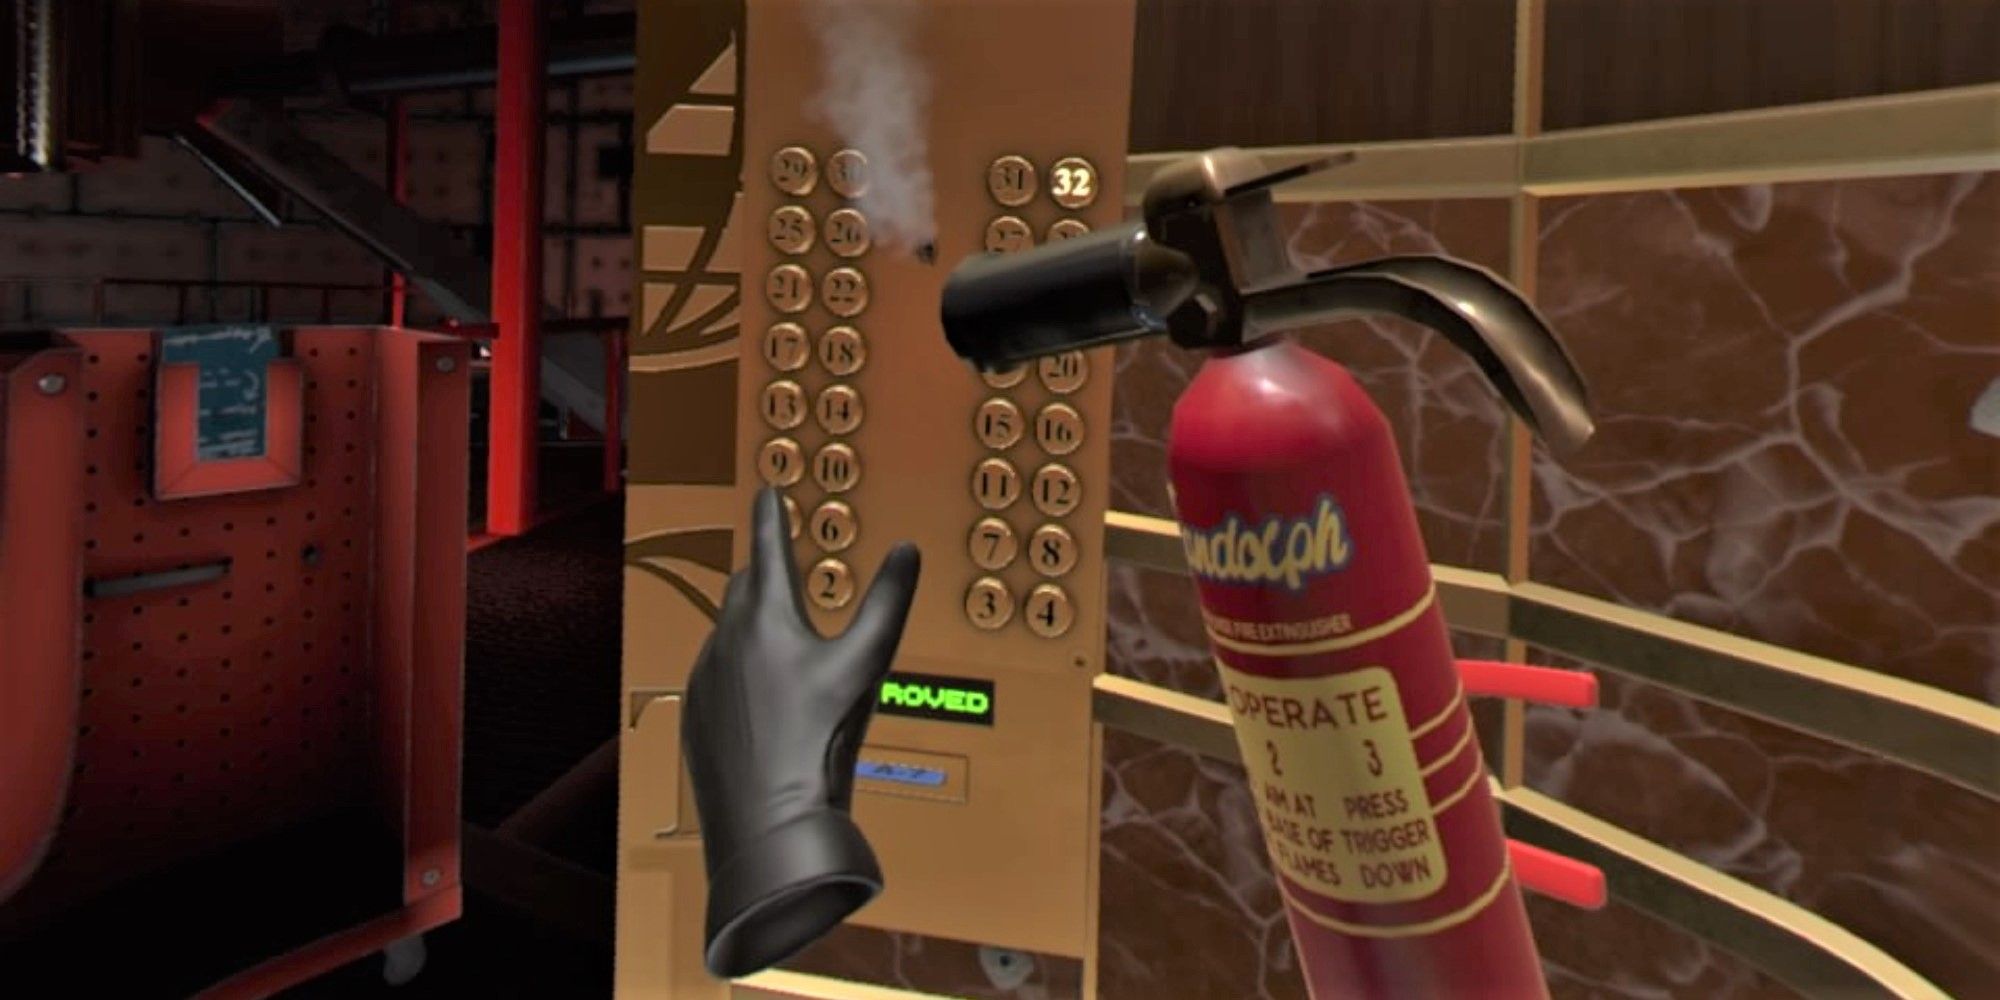
Collect the following tools from the area outside the elevator and keep them handy:
- The fire extinguisher found on the left.
- The small key with a 15 on it.
- The key with a square end.
- The wire cutters.
- The screwdriver.
- Using the screwdriver, unscrew the four screws found at the corners of the elevator buttons' outer panel.
- Before taking the outer panel off, hold the fire extinguisher ready. When you pull the panel, a can will fall out and start a fire. Immediately put this fire out with the extinguisher.
- Use the wire cutter to snip the red wire and the black wire at the top of the elevator button panel.
Free The World Leaders
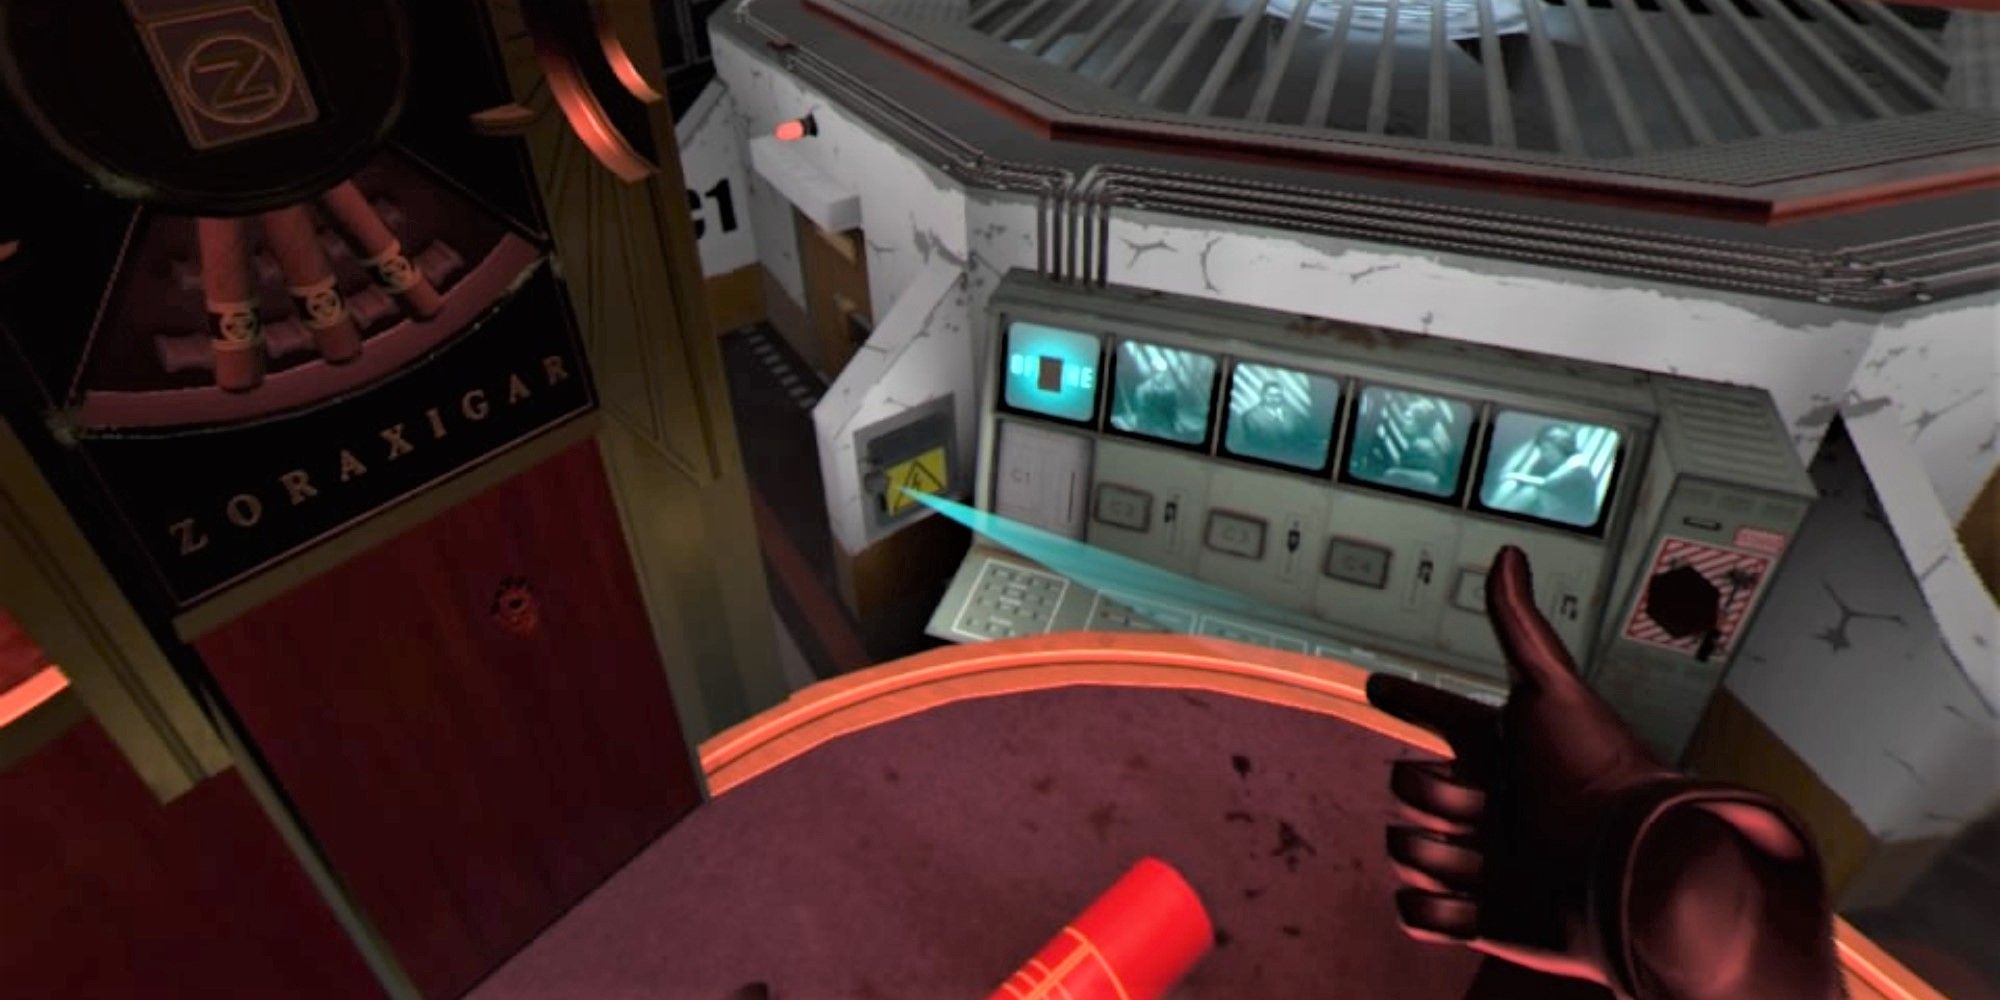
After some shuddering, the elevator will lose power and fall down slightly. Here, you'll be able to see into the next floor down where all the world leaders are currently being held.
- Firstly, collect the cattle prod from the right-hand side of the room, next to the row of switches.
- Using the small key with the number 15 on it, unlock the padlock found to the left of the row of switches.
- Remove the padlock and open the cabinet to reveal yet another switch. Pull it down to release the world leaders and open the door on the left all at once.
-
Before anything else, take the square key from earlier and use it to open up the hatch on the elevator's ceiling. There will be a large industrial saw there ready to eviscerate you when you power the elevator back on.
- Open up the small door on the saw to reveal some wiring.
- Activate the cattle prod and thrust it into the wiring to disable the saw.
Power The Elevator
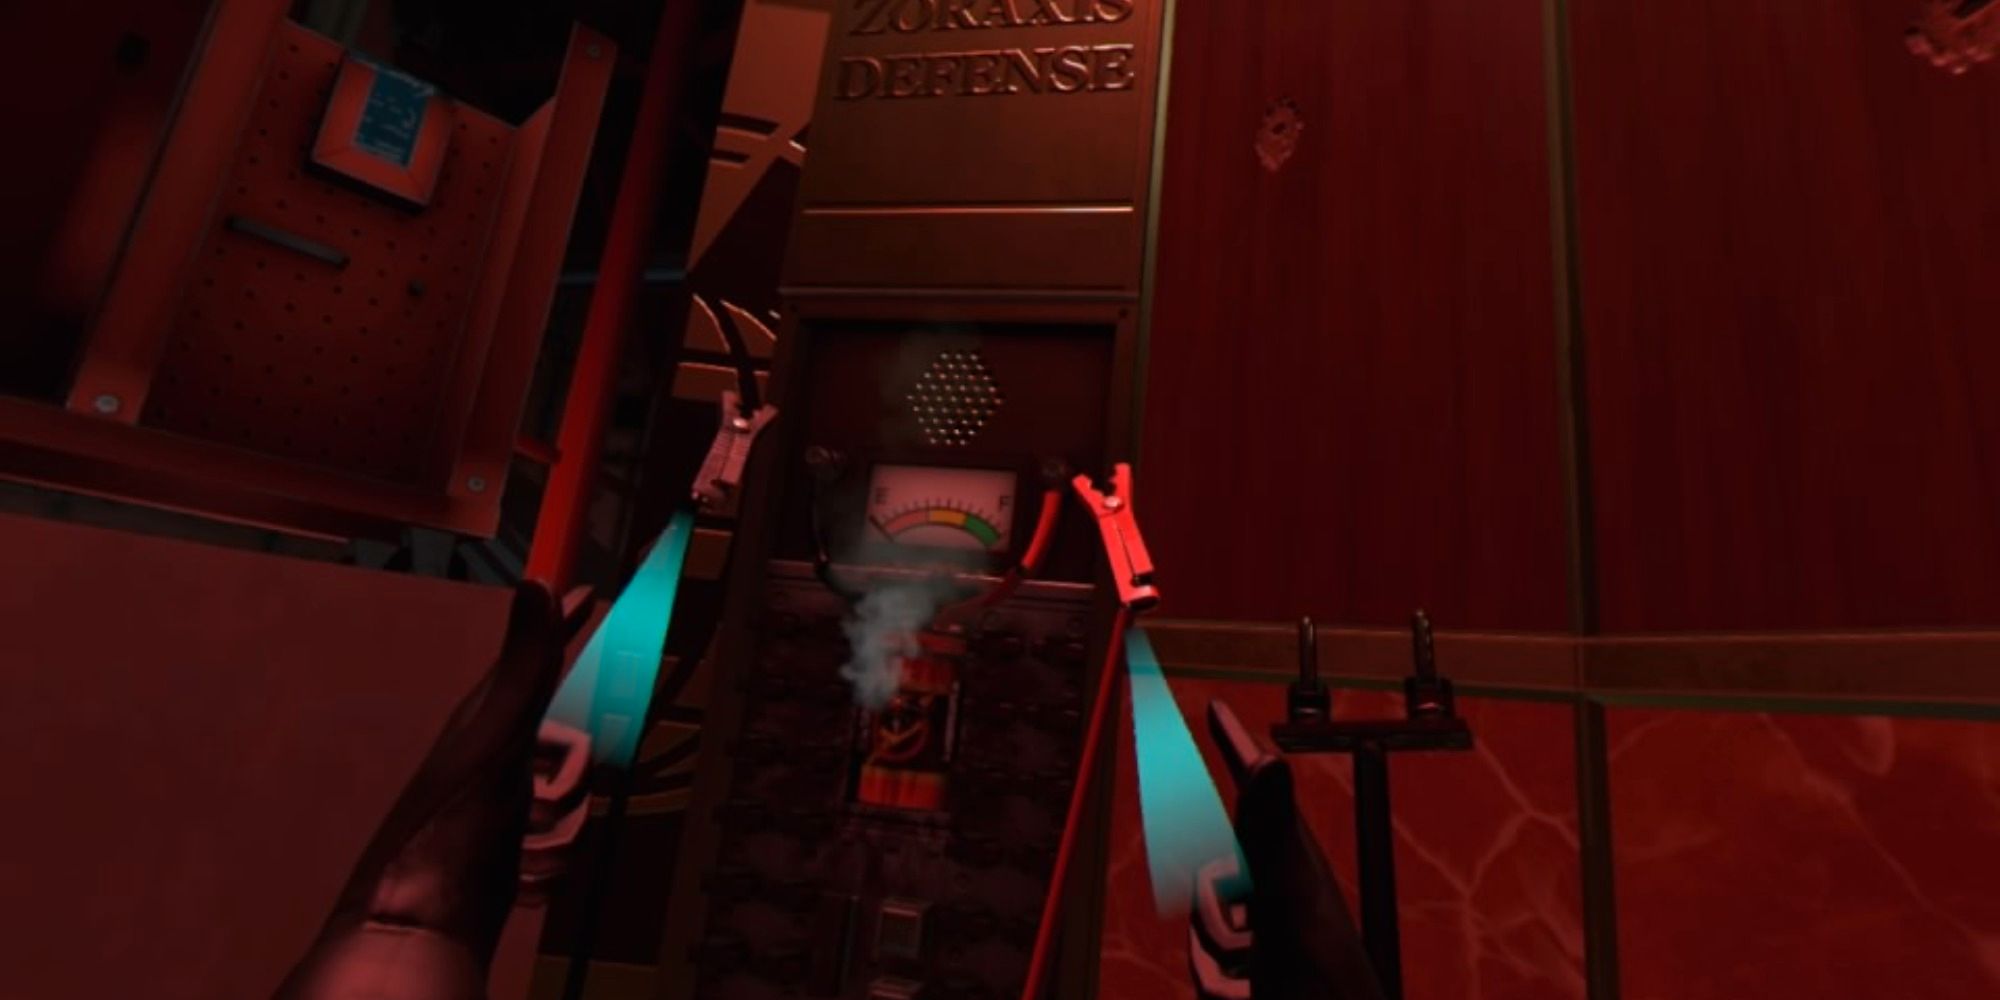
Once the world leaders have been saved and the imminent threat of the saw has been dealt with, you need to power up the elevator to continue your trip to the top of the building.
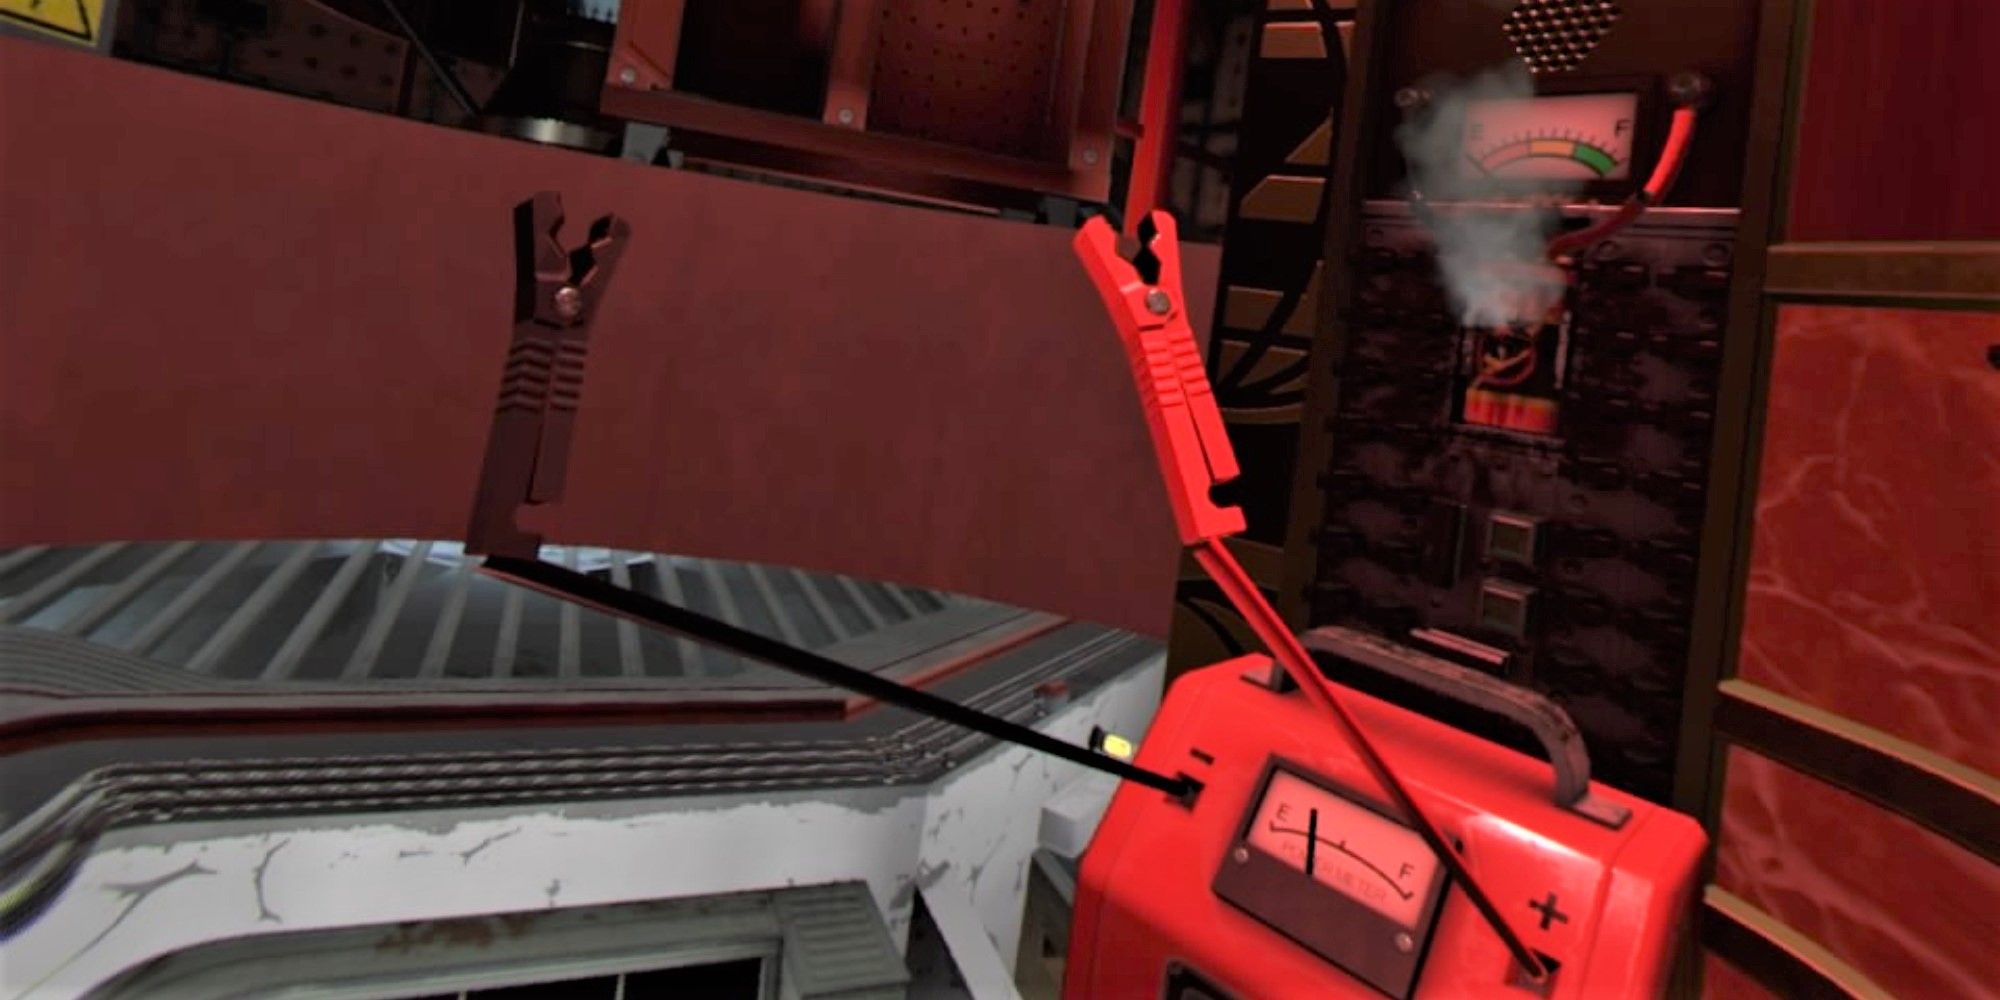
- A large battery fell when you opened the door to the left of the switches earlier. Pick it up and place it at the bottom of the elevator panel.
-
The battery has two crocodile clips at the top of it, a red one and a black one.
- Look up at the industrial saw's wiring panel. It has two fuses, a red one and a black one. Connect the battery's clips to these fuses to charge the battery up.
- Now connect those clips to the red and black fuses at the top of the elevator panel.
- This will charge the elevator up and resume your journey. Be on your guard as you will have to react quickly when you reach the top.
Incapacitate John Juniper
Don't get too stunned when you reach the top, Juniper will notice you and waste no time aiming as his henchmen do.
- If you still have the elevator panel from earlier, you can use this to easily block Juniper's bullets while you work this puzzle out.
- On the right side of the room is a small box. Open it and pull the handle inside, it will cause the catwalk to separate and cause Juniper to fall.
- Juniper will also drop the nuclear briefcase. Take it and bring it towards you.
Abort The Nuclear Launch
This is it: the endgame. Now that you have the briefcase, there are only four little puzzles preventing you from completing the game. Open the briefcase and solve the three puzzles inside.
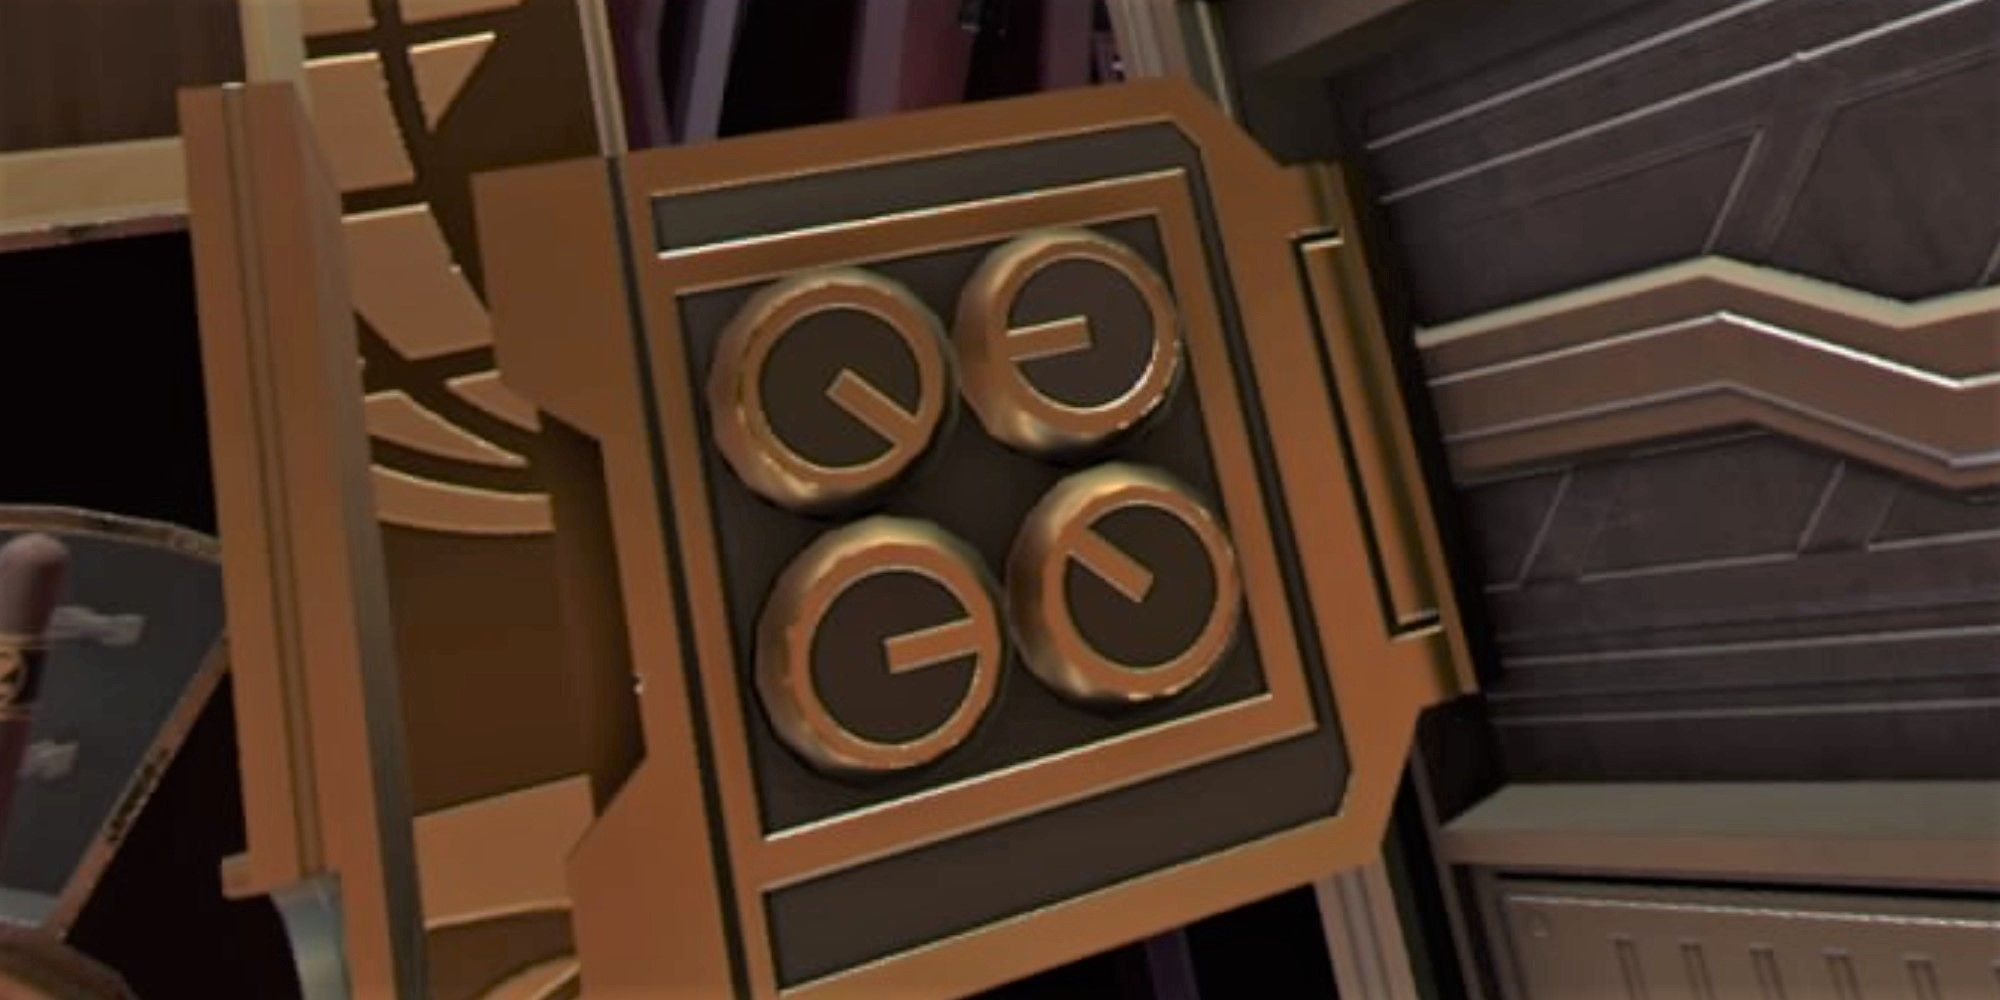
- The first puzzle at the top is a simple dial puzzle. Open the panel with its handle and you'll find the four dials on the back.
- You must make the shape on the front of the panel into the shape of the letter Z. To do this, make a reversed letter Z with the dials on the back, as shown in the image above.
- Once there is a Z the dials will lock into place. Move the knob down the lines as if writing the letter Z and the puzzle's light will turn blue to let you know you are successful.
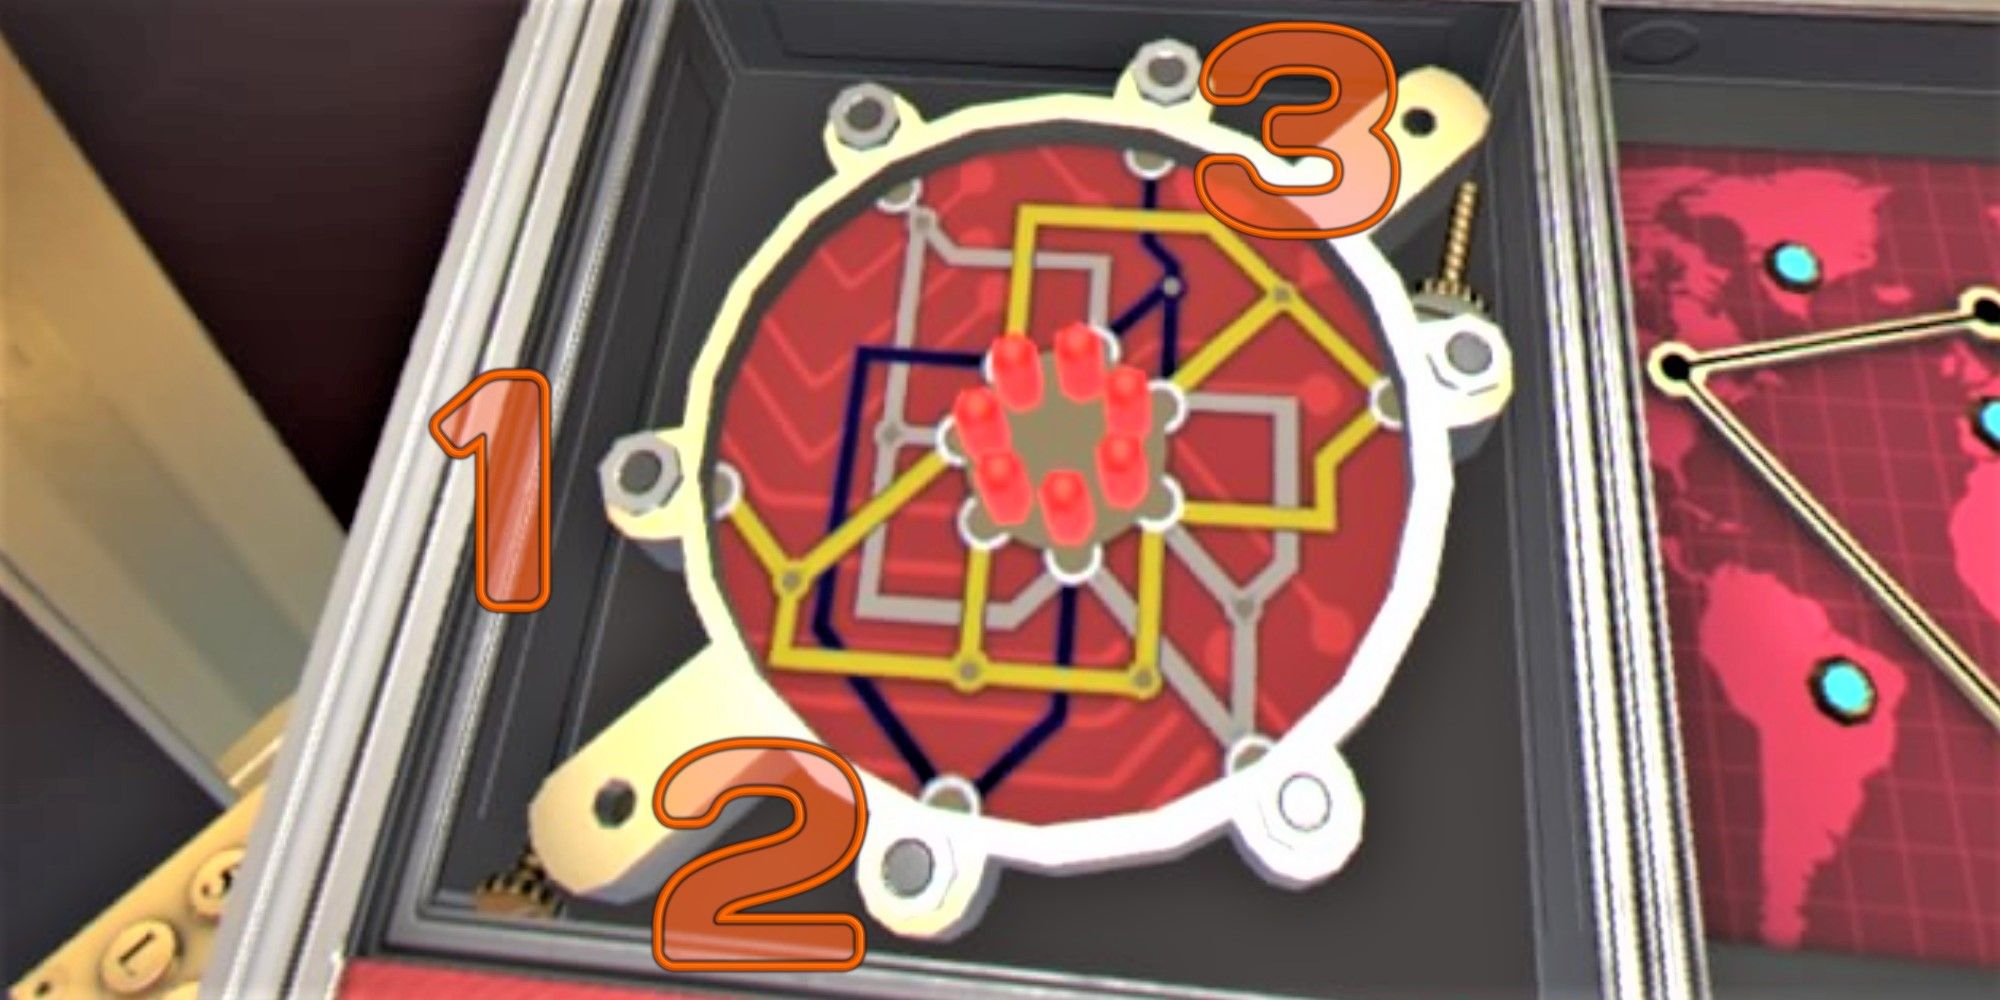
- For the second puzzle, you will need to retrieve a screwdriver. There is one on the back of the door to the lever that you used to incapacitate Juniper. Use this screwdriver to remove the two screws.
- You need to press the buttons so that all seven lights turn blue. Press the leftmost button, the bottom left button, and then the topmost button to complete this puzzle. The image above shows the solution too.
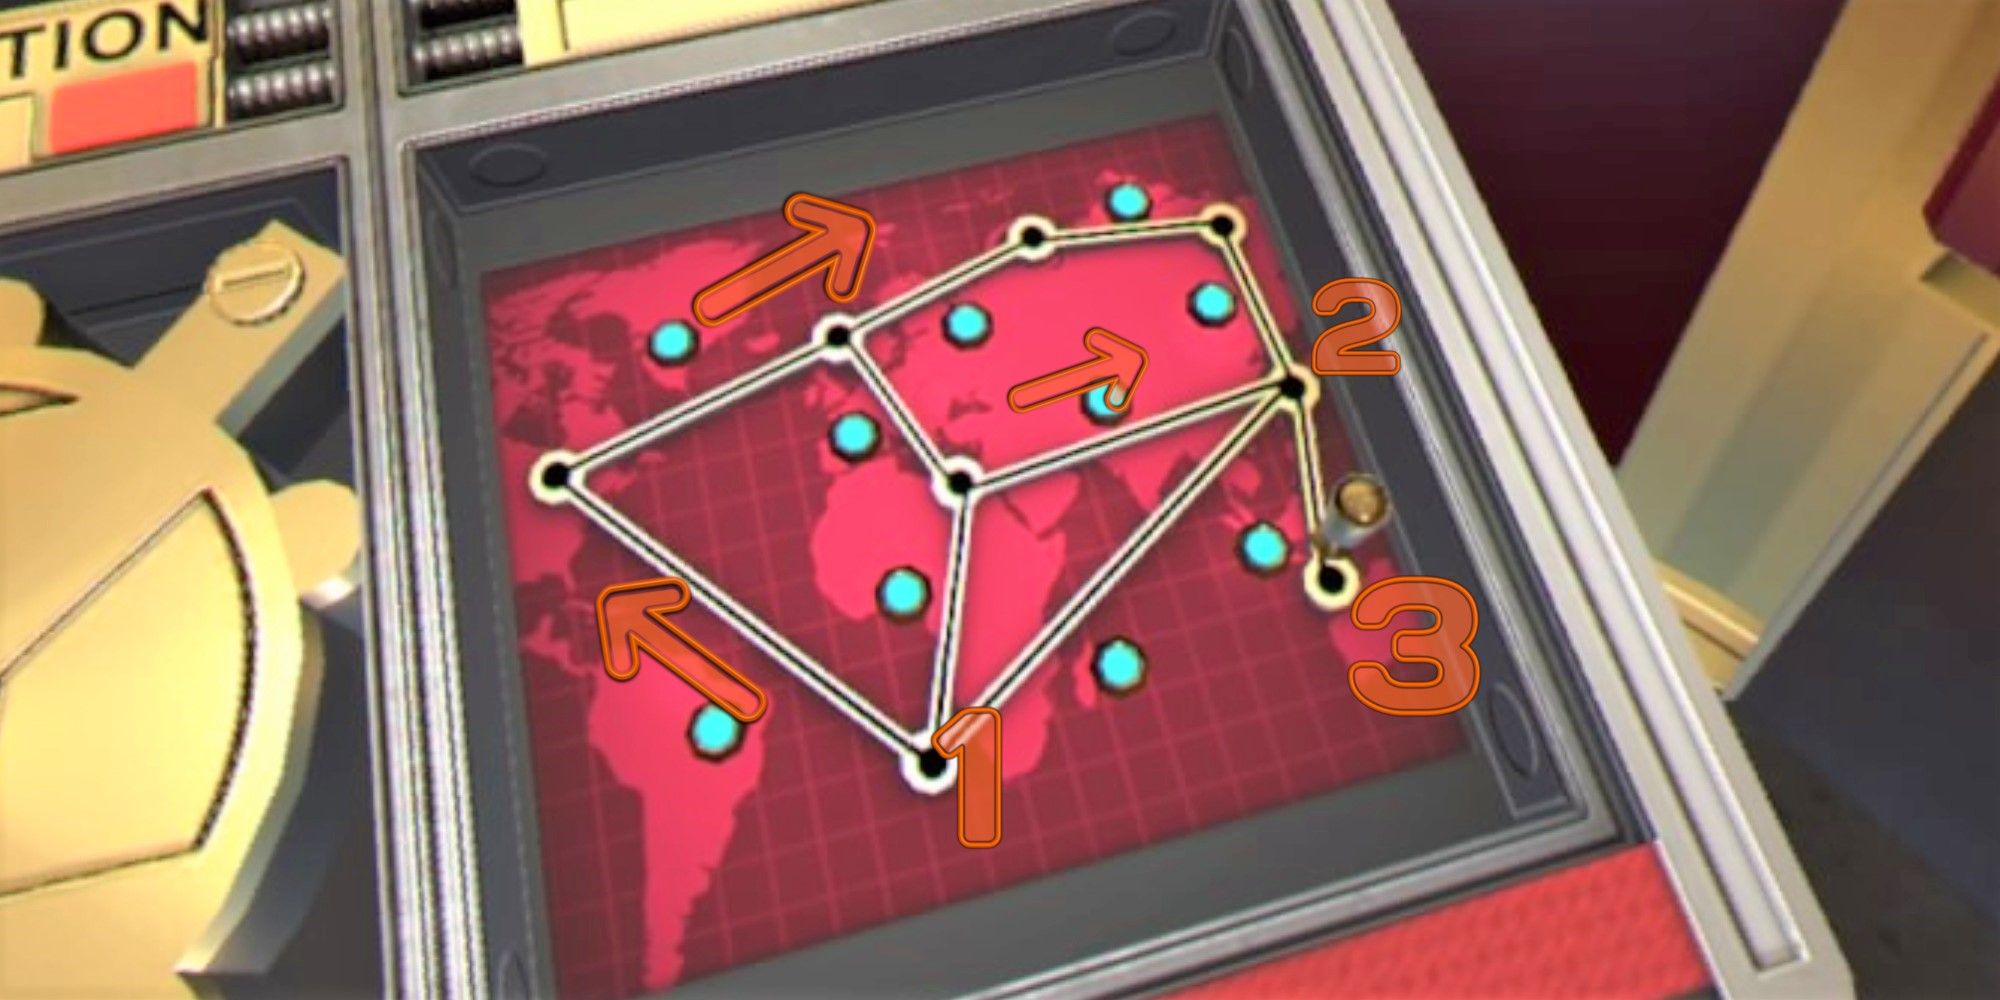
- To solve the puzzle represented by a map you need to move the small knob past each light once and only once.
-
The knob begins in the south of Africa, move it up to North America, and then right across to northeast Asia. Move it south to the ocean but not to Australia. Now head back down to the south of Africa and then up to Egypt. Finally, move the knob directly across and down to Australia.
- You can also follow the arrows and numbers in the image above.
- With that, all three puzzles should be complete and you can press the Abort button. Alas, this will not work and a whole new panel will be revealed to you as the briefcase loses power. The panel has a black fuse and a red fuse.
- As you might expect, the solution to this is simply to connect the battery's crocodile clips from earlier to their corresponding fuses on the briefcase. This will power up the briefcase.
- Hit the Abort button and enjoy the ending!
Operation: Phoenix Rising Speedrun Guide
With so many different stages and lots of moving parts, this is the hardest level to get a successful speedrun on. Mostly the strategy is making everything go as smoothly as you can, but there are some neat tricks to be aware of.
- The ticket you need at the beginning of the level is the one furthest away. Knowing this will make the first part of the level go much more smoothly.
-
When you are using the screwdriver to take the elevator panel off, try multitasking to speed things up. Use your non-dominant hand to take care of that task while you collect the other tools you'll need for this part of the level.
- Use the square key to unlock the ceiling hatch immediately.
- Have the wire cutters close to where the wires will be revealed once you take the elevator panel off.
- Save the fire extinguisher for last as you'll be using that immediately after the last screw is unscrewed.
- Use the lever inside the locked cabinet to save all of the world leaders at once while also getting the elevator battery.
- Connect the crocodile clips to the cattle prod to power up the battery quickly, and use the broken battery with a bullet in it to disable the industrial saw (see the Souvenir guide for tips on how to do this).
- When it comes to the confrontation with Juniper and the nuclear briefcase puzzles, you simply need to do them as fast as you can. Practice will make perfect.
- If you managed this within two minutes and forty seconds, you will achieve a speedrun-worthy time.
NEXT: I Expect You To Die 2 – Operation: Stage Fright Guide