This fragrant yet frenetic field full of conveyor belts is the largest out of the 3 Quick Battle maps, which means that it has the most to explore. Though, despite this, there are only 2 goal zones located here on opposite sides of the large and busy square stretch of hedges and grass.
RELATED: Pokemon Unite: Gardevoir Builds
Those enjoying Pokemon Unite would do well to learn a bit about Auroma Park so that this big map won't be confusing or tedious to traverse when in the heat of battle. This involves learning about the map's layout, its wild pokemon, and the best methods for farming as well as scoring.
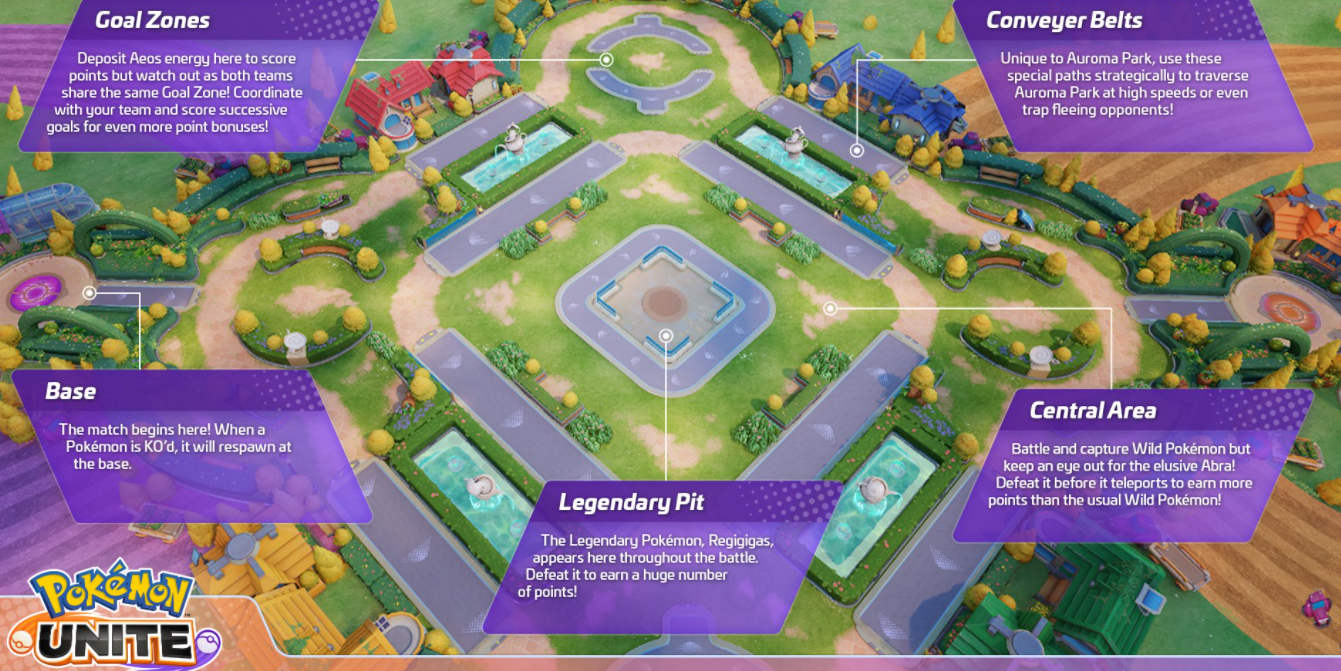
As with all other locations in this MOBA game, each team's base will be located at opposite ends of the map, and players will respawn in their respective bases after being knocked out.
In the other 2 corners are some conveyor rings housing Araquanids that are very close to each goal zone. This is where many players spend the first chunk of each Quick Battle in Auroma Park due to them being prime farming spots.
RELATED: Pokemon Unite: How To Beat Abra
Along the walls of the square map will be 2 conveyor belts on each side, though, keep in mind that their directions will change on occasion.
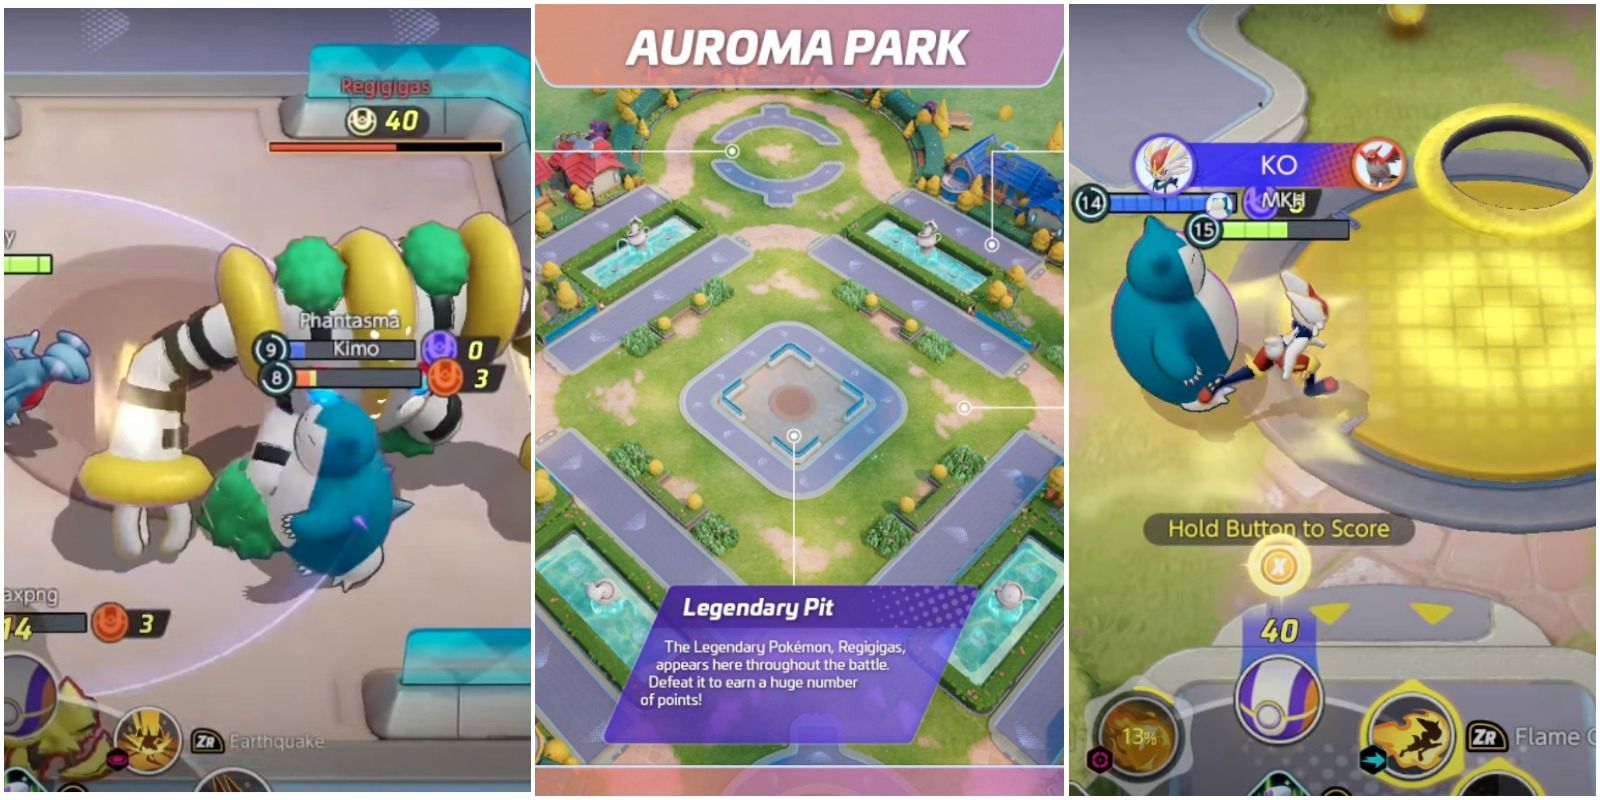
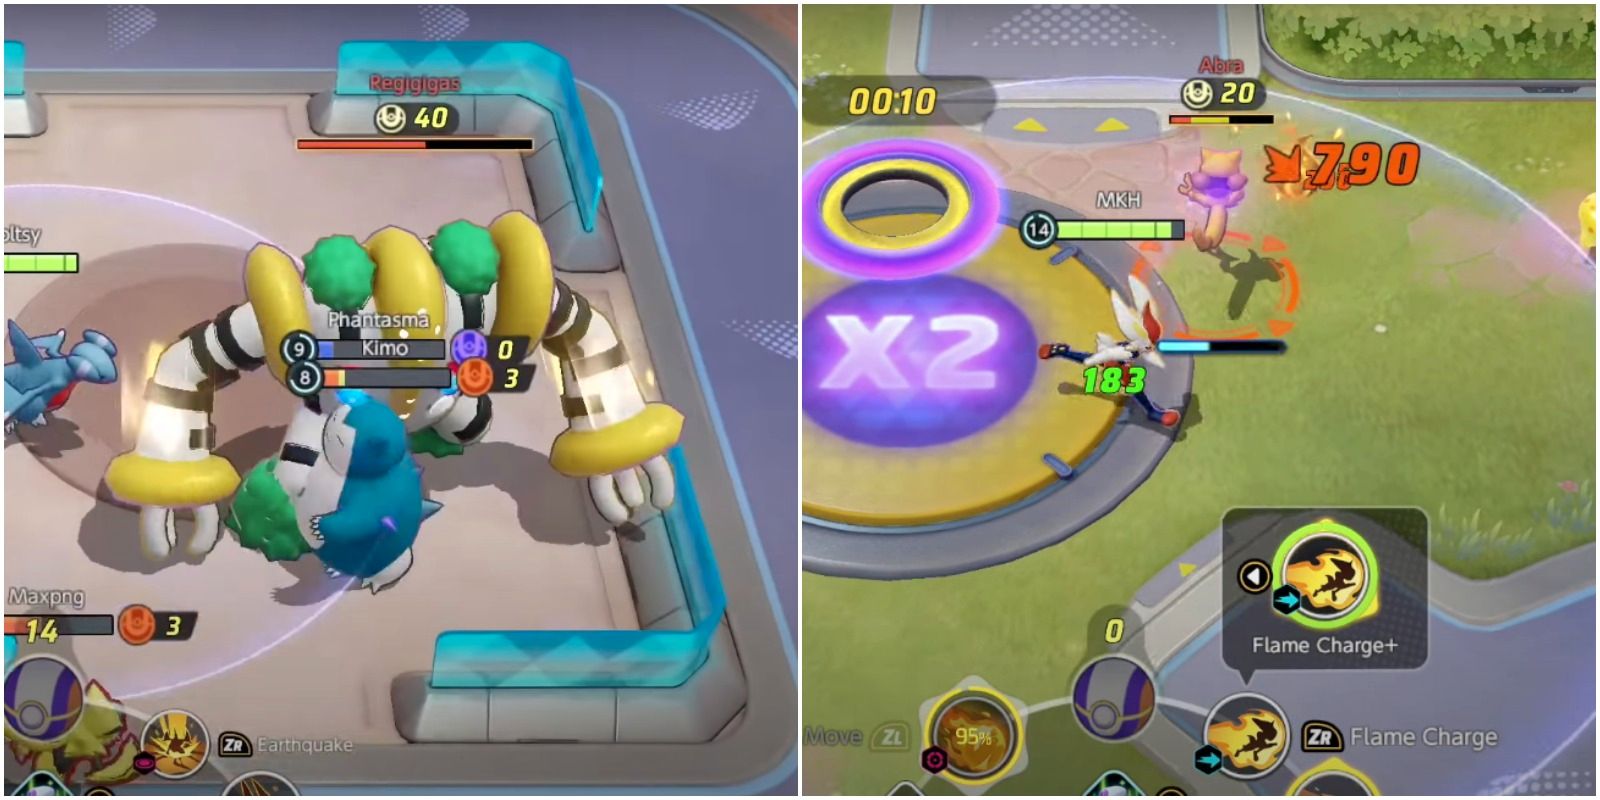
In the center, there is a square loop of a conveyor belt that runs around a cornered area holding the legendary pokemon Regigigas, who can be defeated for a lot of points and some decent Exp.
These cute garden pocket monsters will make up the majority of the farmable wild pokemon, though they won't be worth very many points or Exp each, so players will have to take down a bunch of them for a decent yield. Thankfully, later in the match after a certain amount of time has elapsed, all Ledyba and Sunkern will evolve into Ledian and Sunflora and offer nearly twice as many points and Exp per takedown.
Around the square central area where Regigigas spawns, there will be 4 spots where Venomoth will appear. They are worth 5 points each and will remain of that value for the entire battle, however, they are tougher than the more common wild pokemon and should be tackled carefully if players are below level 2 or 3, or are severely injured.
Easily the best wild pokemon to repeatedly farm in Auroma Park are the 2 Araquanids that spawn in the corners near each goal zone. They are worth 20 points after being taken down, though, they also spawn Dewpiders frequently, which are worth a few points each. The Exp gained from farming these Water and Bug-type pokemon is reasonable and can help players evolve and learn moves fairly quickly.
RELATED: Pokemon Unite: Slowbro Build Guide & Tips
This tricky Psychic-type will teleport all over the map, which can make them difficult to find. Furthermore, when attacked, they will flee, just like in the main series of Pokemon games. Since they often spawn on conveyor belts, players will need to either be capable of high burst damage or buddy up with a teammate to take one down. However, since Abra is worth 20 points and some decent Exp, they are quite worth defeating if a player spots them.
Worth a huge 40 points every time that they are beaten, the legendary pokemon holding the center of the map is a formidable foe and should not be tackled when one is alone, even if a player is confident in their build. It is best to coordinate an attack on this titan with one's allies or stealthily steal the takedown from the opposing team if they try to do the same.

The speedy belts can allow players to travel around the map quickly, even if players don't continuously ride one along its full course. If a player just touches a conveyor belt, even for a fraction of a moment, they will gain a significant movement speed bonus for a couple of seconds. In this manner, players can even use conveyor belts pointing away from their desired destination for some quick movement speed boosts.
The minimap also displays the directions that each belt is moving, so be sure to take note of that when deciding on how to get to one's desired spot, as making use of the conveyor belts is important for efficiently traveling Auroma Park.
Each time that a player scores, a multiplier buff is applied to that specific goal zone which doubles the points of goals scored by the same team, however, this multiplier only lasts for a manner of seconds, so proper timing with teammates is advised to make the most of such opportunities.
Much like with other important information, the multiplier timers will also appear on the minimap, so players can take note of when they should head to a specific goal zone to take advantage of it. It is also worth noting that scoring a goal into a goal zone where opponents have an active multiplier will remove it and return a goal zone to its normal state, which can be a great tactic to decrease the number of points the opposing team can obtain.
NEXT: Pokemon Unite: Pro Tips, Tricks, & Strategies To Win Battles