Before any important meeting, call or an interview, you should always check your microphone and ensure that it is in working condition and is set at an optimum audio input level. In Windows 11 you can easily do a microphone test and using the Windows settings app and ensure that the mic is working perfectly. In this tutorial, I will address this and show you how to test microphone in Windows 11 systems.
Test Microphone Windows 11
The process is very simple and you can do it very quickly. Just follow the steps below:
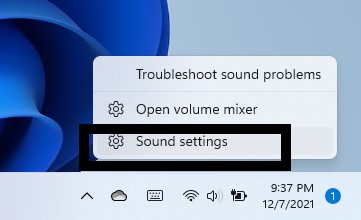
Step-1: Right-click on the sound icon on the taskbar and select Sound Settings.
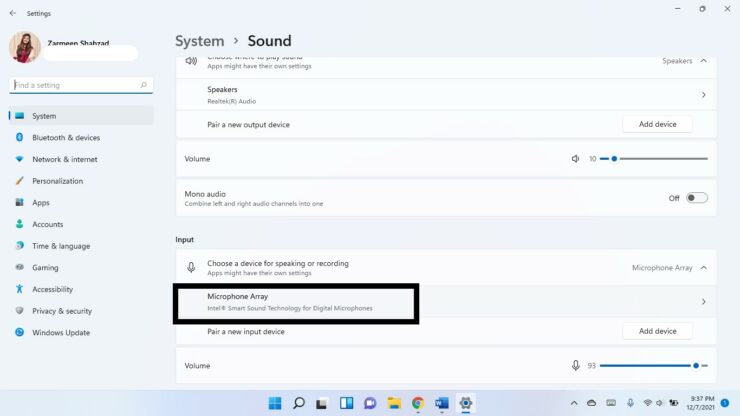
Step-2: In the Input section, click on the Microphone you want to test. It can be the in-built system Microphone (Microphone Array) or an external Mic as well. I am selecting the in-built Mic option.
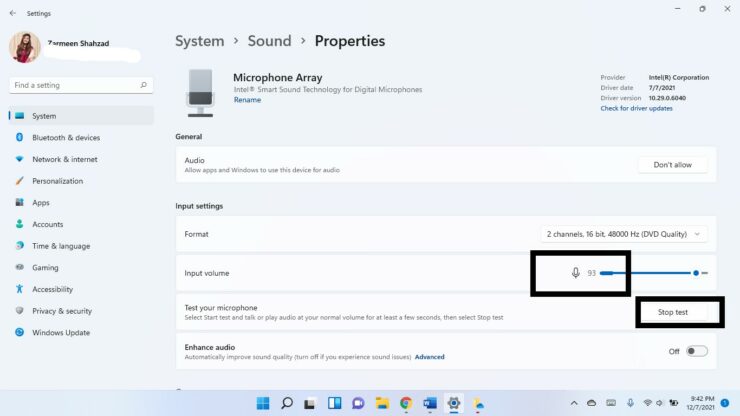
Step-3: Click the Start test option next to Test your microphone.
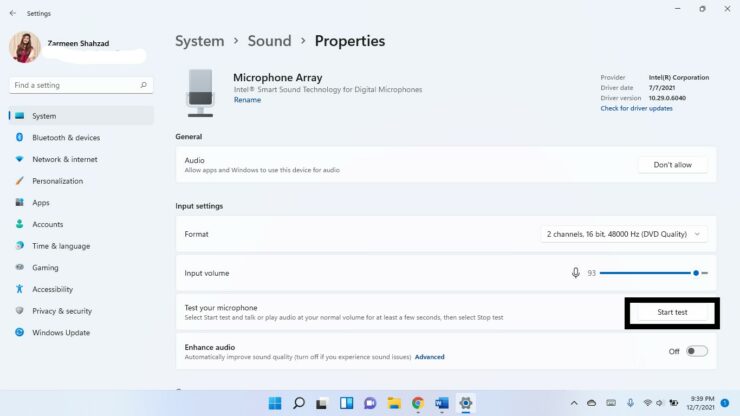
Step-4: Say something and see if the volume slider next to Input Volume shows movement. This indicates that your mic is working. Click on Stop test.
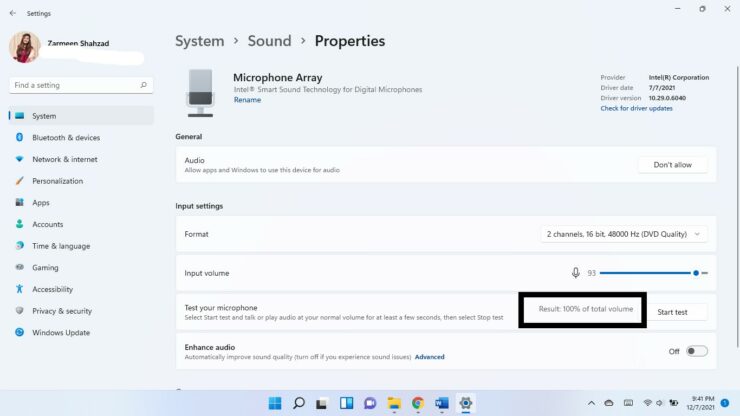
Step-5: As soon as you stop the test, you will see the Result displayed. Essentially the result should be approximately 75% of the volume. If it is below 50%, adjust the Input Volume slider.
I hope this helps you get the best mic volume. Let us know in the comments below.
The post How to Test Microphone in Windows 11 Systems by Zarmeen Shahzad appeared first on Wccftech.