Quick Links
- Nayru's Silent Realm And Getting The Clawshots – Zelda: Skyward Sword HD
- Lanayru Caves Walkthrough – Zelda: Skyward Sword HD
- Lanayru Sand Sea, Skipper's Retreat Walkthrough – Zelda: Skyward Sword HD
- The Shipyard Walkthrough – Zelda: Skyward Sword HD
We're moving forward with our full walkthrough on The Legend of Zelda: Skyward Sword HD, and in this guide we're covering the Lanayru Sand Sea. You will already have learned that you'll need to return to each area to unlock a further dungeon, and after emerging from the Ancient Cistern and taking Farore's Flame to the altar in the Thunderhead, we're ready to explore Lanayru Desert further.
Related: Hopefully Skyward Sword Finally Gets The Respect It Deserves
In this guide we'll be completing Nayru's Silent Realm, making our way through the Lanayru Caves you couldn't reach before, and making our way through the vast Sand Sea so we can uncover the next dungeon, the Sandship. We'll be walking you through everything you need to know every step of the way, so read down below for the Skyward Sword HD solutions you're looking for.
Nayru's Silent Realm And Getting The Clawshots – Zelda: Skyward Sword HD

Right, the first task is to complete Nayru's Silent Realm. This will be your second Silent Realm, so we won't break down what you need to do, but if you do need some advice we have tips on clearing through the Silent Realms right here.
You can dowse for this Silent Realm, but it's very close to the main Power Generator, outside the entrance to Lanayru Mining Facility. This is literally at the Northern part of the map, directly outside where you activated the Electric Power Node. You'll see it quickly when you touch down, as the location has three Blessed Butterflies surrounding it. Just head over and use the Goddess Harp to activate the Silent Realm challenge.
Once you're done, you'll be able to take away the Clawshots as a prize, which will allow you to access a huge variety of areas that you've been unable to get to up until now. Expect to be able to collect a bunch of Goddess Cubes and Chests thanks to this handy tool.
Lanayru Caves Walkthrough – Zelda: Skyward Sword HD
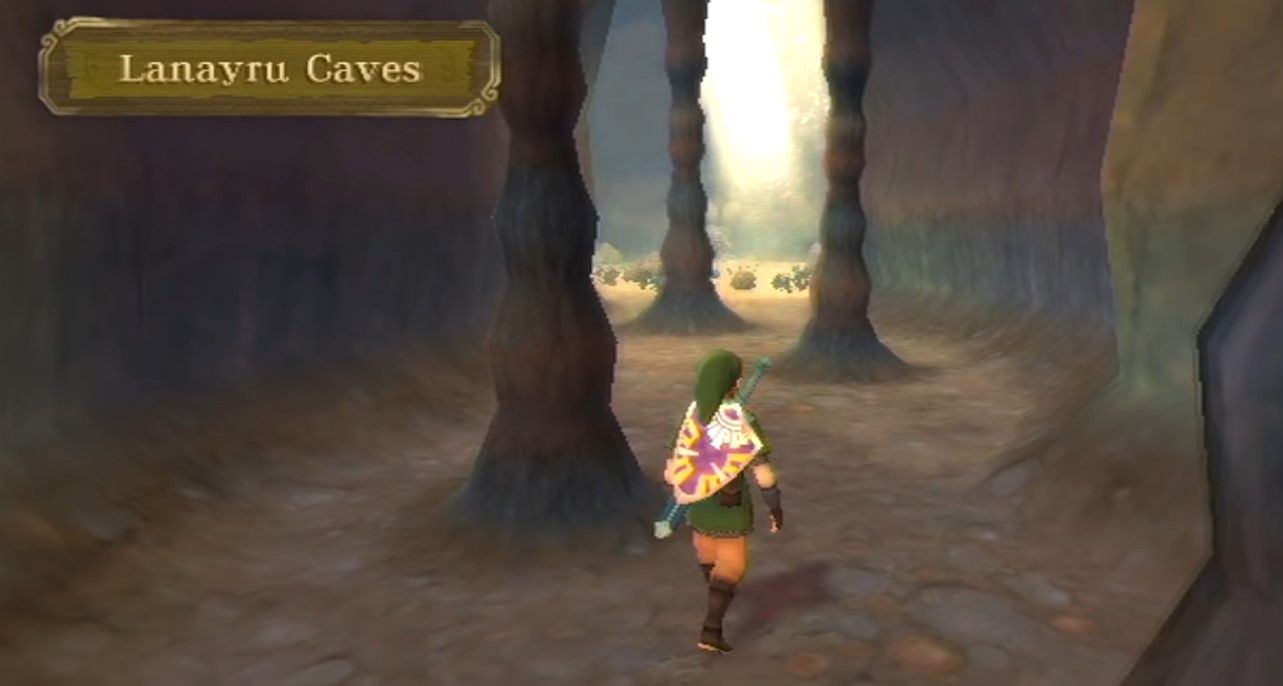
Now that you have the Clawshots you can reach some of the more hidden areas in the game, and your first target should be the Lanayru Caves. You should have passed the entrance to this on your last journey through Lanayru Desert – it's on the Western part of the map, and you should currently see a "?" there, indicating it's unvisited. Hopefully you pushed down those minecarts to be used as shortcuts we mentioned in our Lanayru Desert guide, and you will be able to see the cave above the sand waterfall, next to the section of quicksand that shifts and moves. Make your way up there using your new Clawshots.
In this cave you'll meet Golo, another explorative Goron. Speak with Golo and he'll be nice enough to supply you with a Small Key, which you can use to open the door in this room which leads to Lanayru Sand Sea – just use the Clawshots to get up to the door. No need to rush, though, there's a bunch of things in this room and in the connecting chambers that you can find, if you feel like looking for loot.
Lanayru Sand Sea, Skipper's Retreat Walkthrough – Zelda: Skyward Sword HD
Now we've finally made it to the Sand Sea, which is exactly what it sounds like – large sea made entirely of sand, though it was a sea made of water once. Use your Clawshots on the pillars to make your way down to the dock, and at the end of the dock you can strike the timeshift stone on the boat to spring the area to life. The small robot on the dock will talk to you, turns out he's seen Nayru's Flame, and it was stolen from him. Luckily he'll give you the use of his boat so you can go look for it.
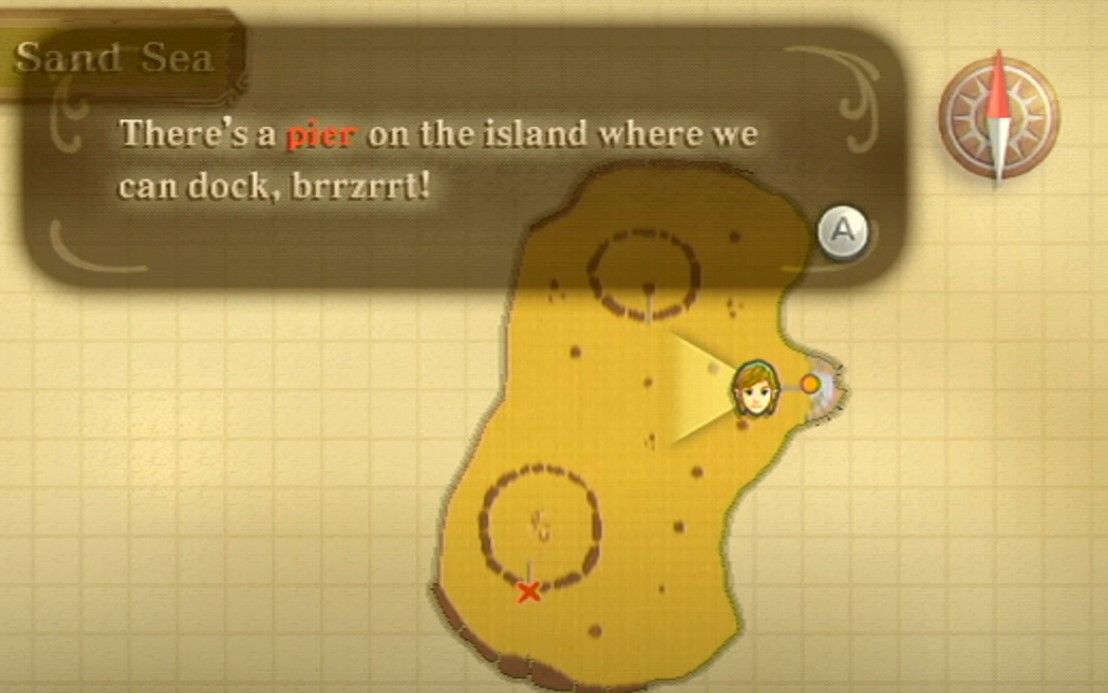
But first, you need a Sea Chart. Your map of Lanayru is out of date, as you've been told once before. But this little robot can't instantly help you with that, you'll need to retrieve his map from Skipper's Retreat yourself. The pier where you can dock will be marked on your map with an X, to the Southwest of your location – head straight there, and you'll see the timeshift stone on the small boat can transform the sand back to water as you sail. It looks beautiful.

Once you've arrived at Skipper's Retreat, it's time to reach the top. There were probably stairs at one point, but these days it's a bit more treacherous. There are a bunch of enemies, so be careful as you make your way up. First, head to the right, cross the sands, and use the Clawshots to climb up to the rock on the right. Beat the enemies, and use the floating plant as an anchor point for your Clawshots before climbing the next pillar. Blow the vulnerable part of the wall to your right and make your way through. Use Clawshots on the flying plant again, on the pillar in front of you, on a higher plant, and then up onto the rock connecting to the bridge. Nearly there, now…
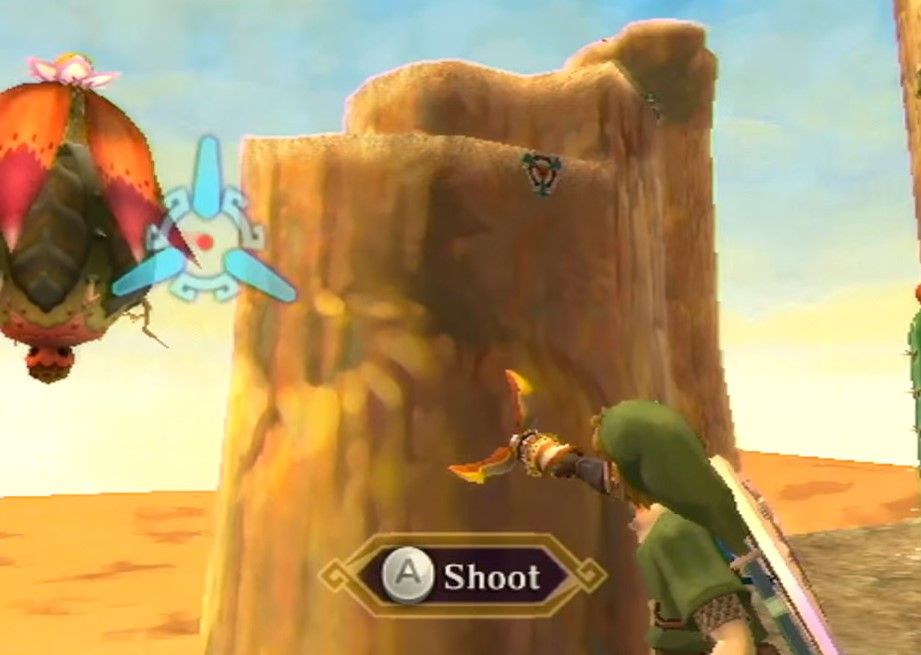
There's a big Moblin on the bridge – best to avoid this one, as it has a metal shield you can't easily cut through. There will also be a zipline here, but it just takes you back down to the bottom, so don't use it until you've got the Sea Chart. Use your whip on the strange red plant on this pillar, and a flying plant for your Clawshots will appear. This one moves a bit, and you can use it to climb the large pillar to the left. The next Clawshots point is also on the left pilar, but there's an enemy blocking it – use the Hook Beetle to cut its stem before moving up, and then climbing the pillar next to it. Clear the enemies and then look to the right for the next plant. You'll need to grip the next plant from between two rocks, and then finally you'll be able to grapple the final pillar – the shack itself. Head on inside.
The place is filled with sand – naturally – so get your Gust Bellows out and start blowing it all away. Where does it go? Nobody knows. There's a bunch of loot to find in here, but most importantly, there's a chest containing the Ancient Sea Chart. But hey, the pictures of the wee robot captain and his crew are adorable, right? You can jump straight off this pillar and dive towards the pier and your ship – or use the ziplines.
The Shipyard Walkthrough – Zelda: Skyward Sword HD
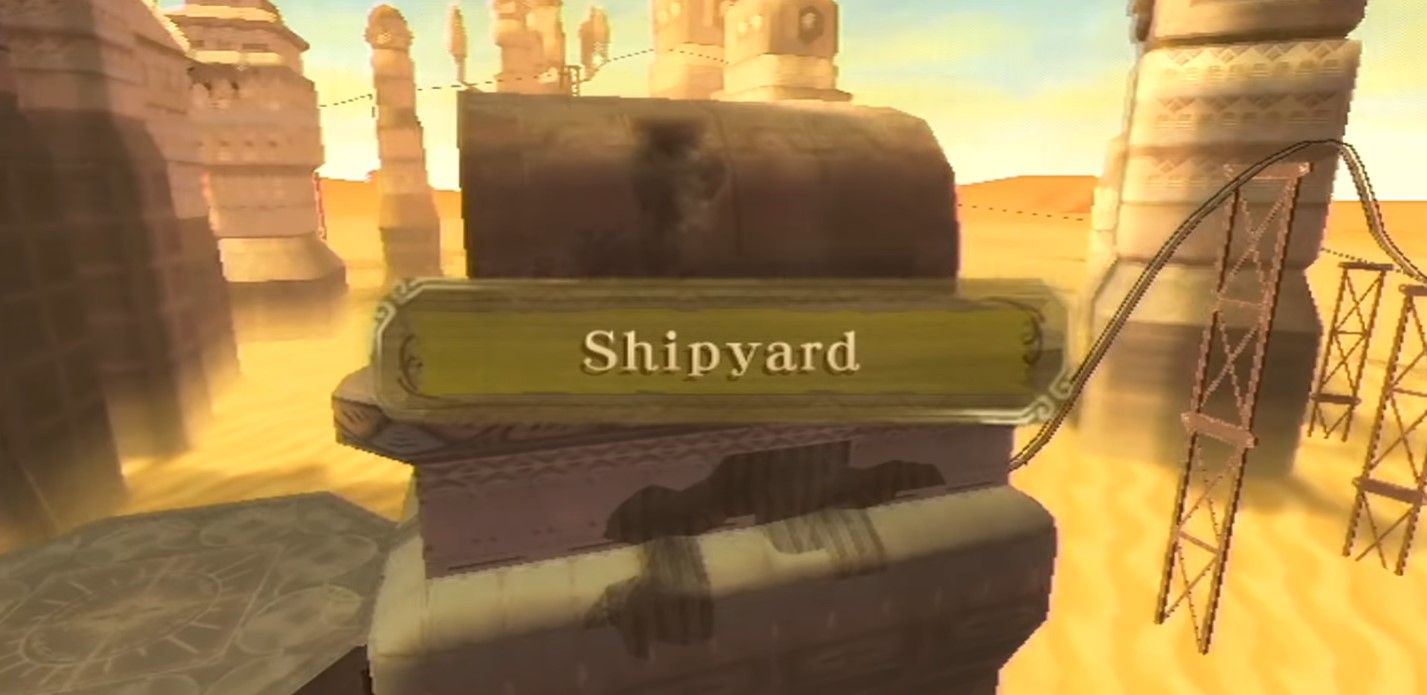
Now that we've got the Ancient Sea Chart we can return to the boat and pull it out. Your view of Lanayru Sand Sea will greatly expand, and you'll see a brand new area you can visit to dock at – the Shipyard. There will be enemies and obstacles along the route there, so be careful as you sail, and feel free to blast them with your cannon.
At the Shipyard, well, it's a very complicated area, complete with a minecart rollercoaster – makes us nostalgic for Donkey Kong Country. Head to the right of the Shipyard and take care of the Lizalfos. Head up the stairs and to the right into the Shipyard Center – wouldn't you know it, there's another friendly Goron here. Chat to him and then jump into the minecart – this minigame is more involved than you might think. You'll need to learn from side to side to stabilise the minecart as you ride, and even jump over gaps and obstacles. Good luck!
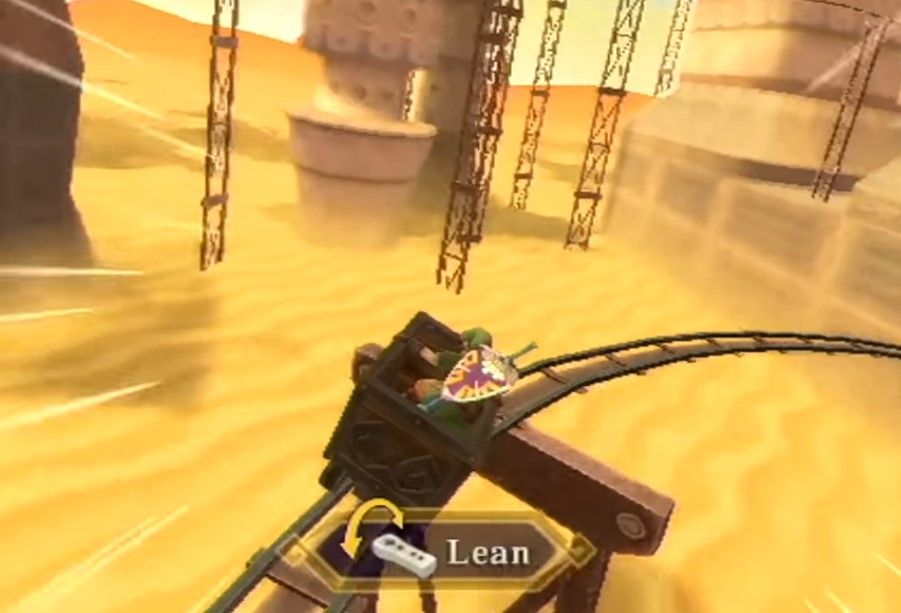
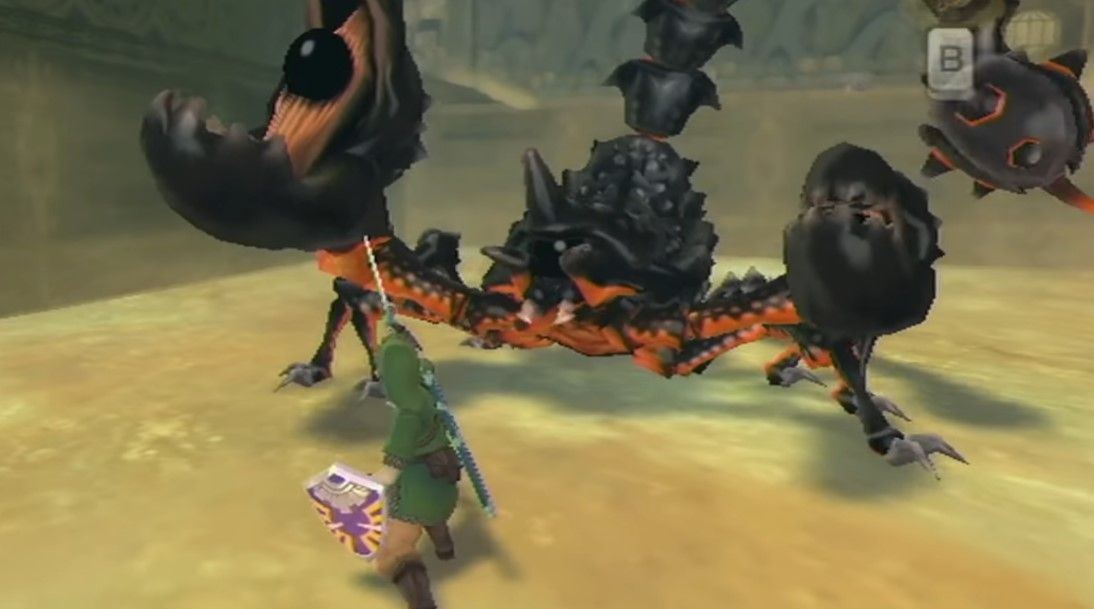
On the other side of the minecart you'll find yourself in another station. Exit and climb the stairs. The zipline at the end here will take you back to your boat. Head right, and you'll find another mincart. Keep going! In the next station take the only door into the Shipyard Construction Bay. Head into the sand below and use the Gust Bellows to clear it out – seem familiar? Well, it should! Modarach is here, the scorpion boss you previously fought at the end of the Lanayru Mining Facility. Beat it down with the exact same tactics you used previously. After, the door on the bay floor will open up.
This will take you to the end of the Shipyard area, report to the robot and you'll be due to head for the next place – the Pirate Stronghold. In this area you'll finally find what you need in order to locate the Sandship dungeon.
Next: Skyward Sword: A Complete Guide to Gratitude Crystals