Have you ever played a game and found a really nice spot for a screenshot but suddenly you forgot to enable your steam overlay, or you are one of those people who just might want to turn it off because it could be affecting the performance of your game? Or you just want to use your own screenshot tool, and not Steam’s own?
Another reason might be that you want to take a screenshot but edit it and then upload it to your steam account which is not possible with the steam screenshot tool the by using the overlay the client offers.
We have noticed that there’s not enough attention brought to this specific topic and it’s sad that after all these years steam hasn’t implemented an alternative yet, so we decided to create a guide that will help you upload screenshots from any game that you want.
1. Find the AppID of the game.
Keep in mind that this counts for games that do not support Steam Overlay, therefore it’s impossible to take Screenshots by using the overlay. If you already know how to find the Screenshots Folder or the game you want to upload custom screenshots for supports the Steam Overlay you can skip this part and begin from the second one.
The AppID is a series of numbers that is unique for each game, there are multiple ways to find it like using the Steam Database and search for the game’s name, through the Steam Store or by making a Shortcut, you will see some screenshots with all three examples.
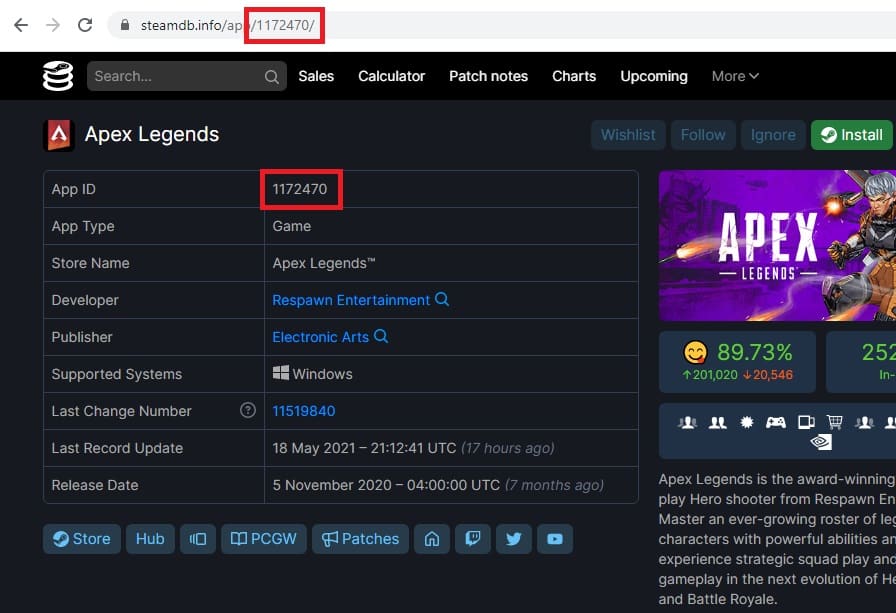
For this example, we will use Apex Legends.
This screenshot is from the Steam Database or SteamDB for short, as you can see below the AppID can be found below the title of the game as well as in the URL
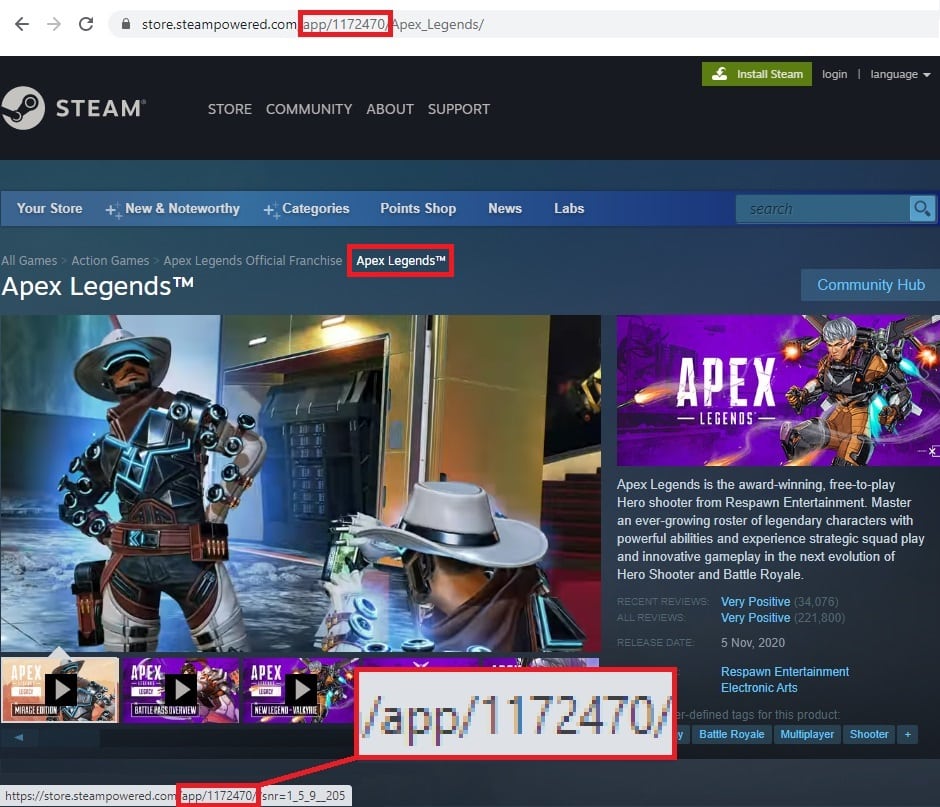
This one is from the steam store, as you can see the AppID can again be found on the URL but it can also be seen at the link preview on the bottom left of the screen, in order to make this one appear you need to hover your mouse over the name of the game that is inside the red box.
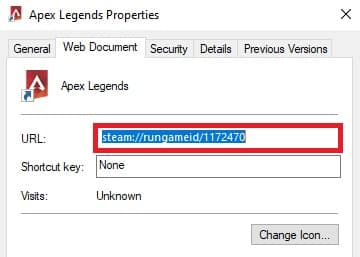
As for the Shortcut all you have to do is right click on it and go to properties from the drop down menu, after that you can easily find the AppID under the Web Document tab in the URL section
2. Creating a screenshot folder.
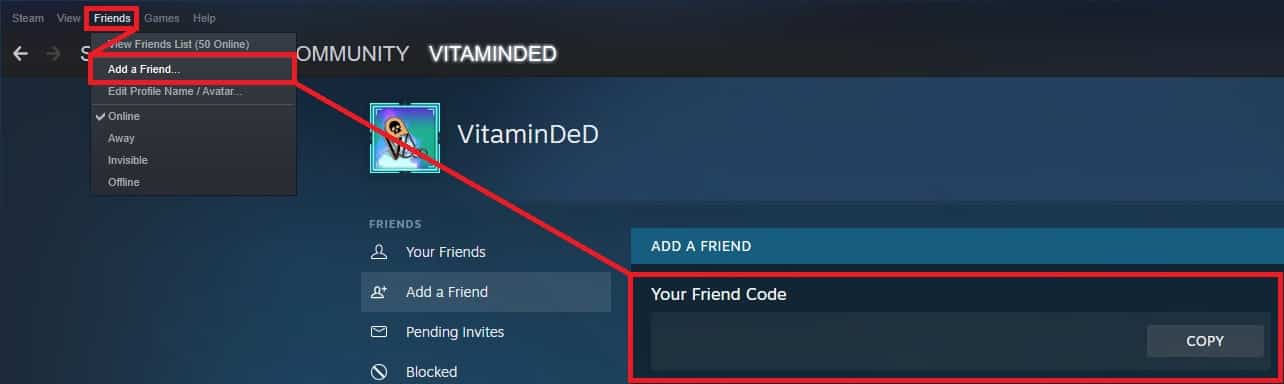
First what you need to do is to find your SteamID, it’s very easy to find it and in order to do so simply click on the Friends at the top left of your Steam Application, then Add a Friend and then you will see your Friend Code.
Here’s a screenshot so you can understand better.
(The friend code in the screenshot is empty for obvious reasons but you should see a few numbers in there.)
Next, what you need to do is find the Screenshot Folders, one way is to navigate through your PC to Steam’s Installation Path and another one which is easier is to use the Steam Application once again.
The installation path will look like this: “C:Program Files (x86)Steam”
After that, you will see a folder named userdata once you open it you will find a few folders with numbers, this is where your SteamID number or Friend Code is going to be, one of those folders will be named after it.
The path to your SteamID folder will look something like this: “C:Program Files (x86)Steamuserdata<your steam id>”
The folder that the screenshots are saved is named 760, so the path the folders for the screenshots of each game is will look like this: “C:Program Files (x86)Steamuserdata<your steam id>760remote”
In order to create your own custom Screenshot Folder you will need to take the AppID of the game and create a new folder which should look something like this: “C:Program Files (x86)Steamuserdata<your steam id>760remote1172470”
Then inside of this folder, you have to create another one named screenshots and inside that folder you have to create one last folder which is going to be named thumbnails, the paths will look something like this:
“C:Program Files (x86)Steamuserdata<your steam id>760remote1172470screenshots”
“C:Program Files (x86)Steamuserdata<your steam id>760remote1172470screenshotsthumbnails”
Here’s an image so you can understand better.

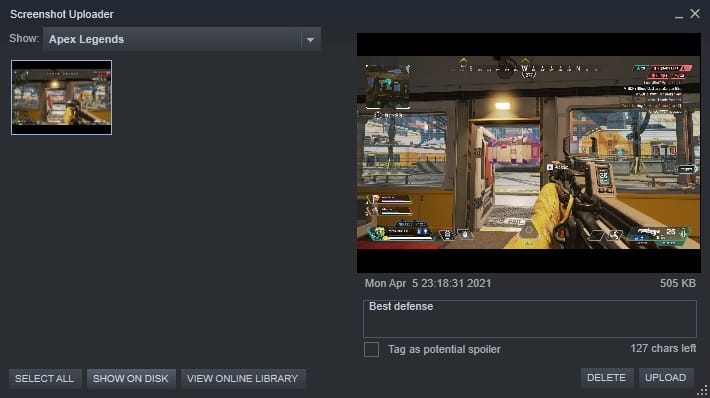
The easiest way though is to just go to your Steam Application click View on the top left, then Screenshots, and after the Screenshot Uploader has opened up click on Show on Disk.
Here’s an image for better understanding.
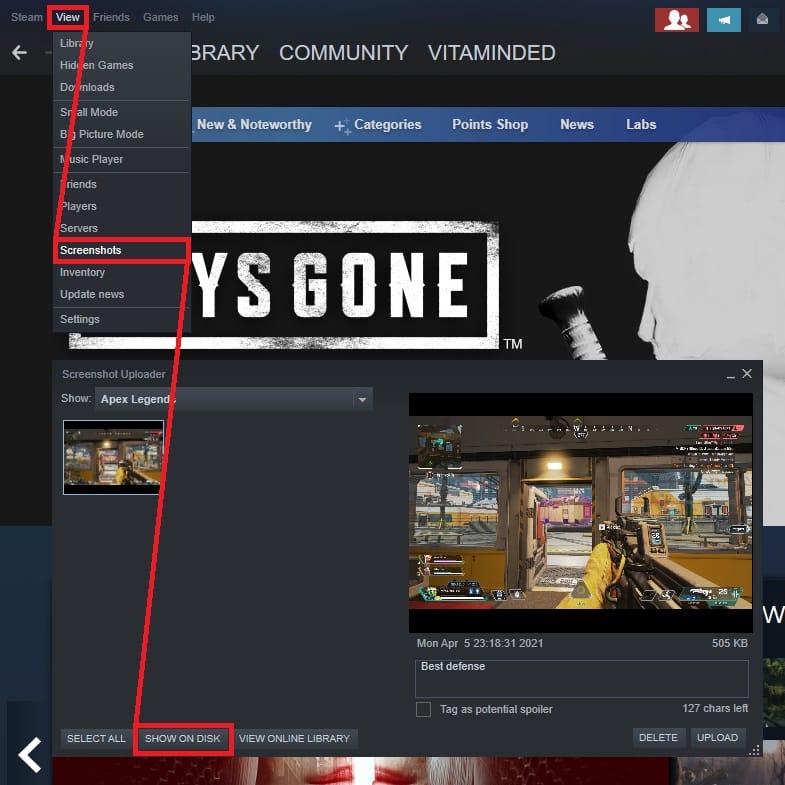
Remember that this counts only for the specific game that you have selected from the drop down menu where it says Show.
3. Taking and naming your screenshots.
The most common way of taking a screenshot is by using the Printscreen button on your keyboard, open MSPaint, and then paste it in there with CTRL + V.
There are more methods and apps that do the same like GeForce Experience or ReLive.
Every screenshot taken with Steam will have this format YYYYMMDDHHMMSS_1.jpg
So after you take your own screenshot from the game you are playing, what you have to do is copy and paste it in the screenshot folder that you created then make a duplicate and copy paste it once more into the thumbnail folder.
Sometimes when you take custom screenshots steam might not be able to read it so inside the screenshot folder you should make a copy of it and add an extra line _vr at the end.
When you take a screenshot you have to rename it as it looks like in the picture below, the first 4 numbers are the year the screenshot was taken the next 2 is the month the next 2 is the day and then the next ones are going to be the hour with the first one being hours second minutes and third seconds, so to make it more clear here is an explanation.
2021 is the year, 04 is the month, 05 is the day, 23 the hours, 18 the minutes and 31 the seconds.
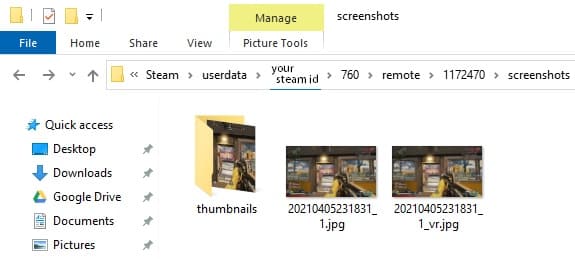
The picture that is named 20210405231831_1.jpg must have the exact name in the thumbnail folder.
Here’s an example of how how the screenshot folder should look like.
And here’s an example of how the thumbnail folder should look like.

Notice how the name of the screenshots and the thumbnails are exactly the same with the only difference being the copy of the screenshot that has the line _vr at the end.
Also, the thumbnail’s dimension is 200×112 but that shouldn’t worry you too much because you don’t actually need to resize it for it to work.
If you want to resize the thumbnail though, the easiest way you can do it with MSPaint but we don’t recommend using it for that purpose because it’s not that good, instead you should try an online app like Pixlr or free software like Gimp.
Note: An easier way of naming the screenshot you took is by copying the name of another screenshot from another game and just change one number, we recommend changing the time instead of the date which is easier to manage.
4. Uploading your screenshot.
If you did everything correctly, once you open the Screenshot Uploader you will see the name of the game (in case you had to follow the first step) on the drop down list, and then you will simply have the screenshot of the game ready to be uploaded.
Using an application to upload custom screenshots.
If you are a user that wants to upload many screenshots and does not want to get through this tedious process each time, then you can use SteaScree which is made by the steam community to help people upload their screenshots much easier, it even automatically finds the game and user id.
The post How to Upload External Screenshots on Steam (Without Overlay) appeared first on Altar of Gaming.